
Adding keys manually means you are in full control of every key that goes into your store. You enter each key yourself, define its properties, such as how many times it can be activated and how long it stays valid, and assign it to a product. When a customer buys that product, the plugin automatically picks the next available key from the pool and delivers it.
This is the right approach when you already have a ready-made list of keys. For example, license keys from a software vendor, and you want to load them into your store one at a time. If you have a large batch to upload at once, the Import Keys in Bulk (Pro) guide is a faster option.
Step 1: Open the Add New Key Page
Go to Serial Numbers → Serial Keys from your WordPress admin sidebar and click Add New.
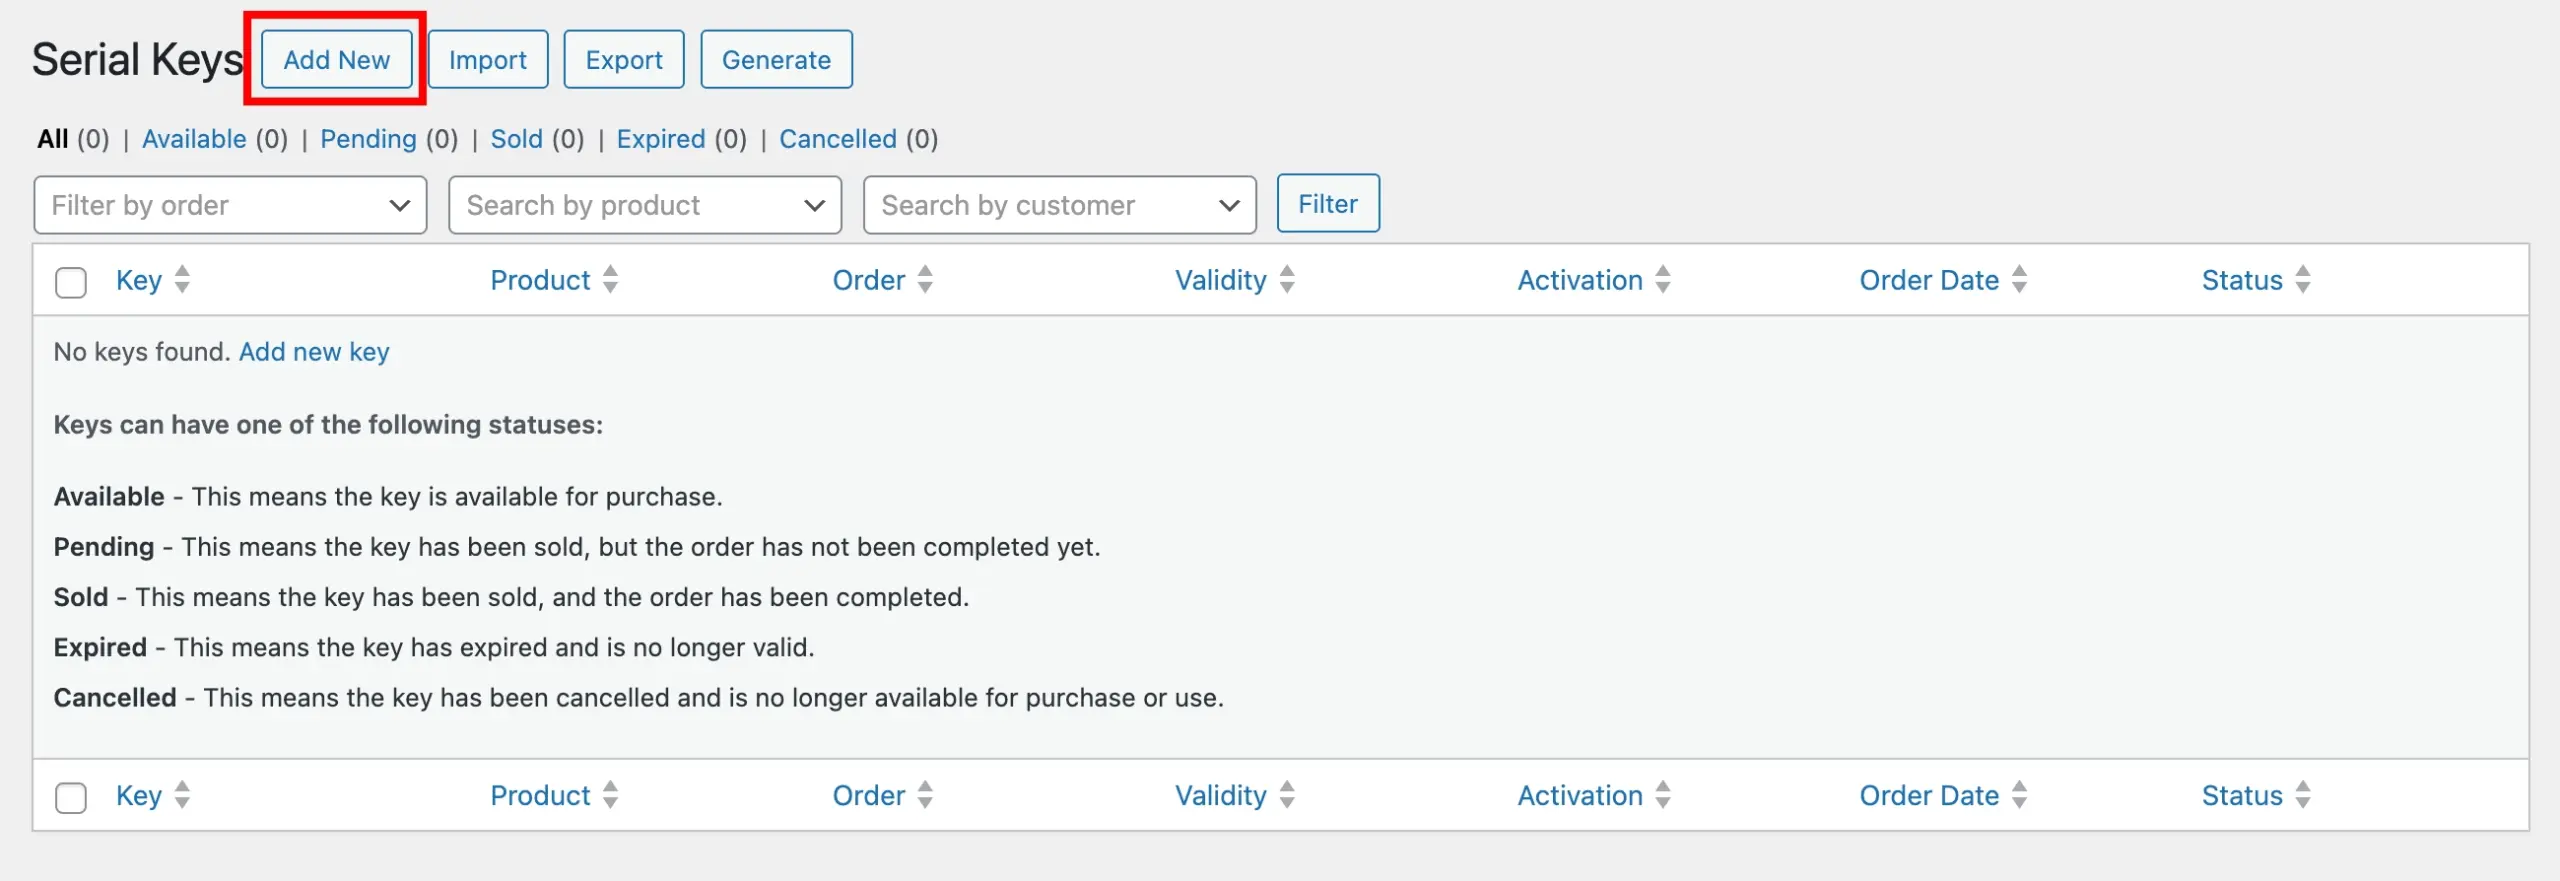
You will land on the Key Details page, where you fill in all the properties for the key you are about to add.
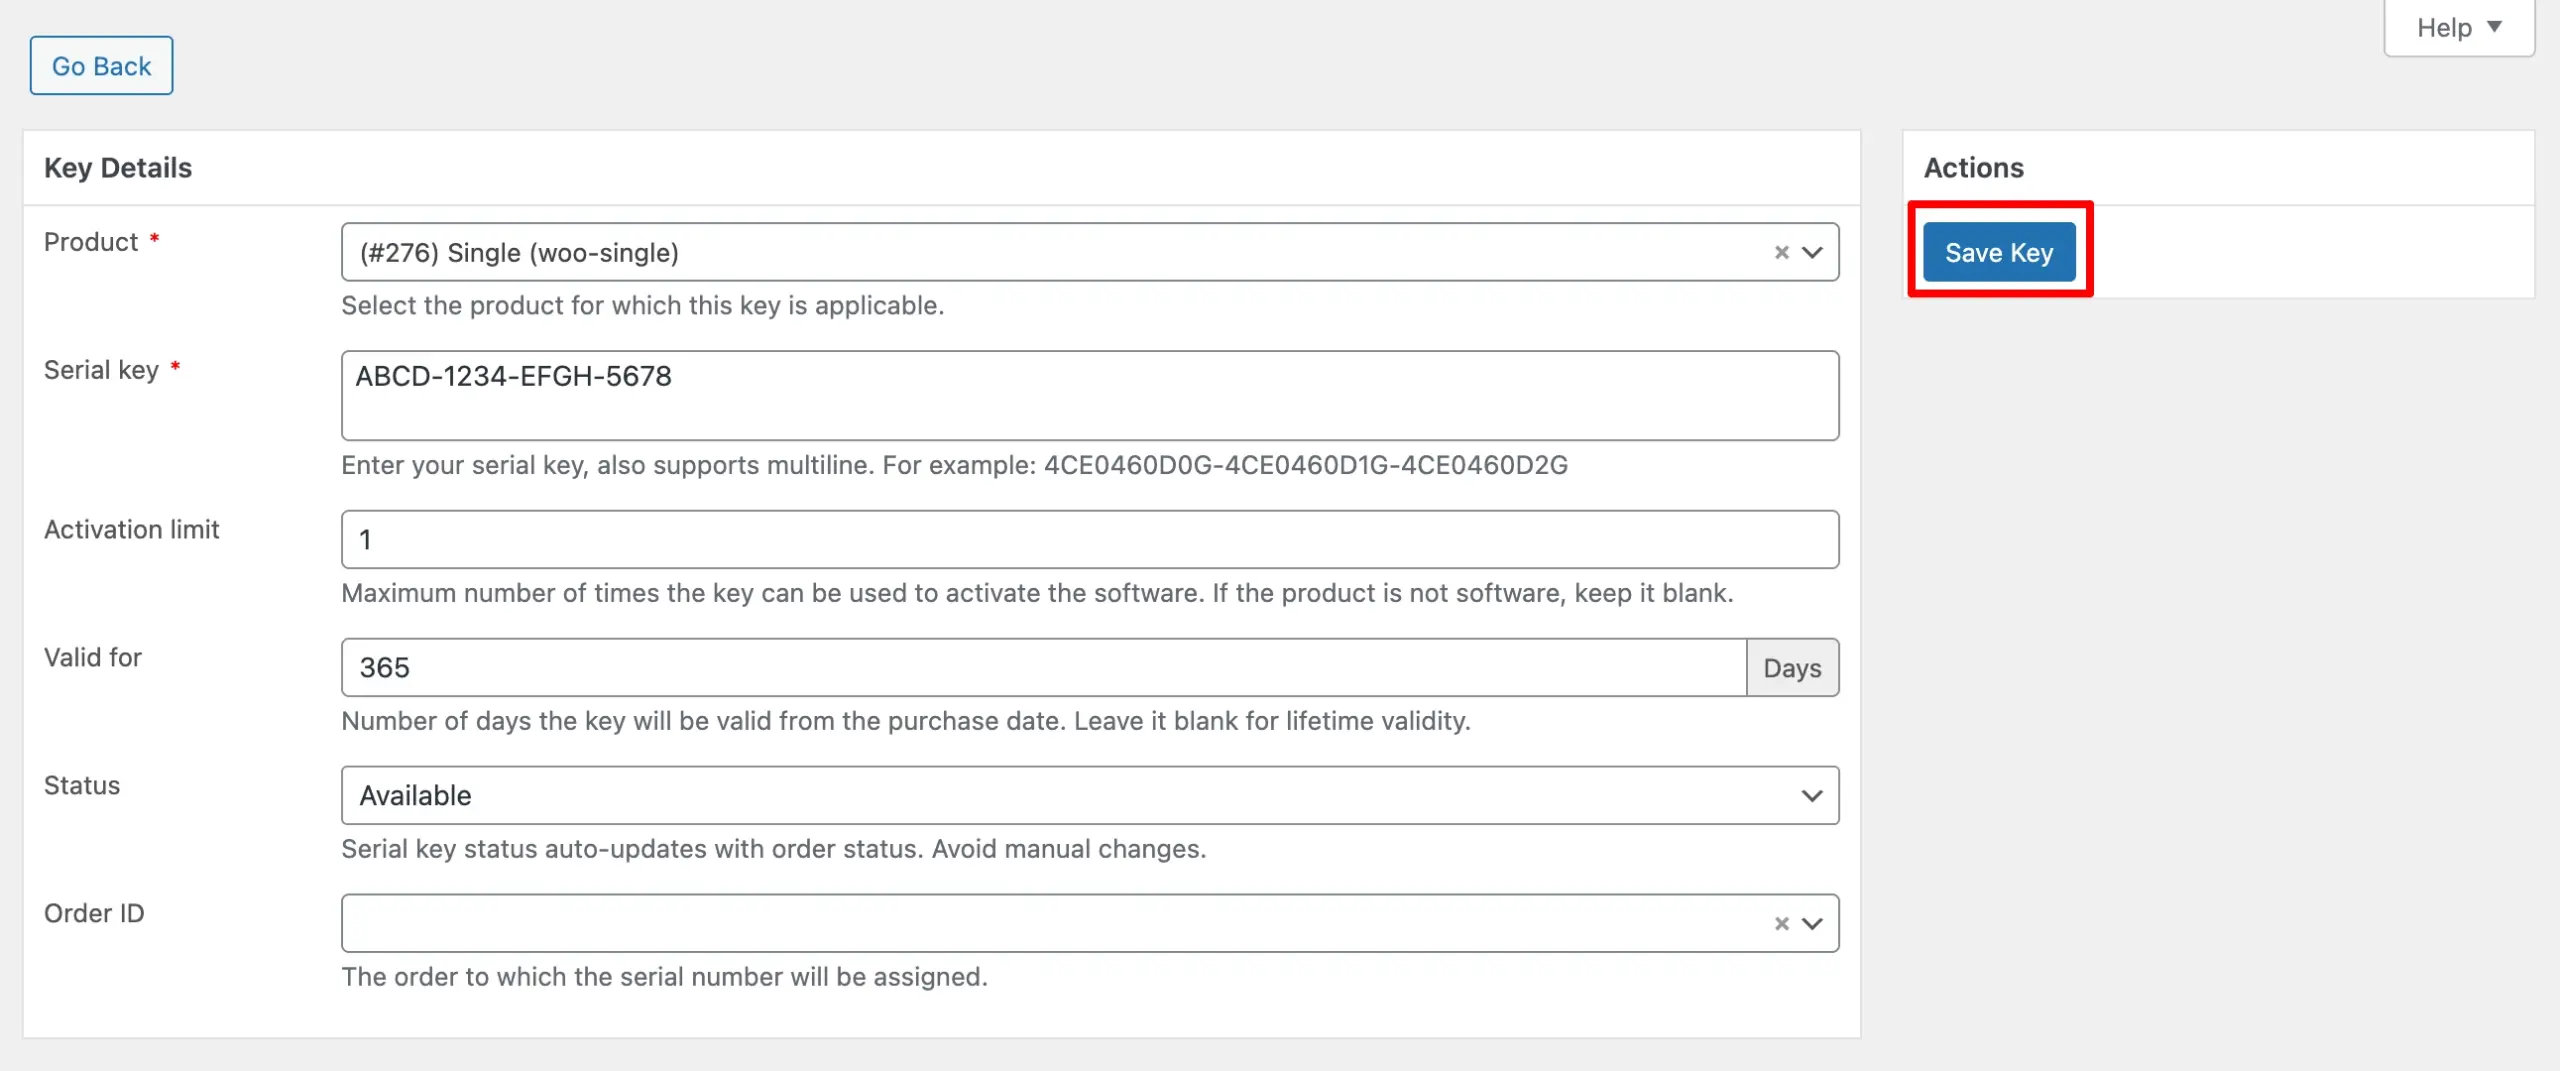
Step 2: Fill In the Key Details

Product
This is where you assign the key to a specific product in your store. Click the dropdown and select the product this key belongs to. Once a customer purchases the product, the plugin will automatically pull this key from the pool and deliver it.
Serial Key
The Serial Key field is where you enter the actual key value; this is exactly what your customer will receive. Whatever you enter is delivered to the customer as-is, with no modifications.
If your vendor sent you a code like ABCD-1234-EFGH-5678, paste it in exactly as it appears.
Tip: This field supports multi-line input.
Activation limit
Sets the maximum number of times the key can be used to activate the software. If the product is not software-based, leave this field blank.
Valid for
Number of days the key remains valid, counted from the purchase date. Leave blank to grant lifetime validity with no expiration.
Status
Sets the key’s current state. Choose from: Available, Pending, Sold, Expired, and Cancelled. Set status to Available for new keys. The status updates automatically to match the order status. Avoid changing it manually after assignment.
Order ID
Assign this key directly to an existing order. Select the order number from the dropdown. Use this when a key needs to be linked to a past or manually created order.
Step 3: Save the Key
Once all the fields are filled in, click Save Key.
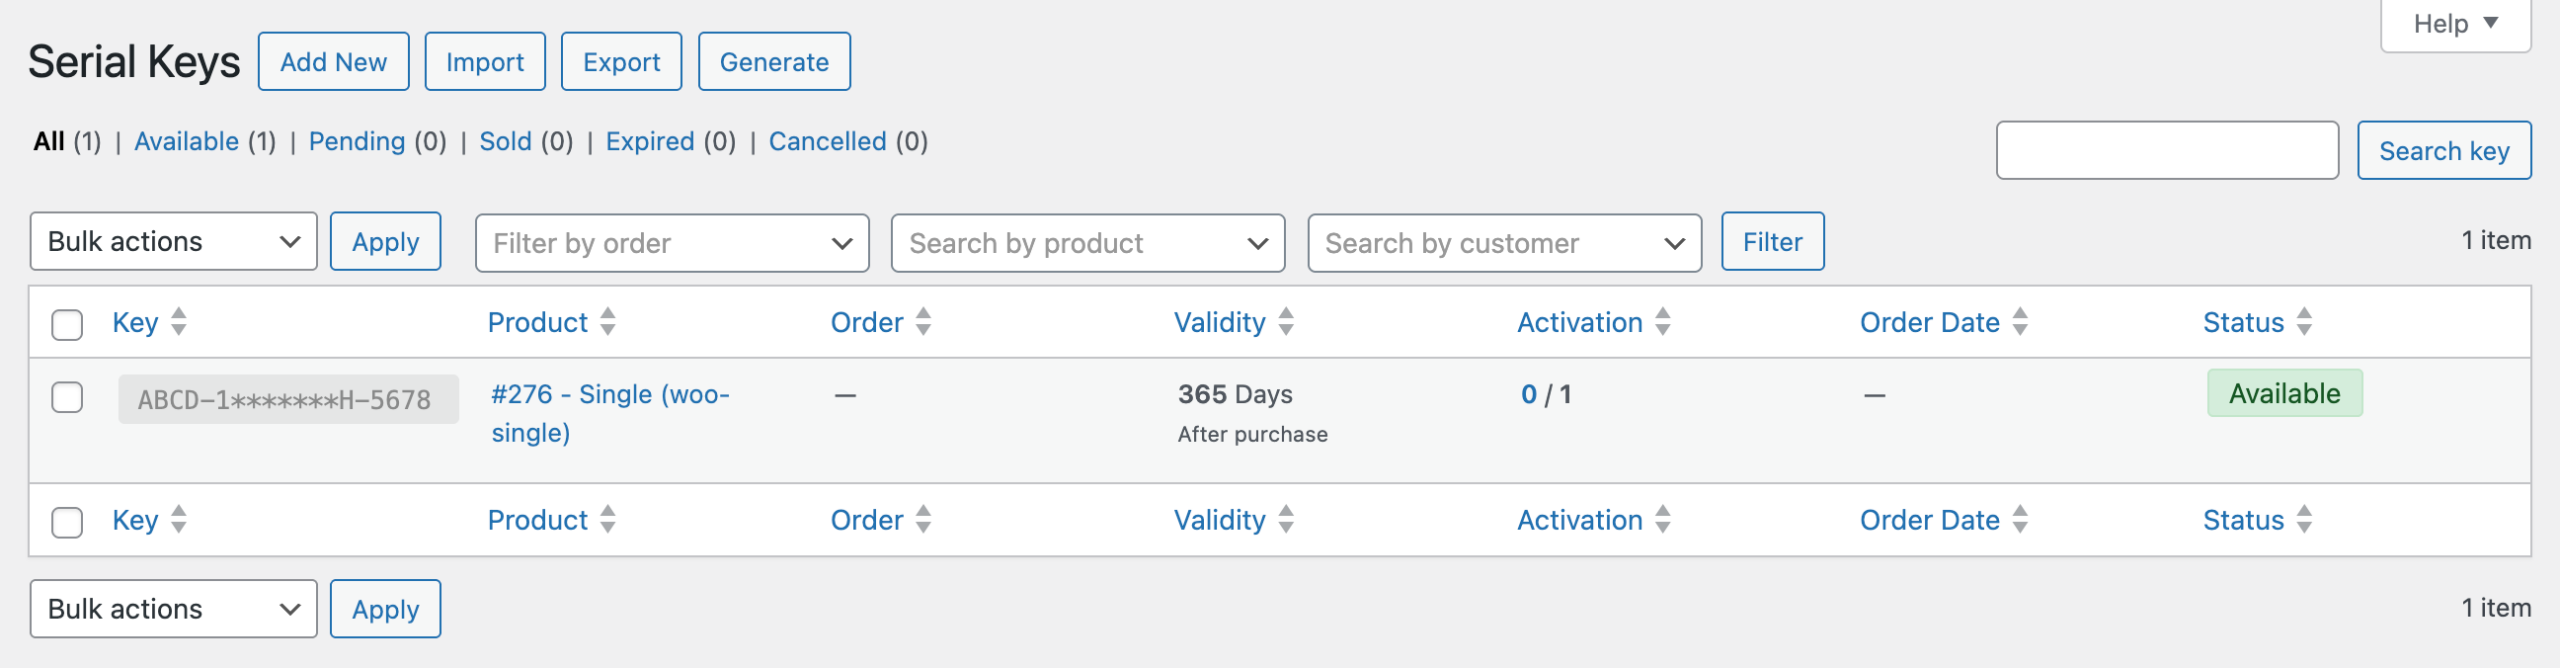
The key will appear in the Serial Keys list table and is now ready to be delivered.
What’s Next
With your keys added, the next step is to make sure your product is configured to deliver them. If you have not done that yet, follow the Configure a Simple Product or Configure a Variable Product guide.