
This guide walks you through selling your first serial key from start to finish, so you can see how the plugin works in just a few minutes.
Before You Begin
Make sure WC Serial Numbers is installed and activated on your WordPress site, and that you have at least one product created in WooCommerce.
Step 1: Add a Key to Your Store
Before the plugin can deliver anything, you need at least one key sitting in your store’s stock. Follow the steps in Add Keys Manually to create your first serial key and assign it to a product.
Step 2: Enable Key Delivery on the Product
Now you need to tell the product to deliver the key you just added.
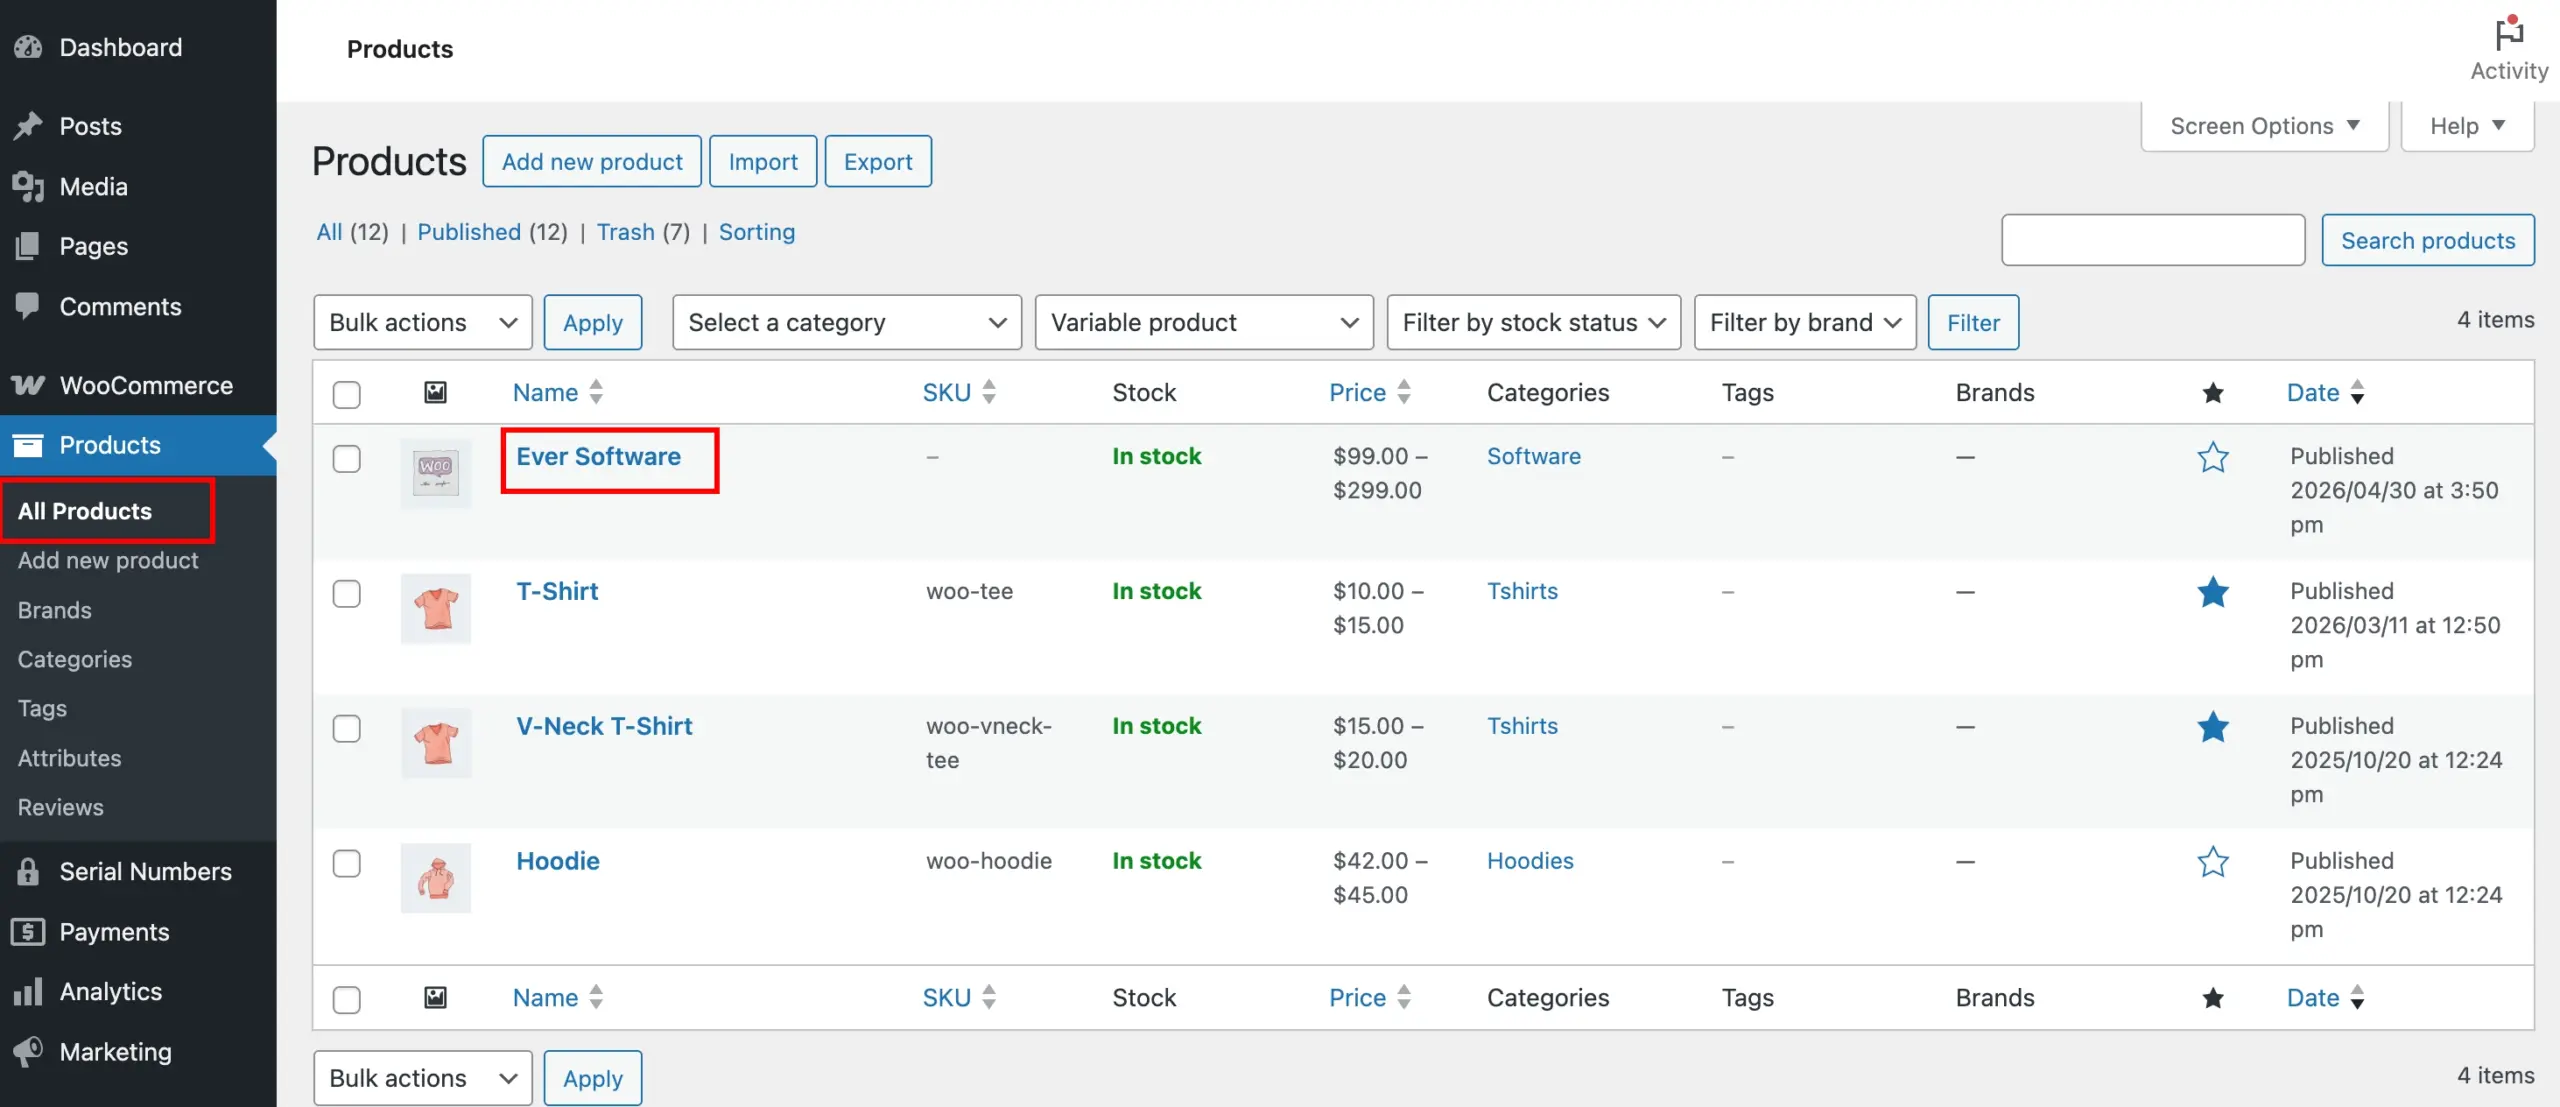
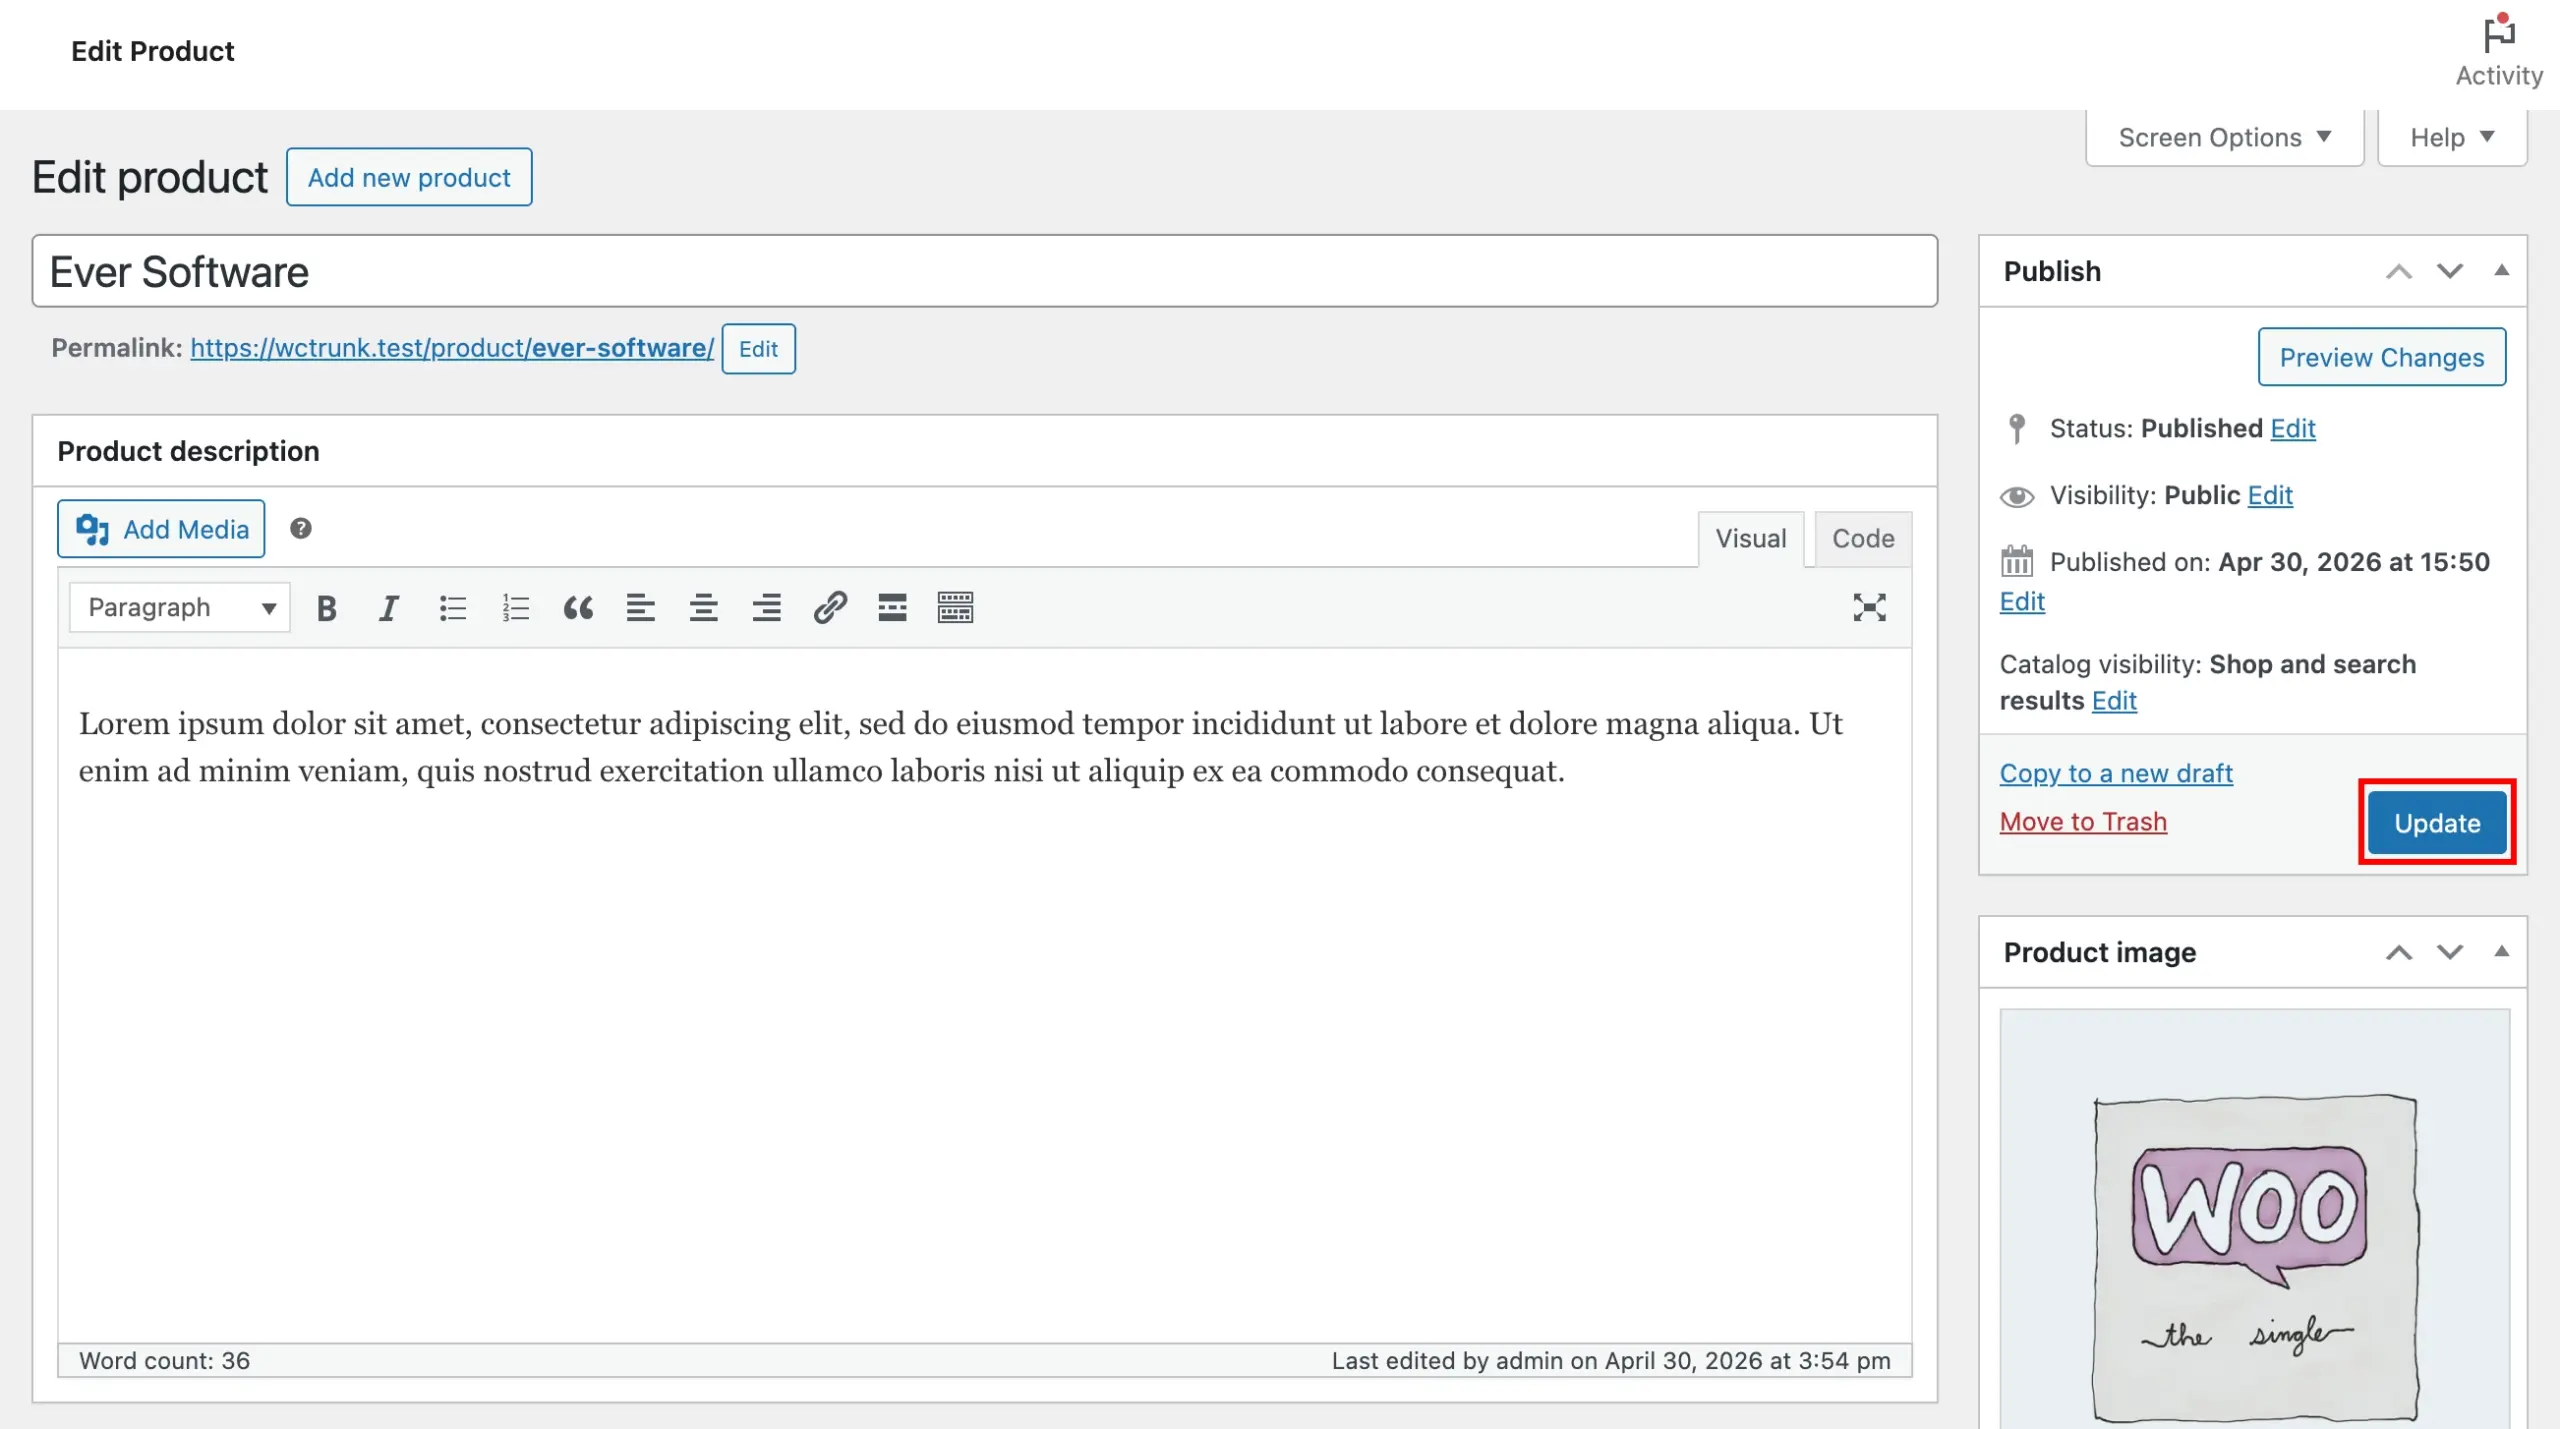
Go to Products in your WordPress admin menu and open the product you assigned the key to.
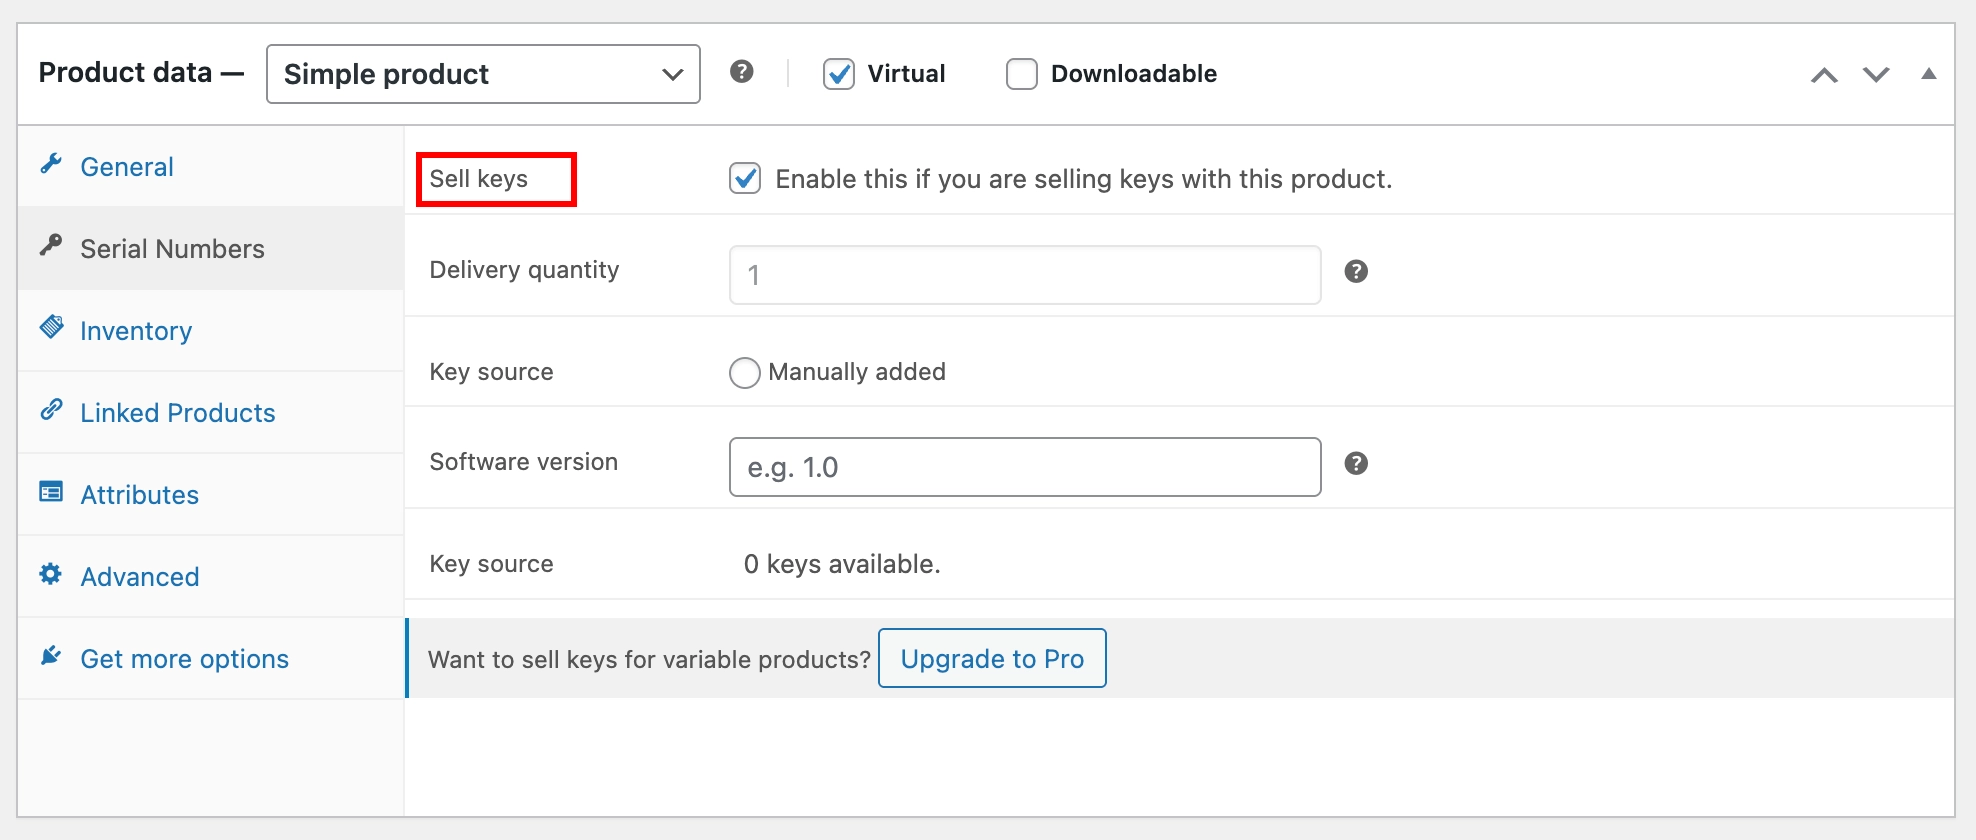
Scroll down to the Product Data section and click the Serial Numbers tab.

Check Sell Keys to enable key delivery for this product. Then set the Delivery Quantity to define how many keys are delivered per unit ordered – in most cases, leave this at 1.
Finally, set the Key Source to Manually Added.
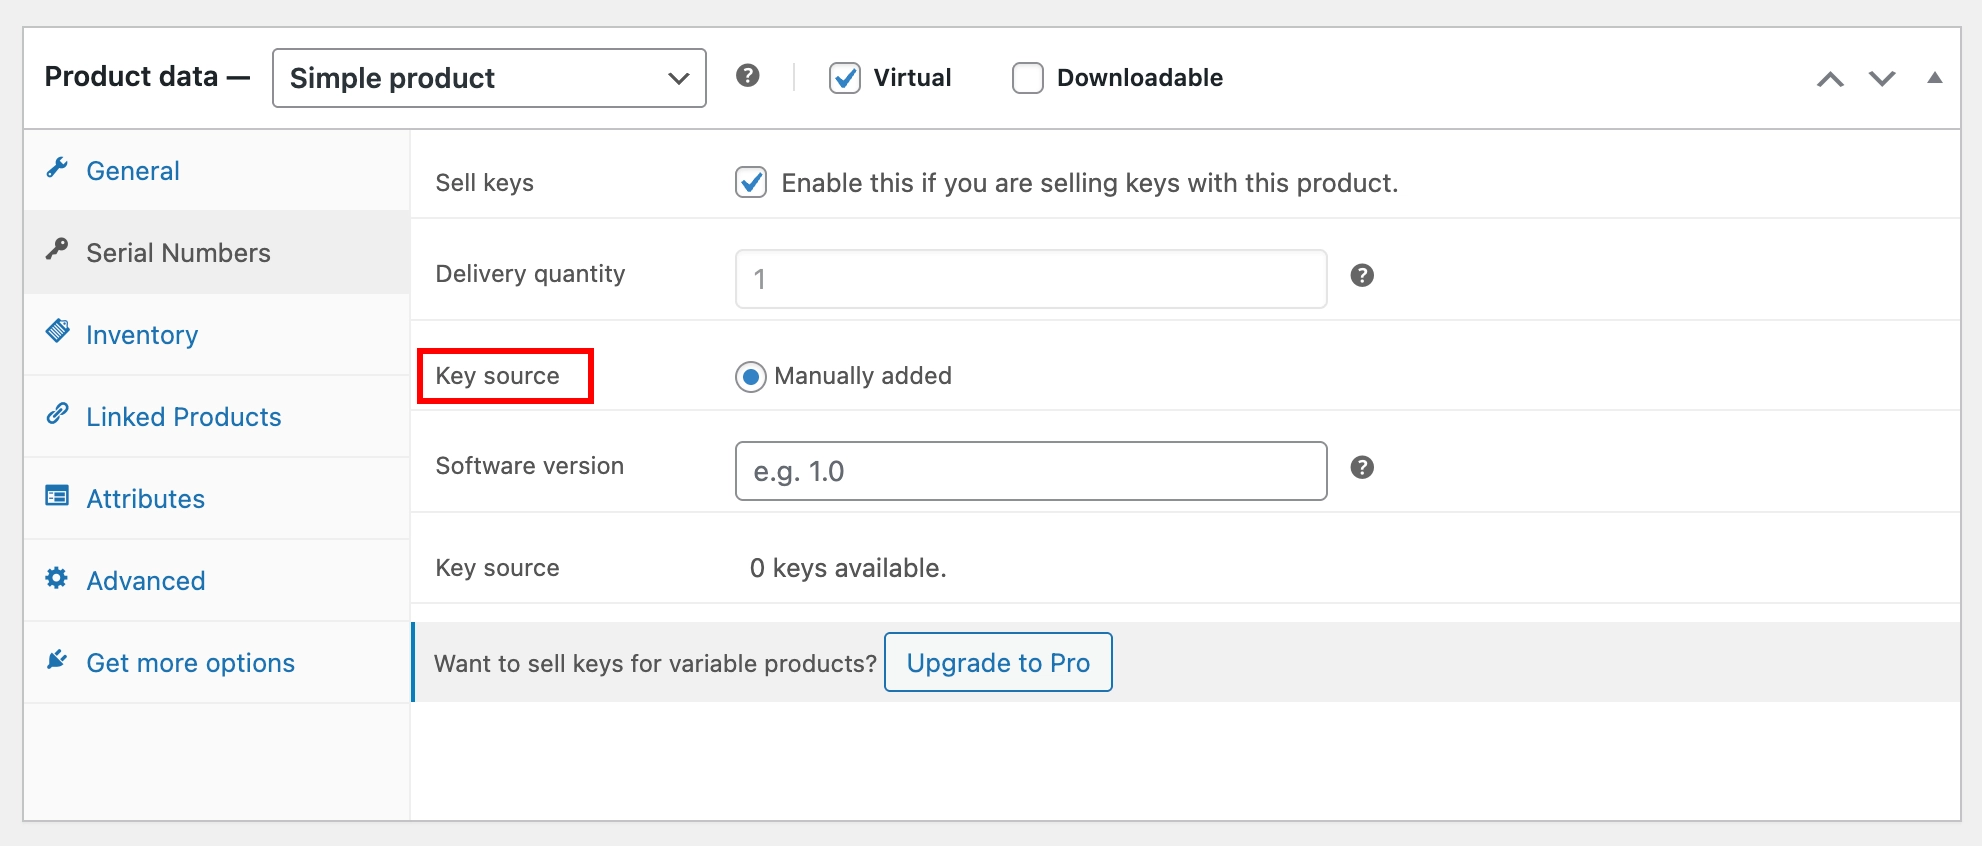
Click Update to save the product.
Step 3: Place a Test Order
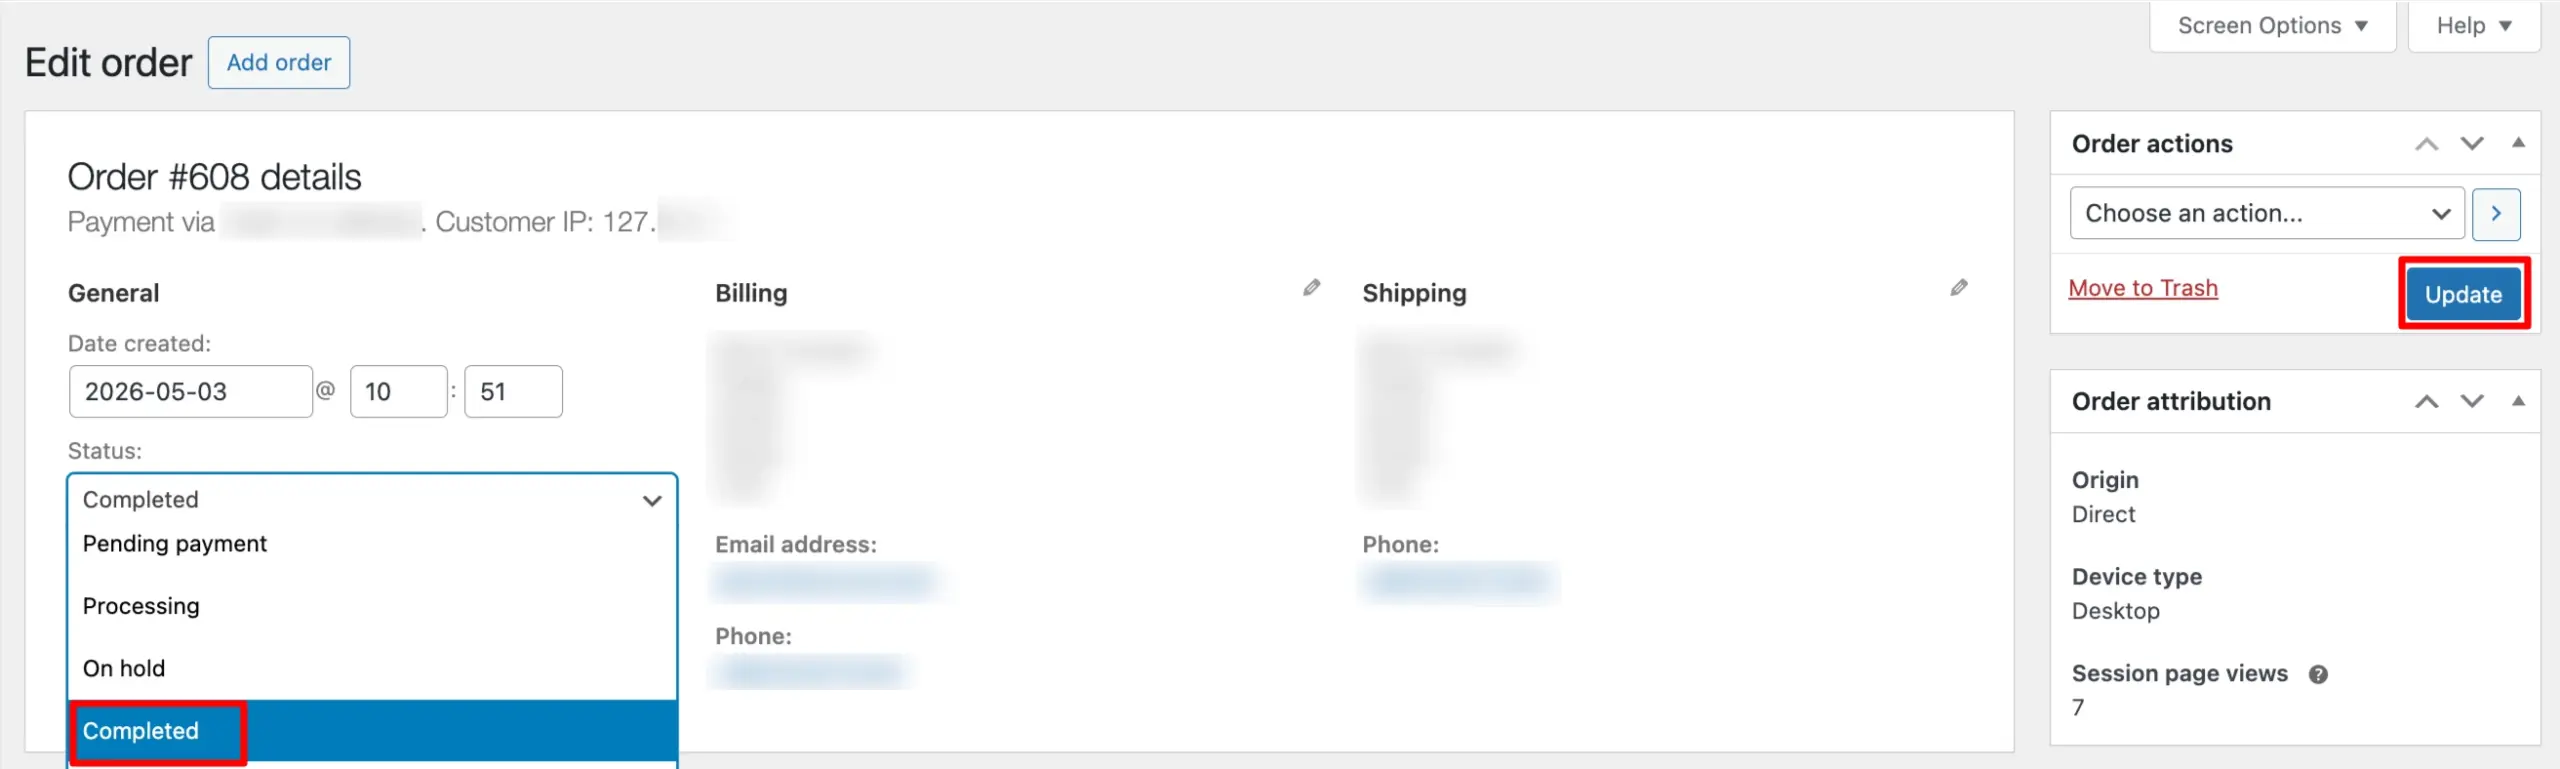
To confirm everything is working, place a test order for the product. Once the order is placed, go to WooCommerce → Orders and open the order. Change the order status to Completed and click Update – this triggers key delivery.
Want to do more? WC Serial Numbers Pro lets you sell keys for variable products, import keys in bulk via CSV, automate key generation with generator rules, and much more. Upgrade to Pro to unlock the full feature set.
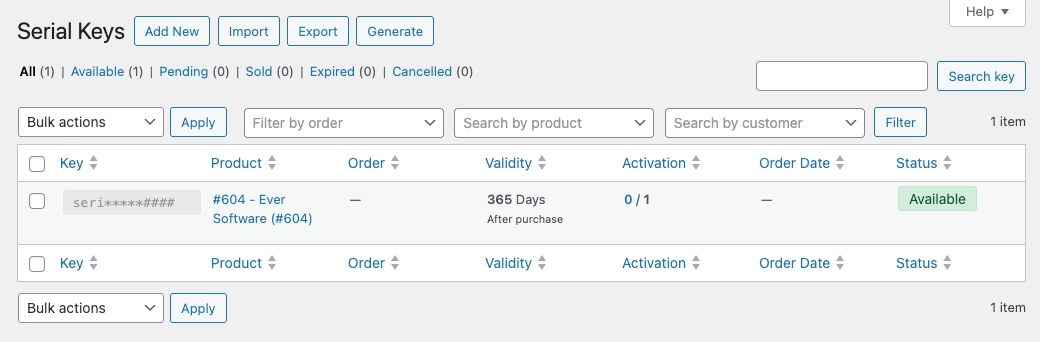
What Happens After Purchase
When a customer places a successful order, the key is automatically assigned and delivered. The customer can view their key on the My Account page and in the order confirmation email.
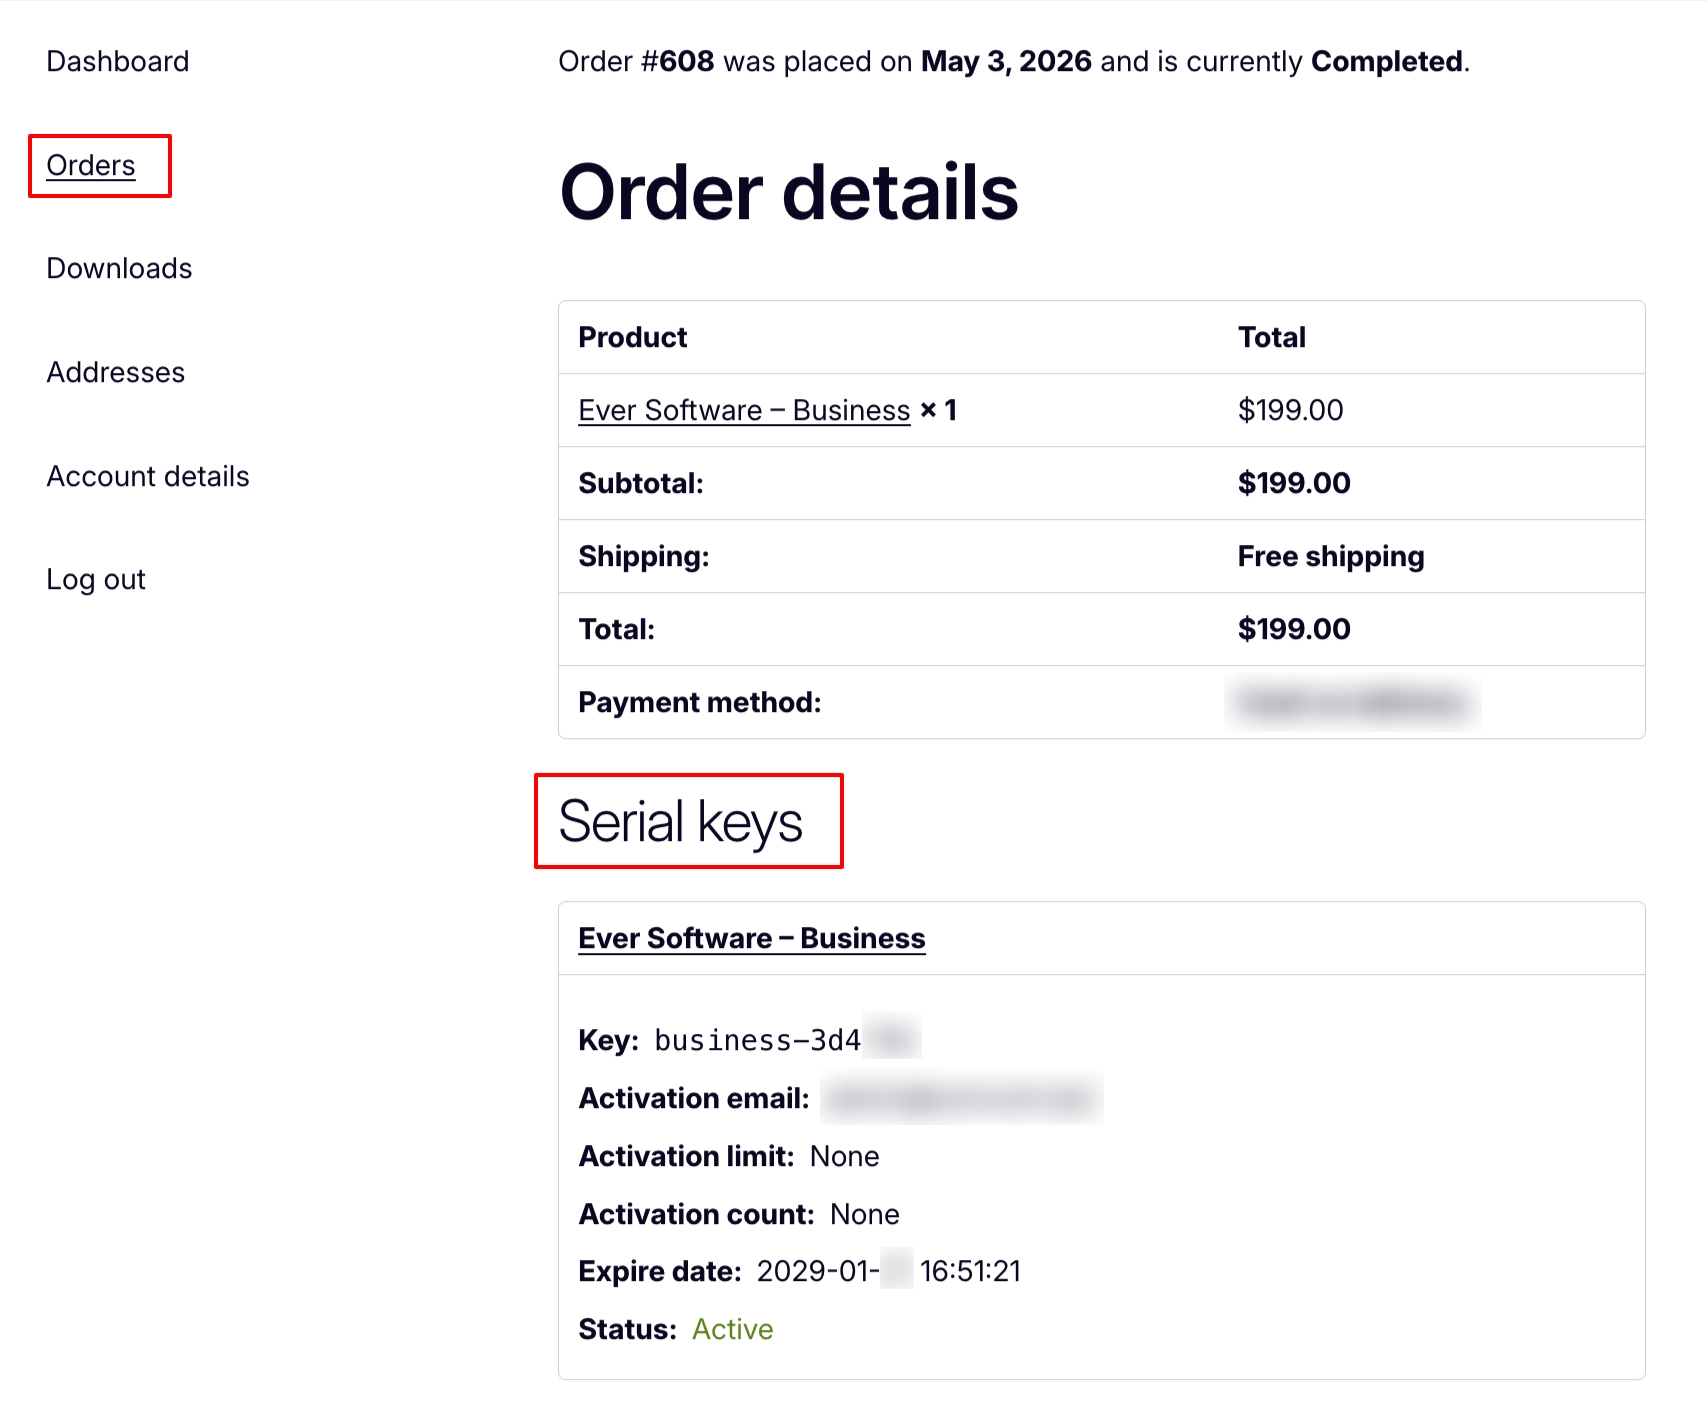
That is it – your first serial key has been sold and delivered.
What’s Next
Now that you have seen how the plugin works end to end, here are a few guides to help you set things up properly for your store:
- Configure a Simple Product – A complete walkthrough for setting up a simple product with all available key source options.
- Configure a Variable Product – Learn how to configure key delivery per edition for products that come in multiple versions. (Pro)