
BOGO for WooCommerce applies these site-wide settings across every product on your store, so you only need to configure them once. Then continue through BOGO Sale Badge, Offer Banner, and the rest, or move straight on to enabling offers on individual products.
Before You Begin
Make sure BOGO for WooCommerce is installed and activated on your WordPress site. If you haven’t done that yet, follow the Installation Guide to get set up in a few minutes.
Once activated, you’ll see a BOGO menu item under WooCommerce in your WordPress admin sidebar. This is where all the settings covered in this guide live.
Step 1: Navigate to the BOGO Settings Page
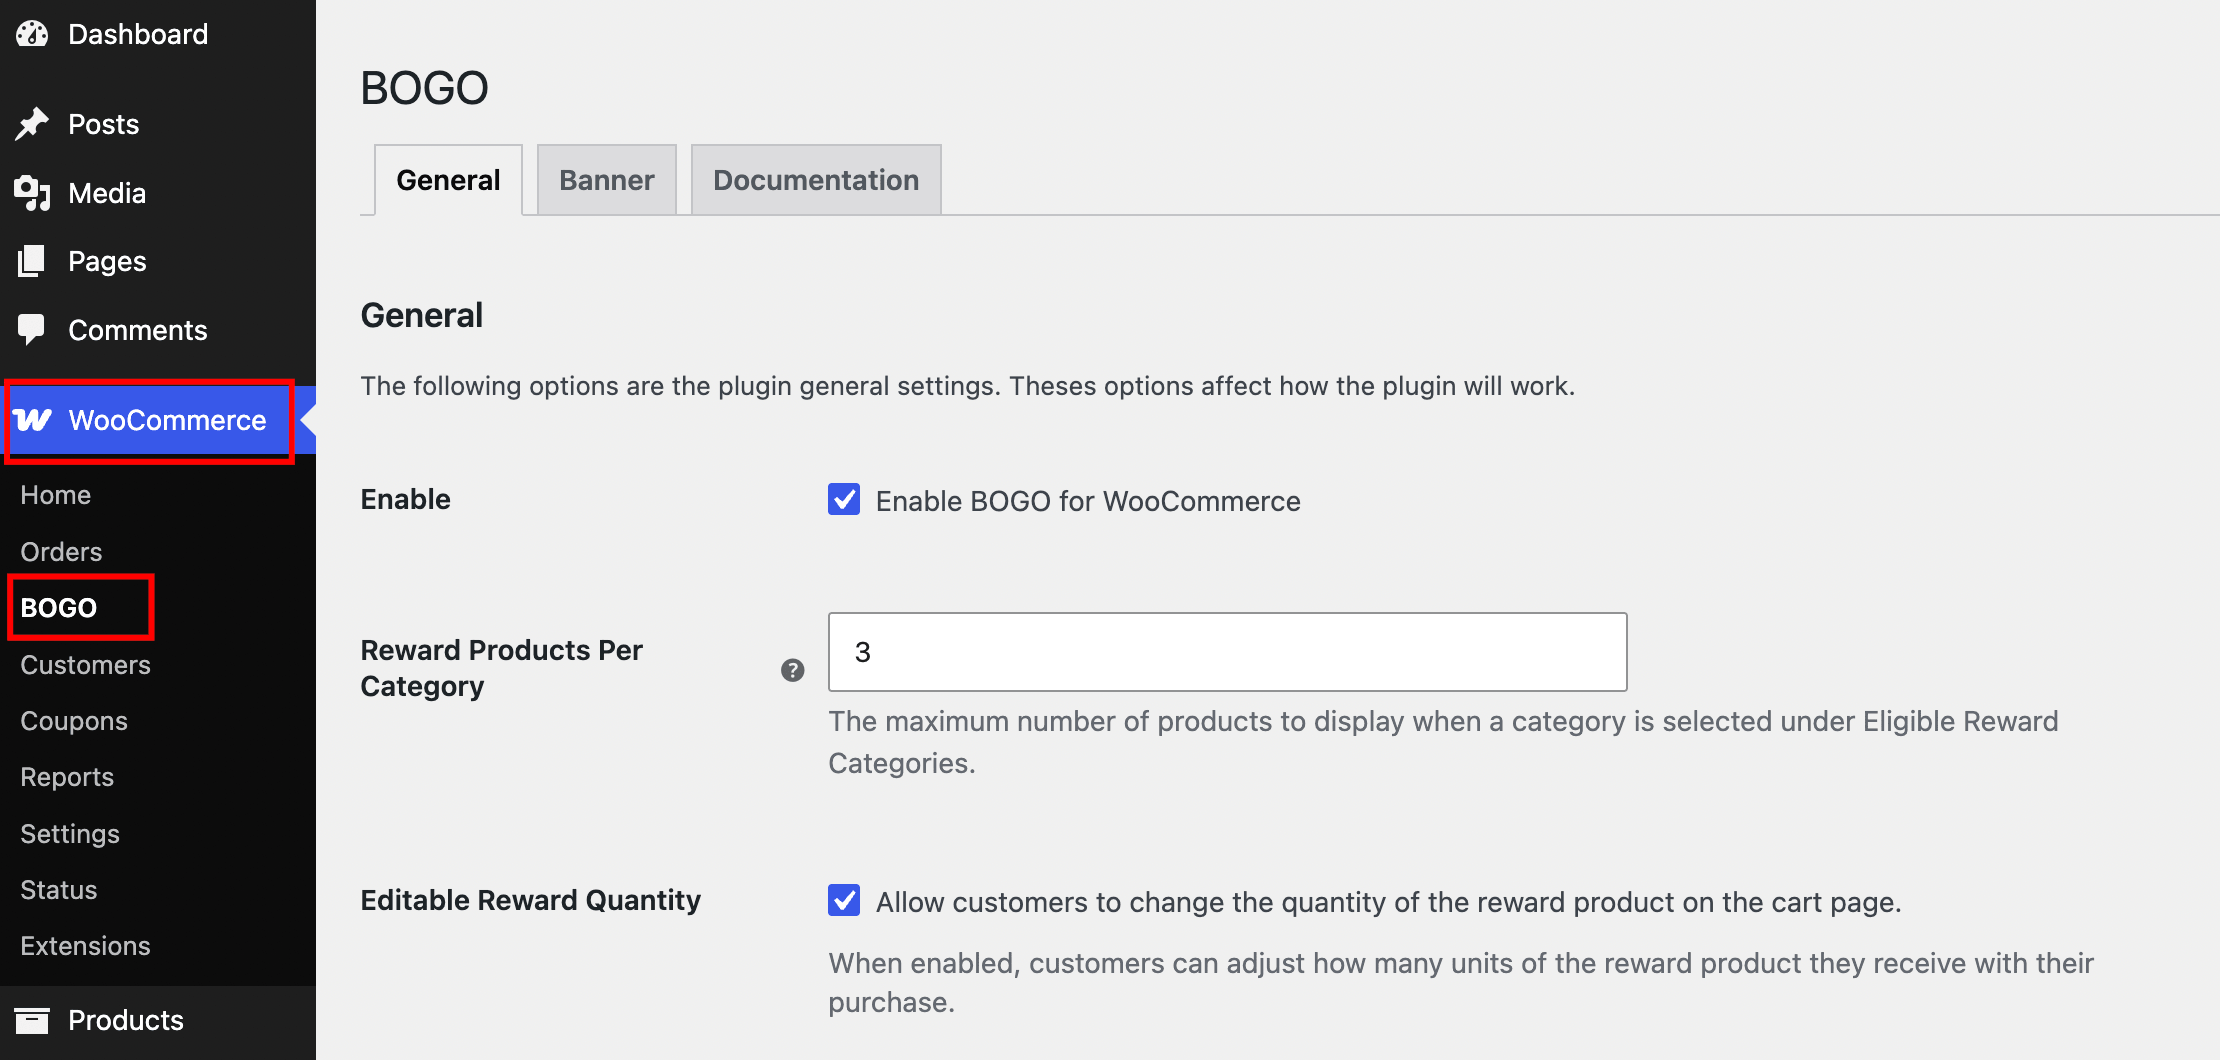
From your WordPress admin menu, hover over WooCommerce, then click BOGO. You’ll land on the General tab by default.
Step 2: Enable the Master Switch
At the top of the page, check the Enable toggle. This is the master switch for BOGO functionality across your entire site. Until this is turned on, no offer will apply on the frontend, even if you’ve configured individual products.

Tip: If you ever need to pause an active promotion campaign, for example, between seasonal sales, turn this toggle off instead of removing your product-level configurations. Your settings stay intact, and you can resume the promotion later.
Step 3: Set the Reward Products Per Category
When a customer’s reward is set to Specific Products/Categories, and you select a category, this field limits how many products from that category the customer can choose from.
Set a number that fits your banner’s layout, showing too many products can make the reward selection feel cluttered on smaller screens.

Step 4: Enable Editable Reward Quantity
Check this option to let customers adjust how many units of the reward product they receive, directly from the cart page.
For example, if the offer is “Buy 5, Get 2 Free,” the 2 free units are added automatically once the customer qualifies. With this setting enabled, the customer can reduce that to, say, just 1 unit if that’s all they want.
When left unchecked, customers receive the exact reward quantity you’ve configured on the product, with no ability to change it after adding it to their cart.

Step 5: Save Your Settings
Once you’ve configured all the options above, click Save Changes at the bottom of the page.

What’s Next
Continue to BOGO Sale Badge to configure the promotional badge shown on your shop and product pages.