
Keeping BOGO for WooCommerce plugin up to date ensures optimal performance, compatibility, and security for your WooCommerce store. PluginEver frequently releases updates that include:
- Security patches
- Bug fixes
- New features
- Performance improvements
Before You Update
While PluginEver thoroughly tests all updates, specific server environments or plugin conflicts can occasionally lead to issues. A backup ensures you can quickly restore your site if anything goes wrong.
Update Methods
Option 1: Update via the WordPress Dashboard (Recommended)
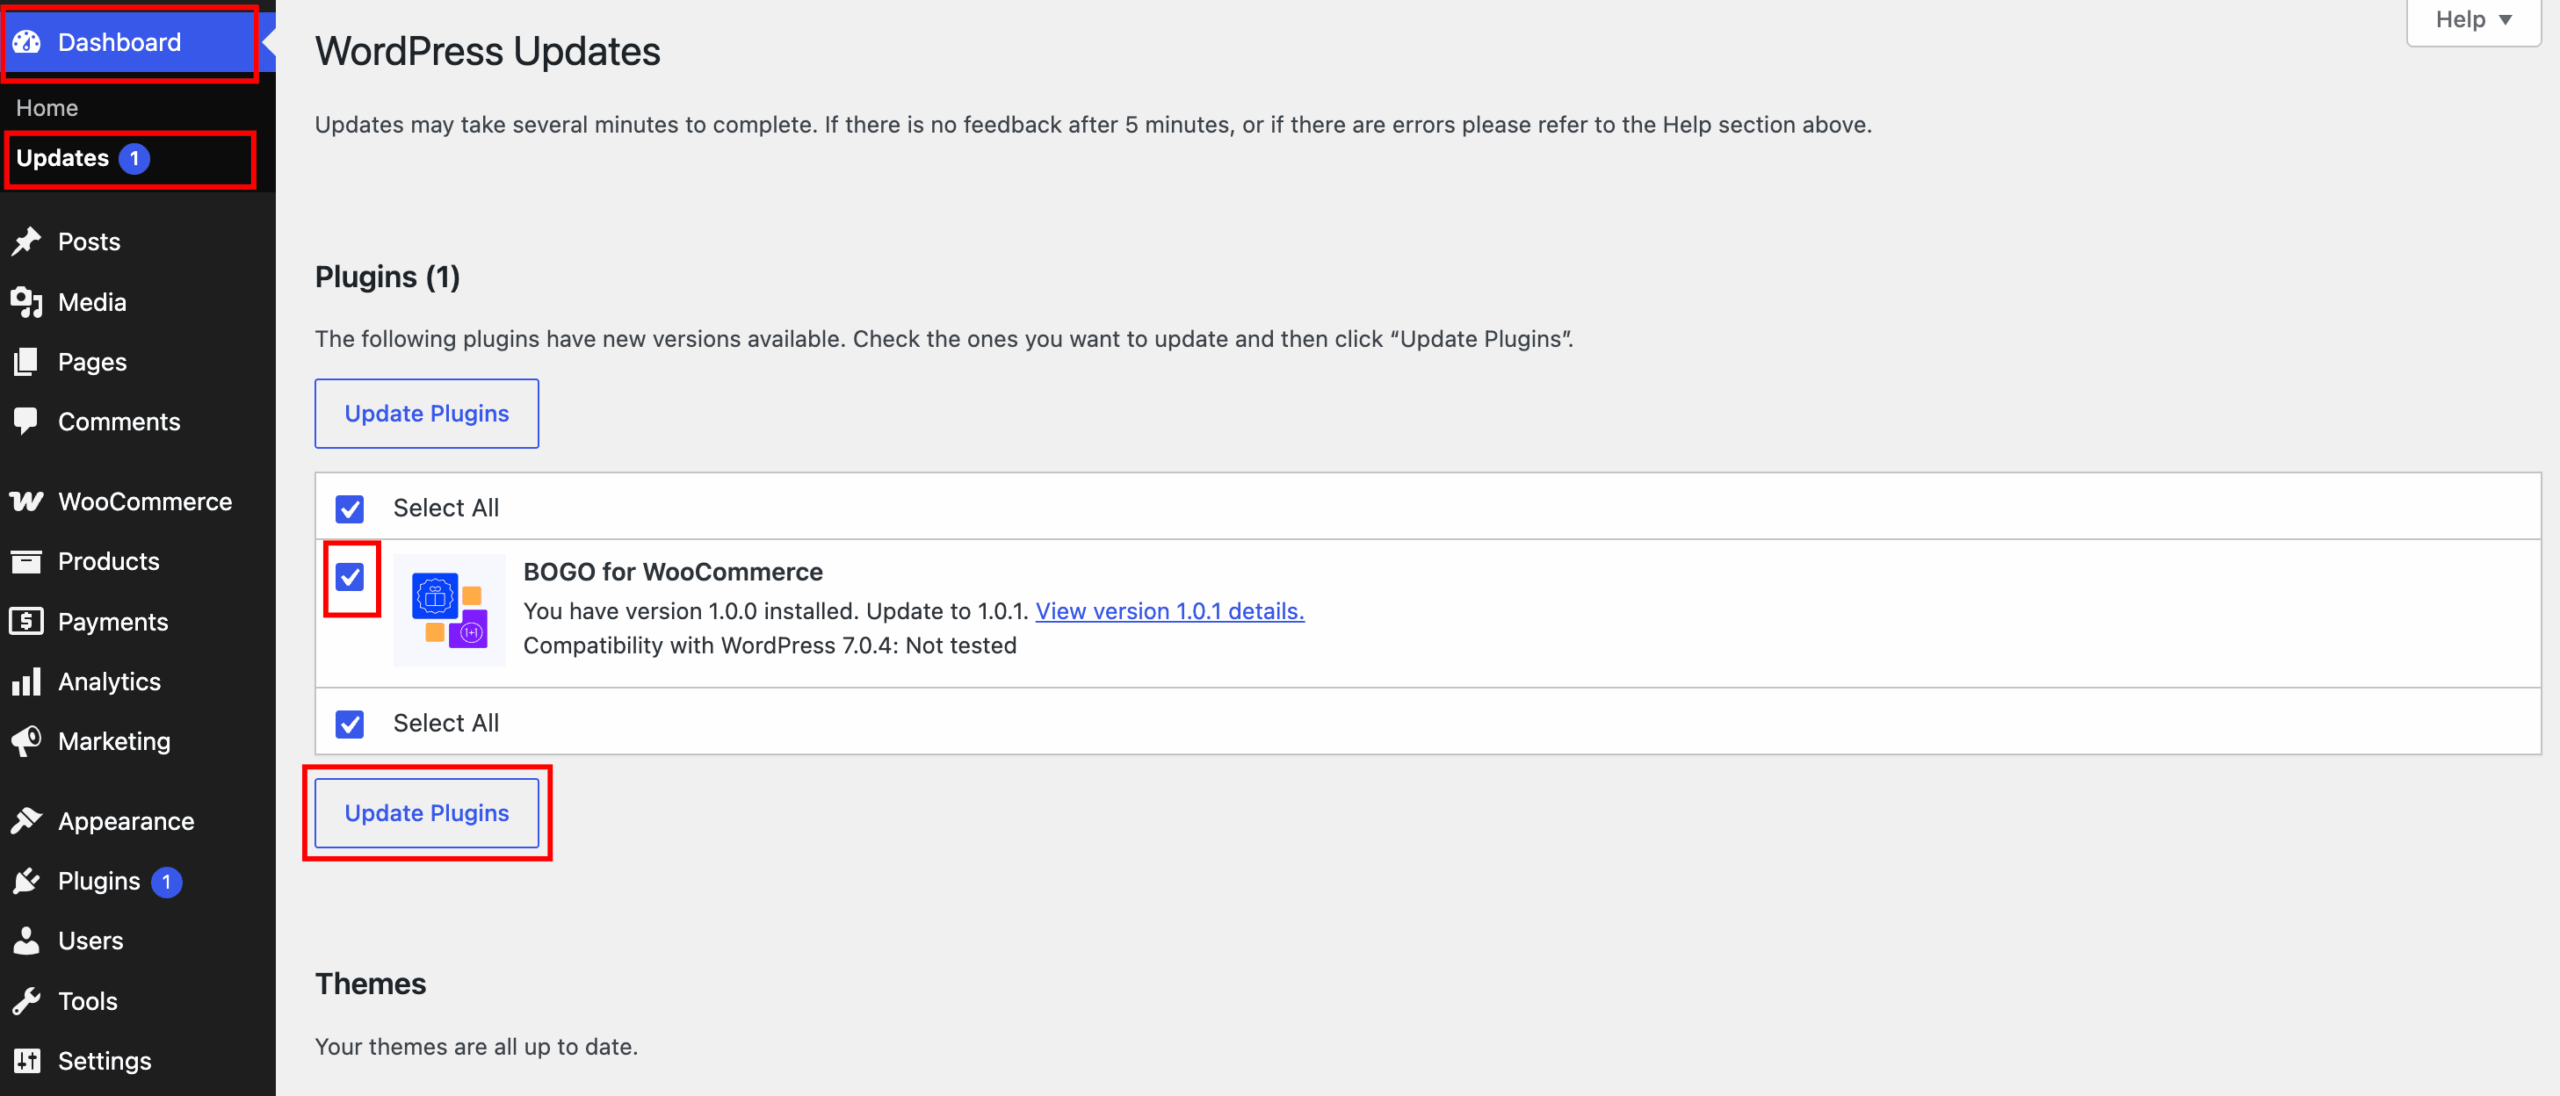
- Log in to your WordPress admin panel and navigate to Dashboard > Updates.
- Look for available plugin updates.
- If BOGO for WooCommerce appears in the list, check the box next to it.
- Click the Update Plugins button.
Option 2: Update via Plugins Page
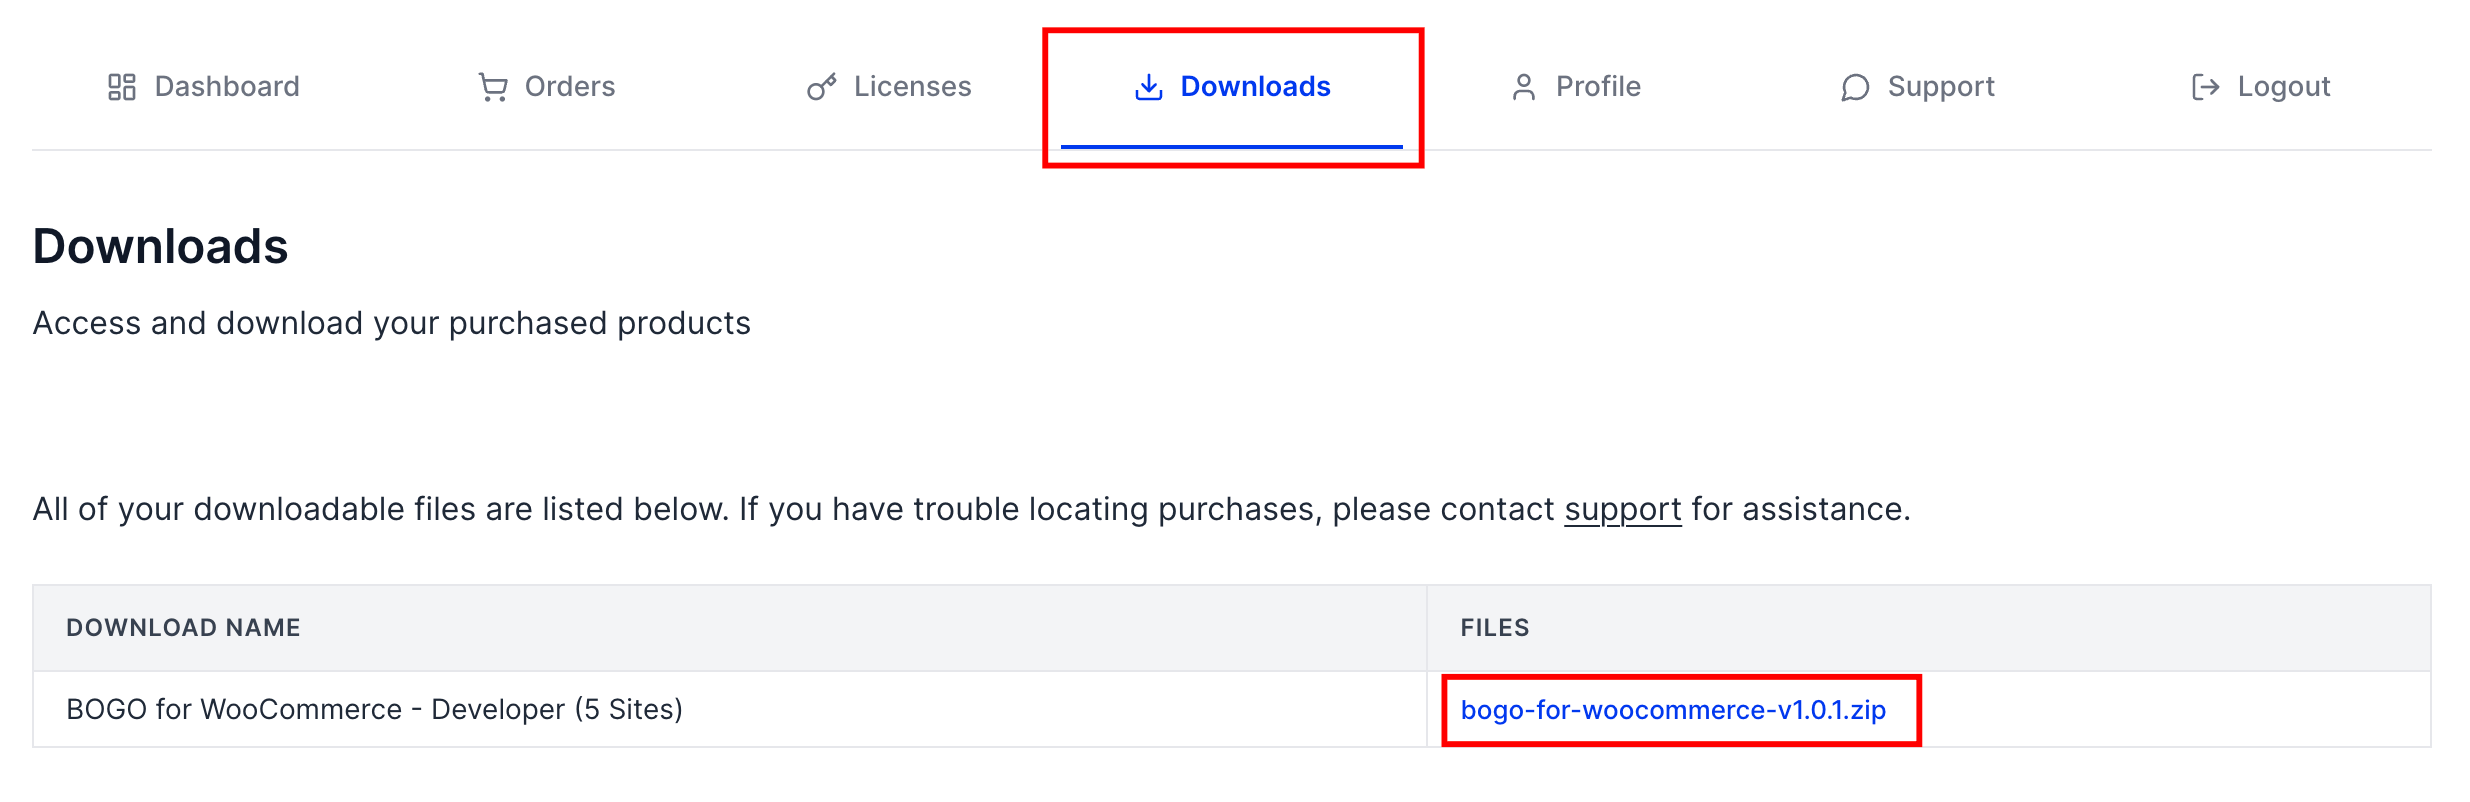
If auto-updates are disabled or not visible:
- Download the latest version of the plugin from your PluginEver Account.
- In your WordPress admin panel, navigate to Plugins > Add Plugin > Upload Plugin.
- Click Choose File and select the latest ZIP file.
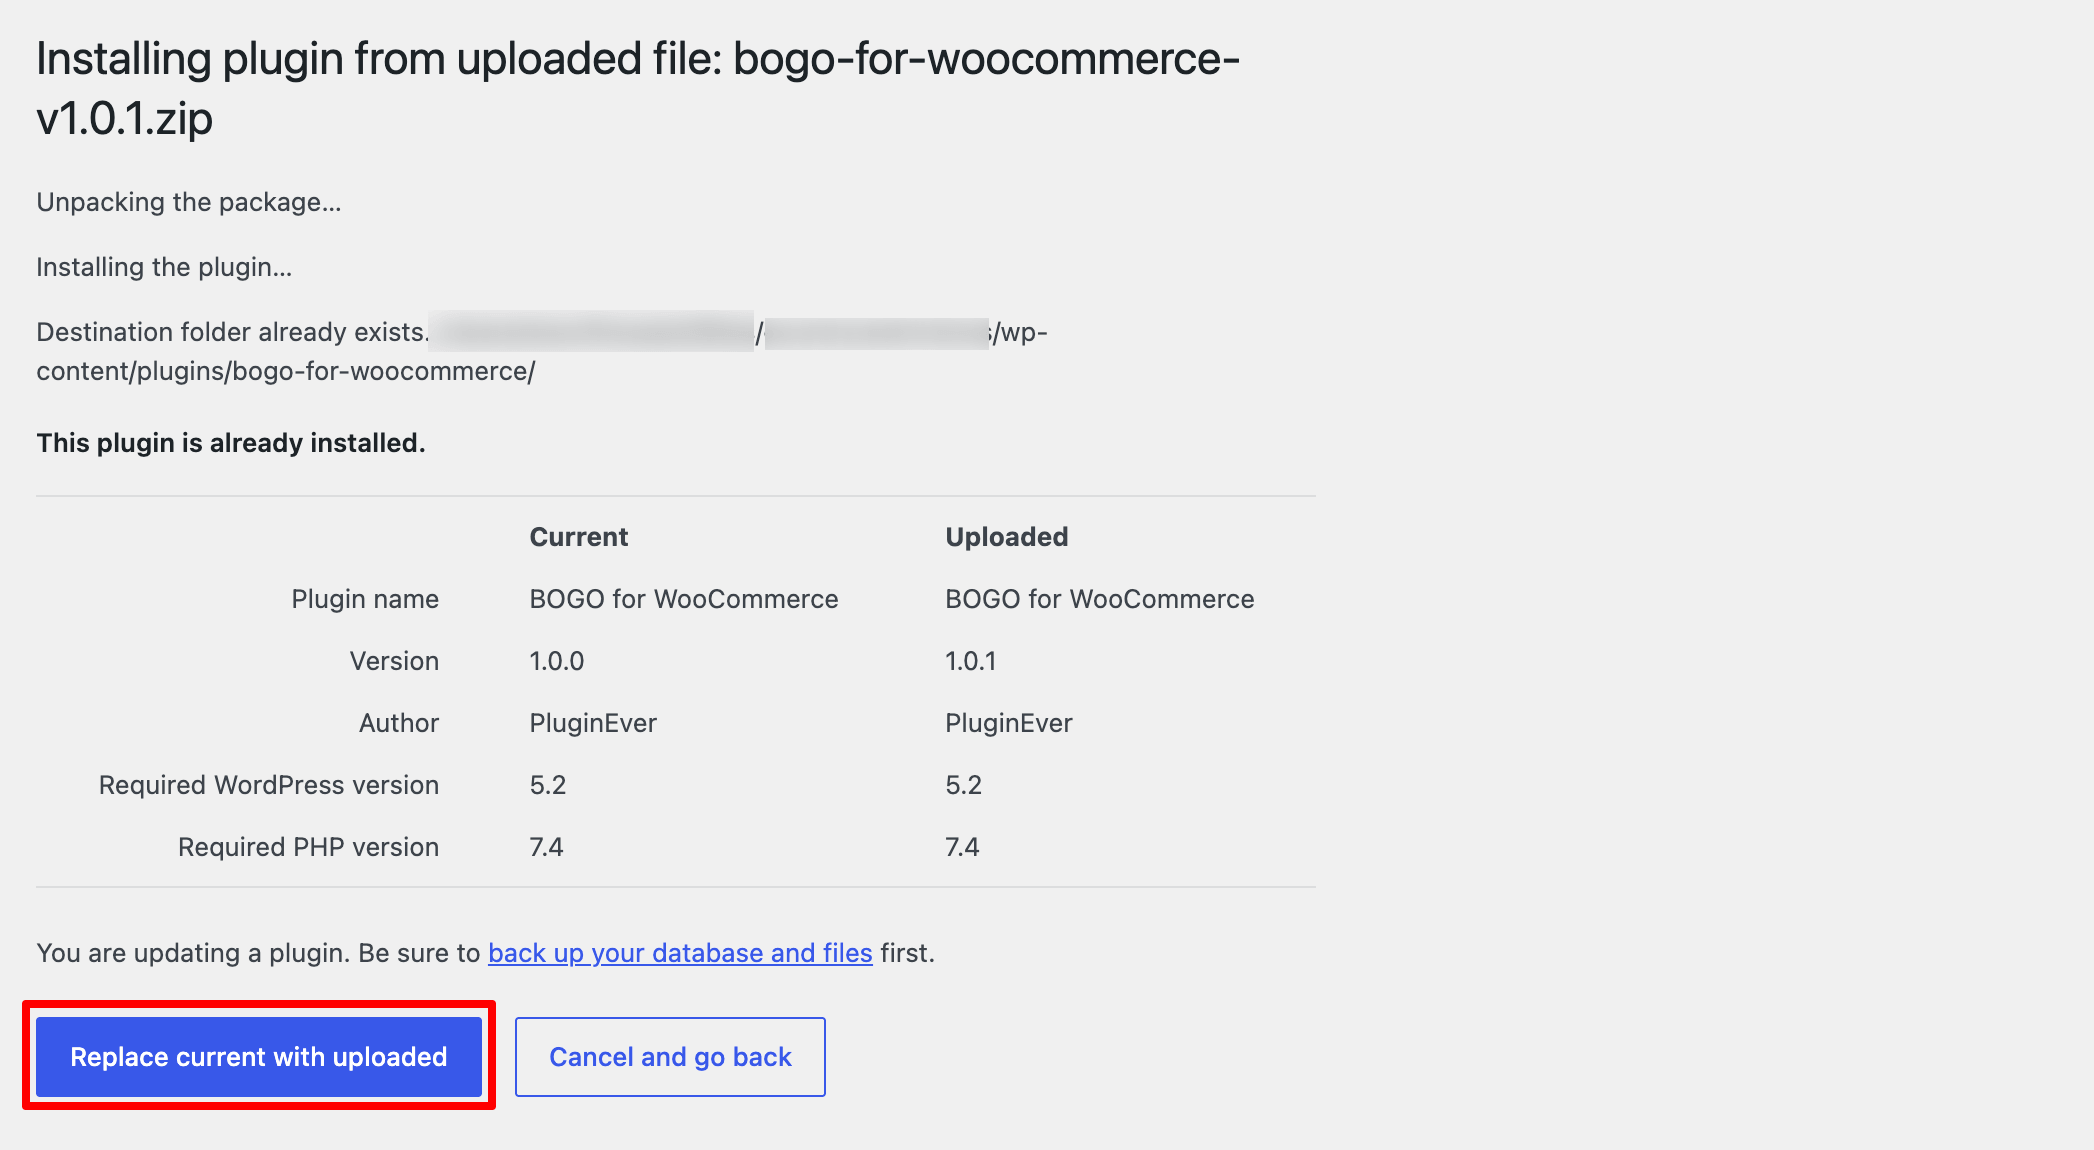
- WordPress will detect that the plugin is already installed and prompt you to replace the current version with the one you have uploaded.
- Click Replace current with uploaded.
Option 3: Update via FTP/SFTP (Developer Method)
- Extract the latest version.
- Connect to your server using an FTP client, such as FileZilla.
- Navigate to:
wp-content/plugins/ - Locate the existing
bogo-for-woocommerceplugin folder. - Overwrite it with the new unzipped plugin folder.
- Log in to your admin dashboard and verify the update under Plugins.
Licensing Note
To receive update notifications directly in your dashboard:
- Ensure your plugin license is active.
- You can activate it under: Plugins > Installed Plugins > BOGO for WooCommerce > Activate License.