
Instead of just hiding or reordering WooCommerce’s default Description, Additional Information, and Reviews tabs, Product Tabs Manager lets you rename them, give them an icon, and control exactly which products or categories they appear on, the same way you would with a custom tab.
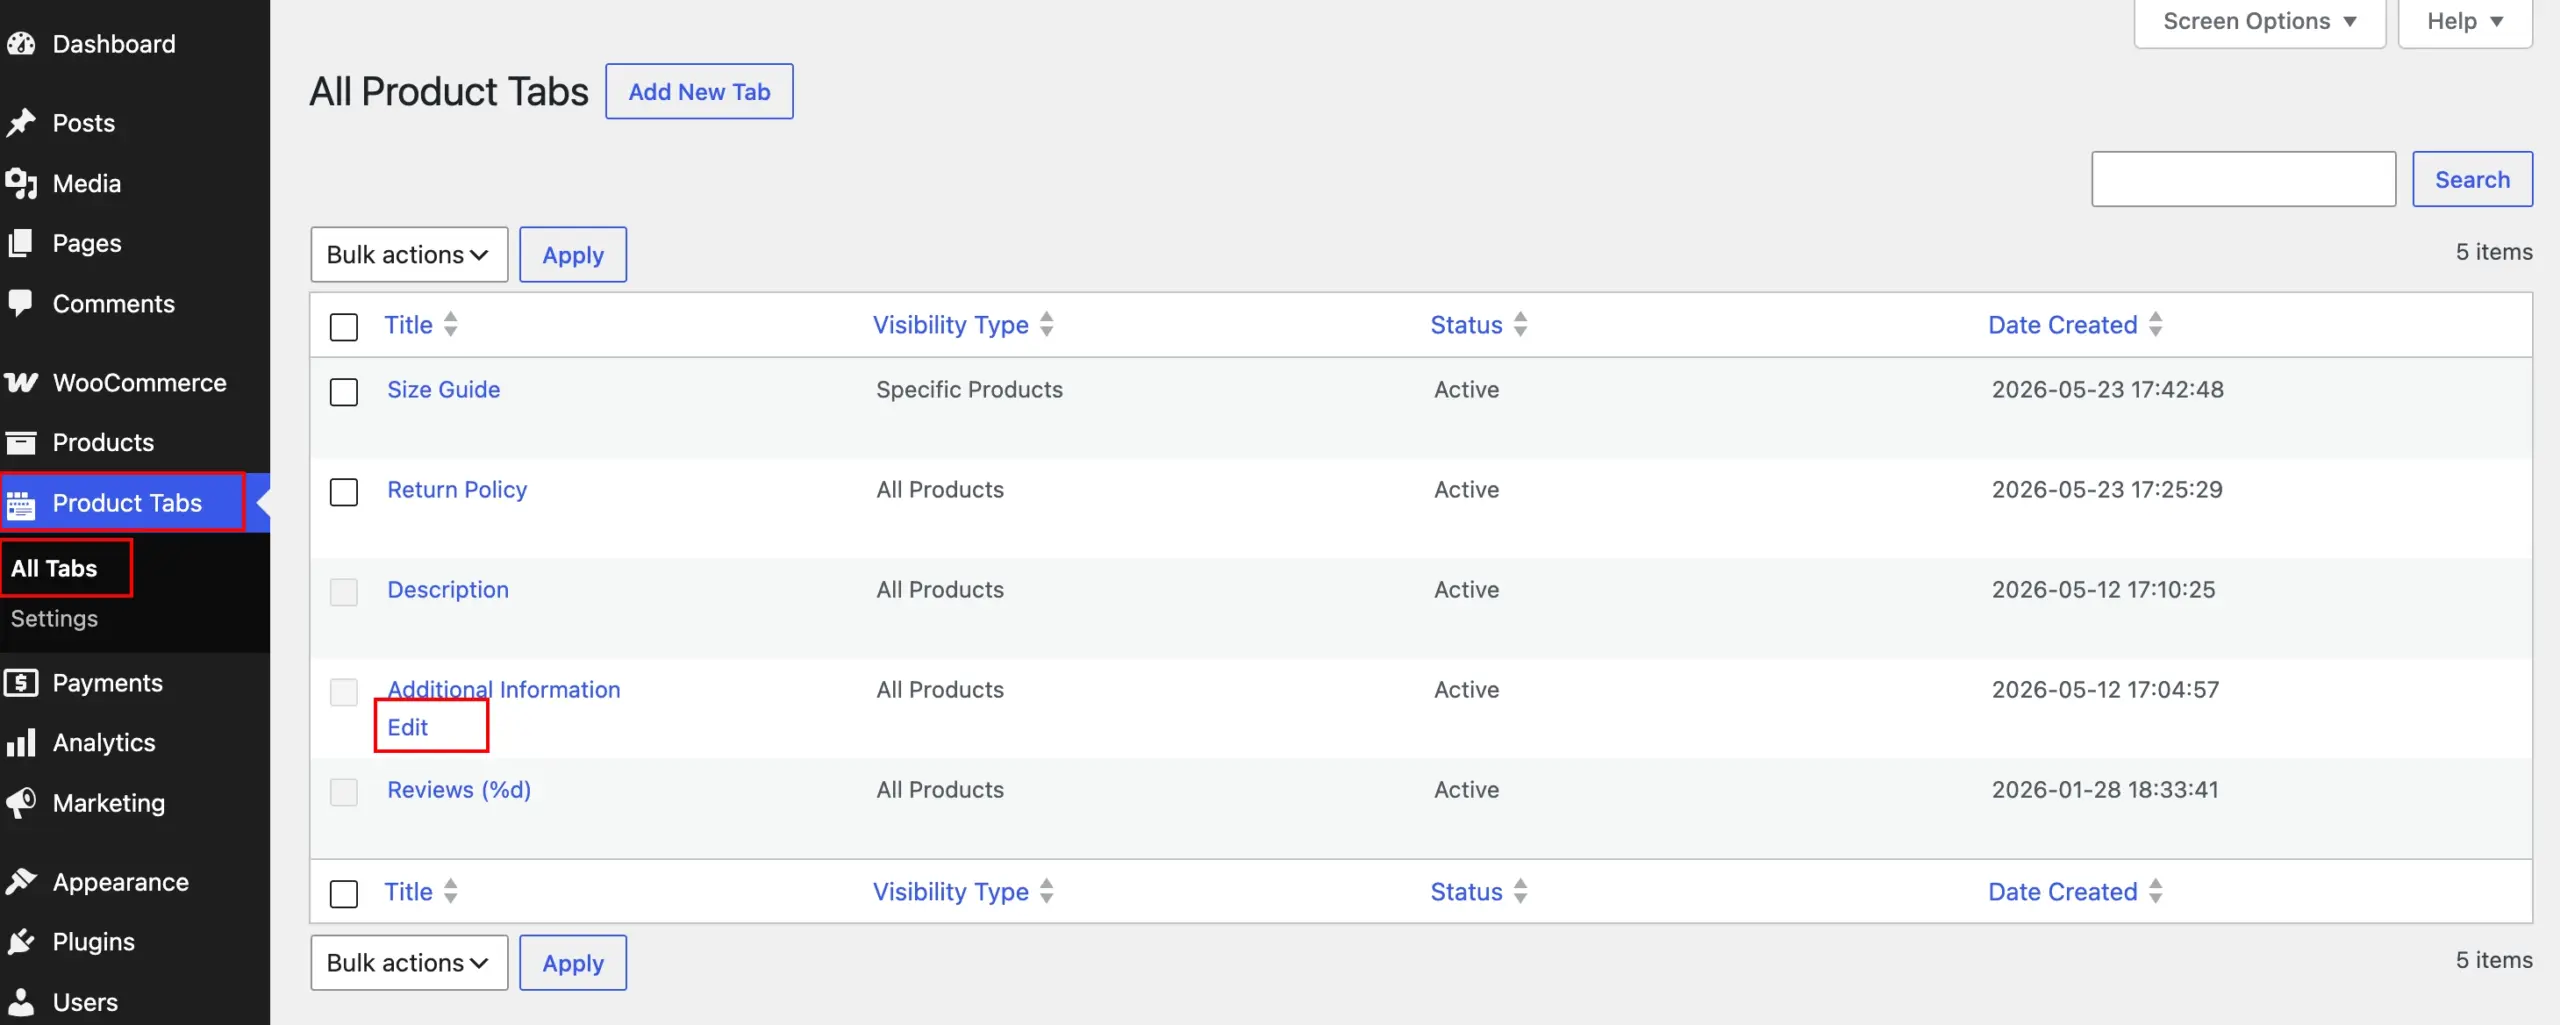
Open the default tab you want to edit by navigating to Product Tabs > All Tabs.
Renaming the Tab Title
Update the Title field with your preferred name. For example, you might rename “Additional Information” to “Specs” or “Description” to “Overview.”

Tip: Renaming a tab only changes its label. If you want to remove it from your store entirely, use Hide Default WooCommerce Tabs instead.
Controlling Visibility
Just like a custom tab, each default tab has its own Tab Settings and Advanced Tab Settings sections, letting you limit it to specific products or categories, or exclude certain ones entirely, instead of applying it store-wide.
Tab Settings
Set Visible Type to All Products, Specific Products, or Specific Categories to control where the renamed tab appears.

Advanced Tab Settings
Use Exclude Products and Exclude Categories to carve out exceptions to whatever visibility rule you’ve set.
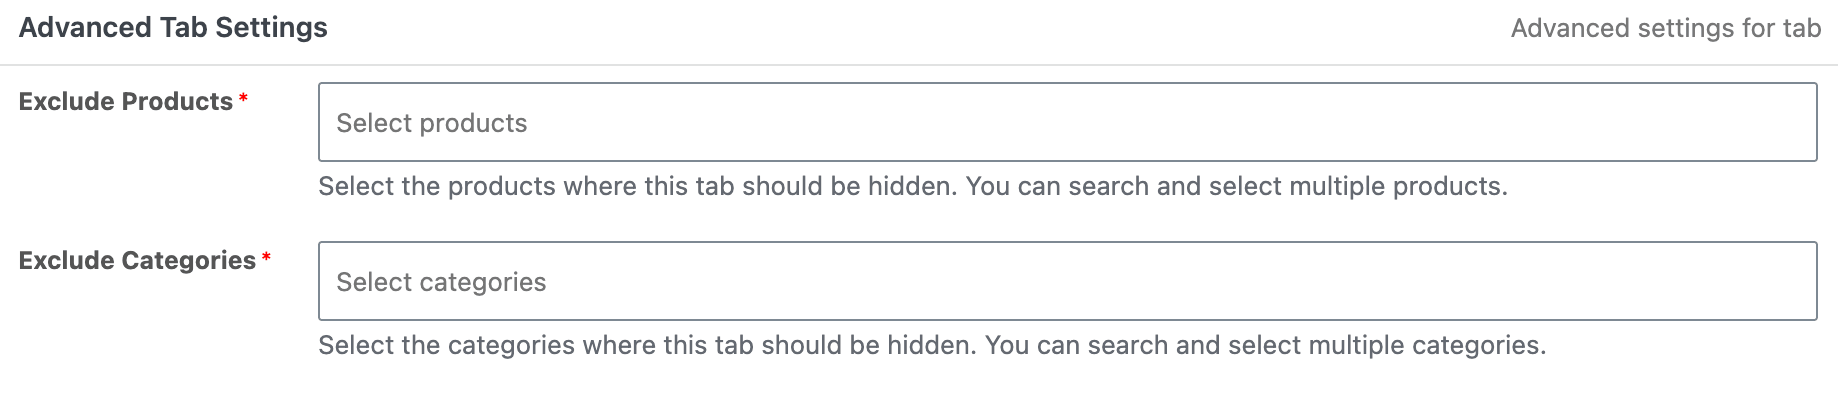
For the full breakdown of how these fields work, see Set Tab Visibility and Exclude Products or Categories.
Adding an Icon (Pro)
If you’re on Product Tabs Manager Pro, you can also assign an icon to the default tab from the same icon picker available to custom tabs. This helps the tab stand out visually and stay consistent with any custom tabs you’ve added.
Saving and Verifying
Click Update after making your changes, then visit a product page that should be affected to confirm the tab shows the new title, icon, and appears only where expected.
What’s Next
Want to hide a default tab entirely instead of customizing it? See Hide Default WooCommerce Tabs. Want to change the order default tabs appear in? See Rearrange Default Product Tabs.