
The BOGO Offer Banner section displays your offer directly on the single product page, showing the offer condition (for example, “Buy 2, get 1 of your choice”) along with the reward products customers can choose from.
Step 1: Navigate to the Banner Settings
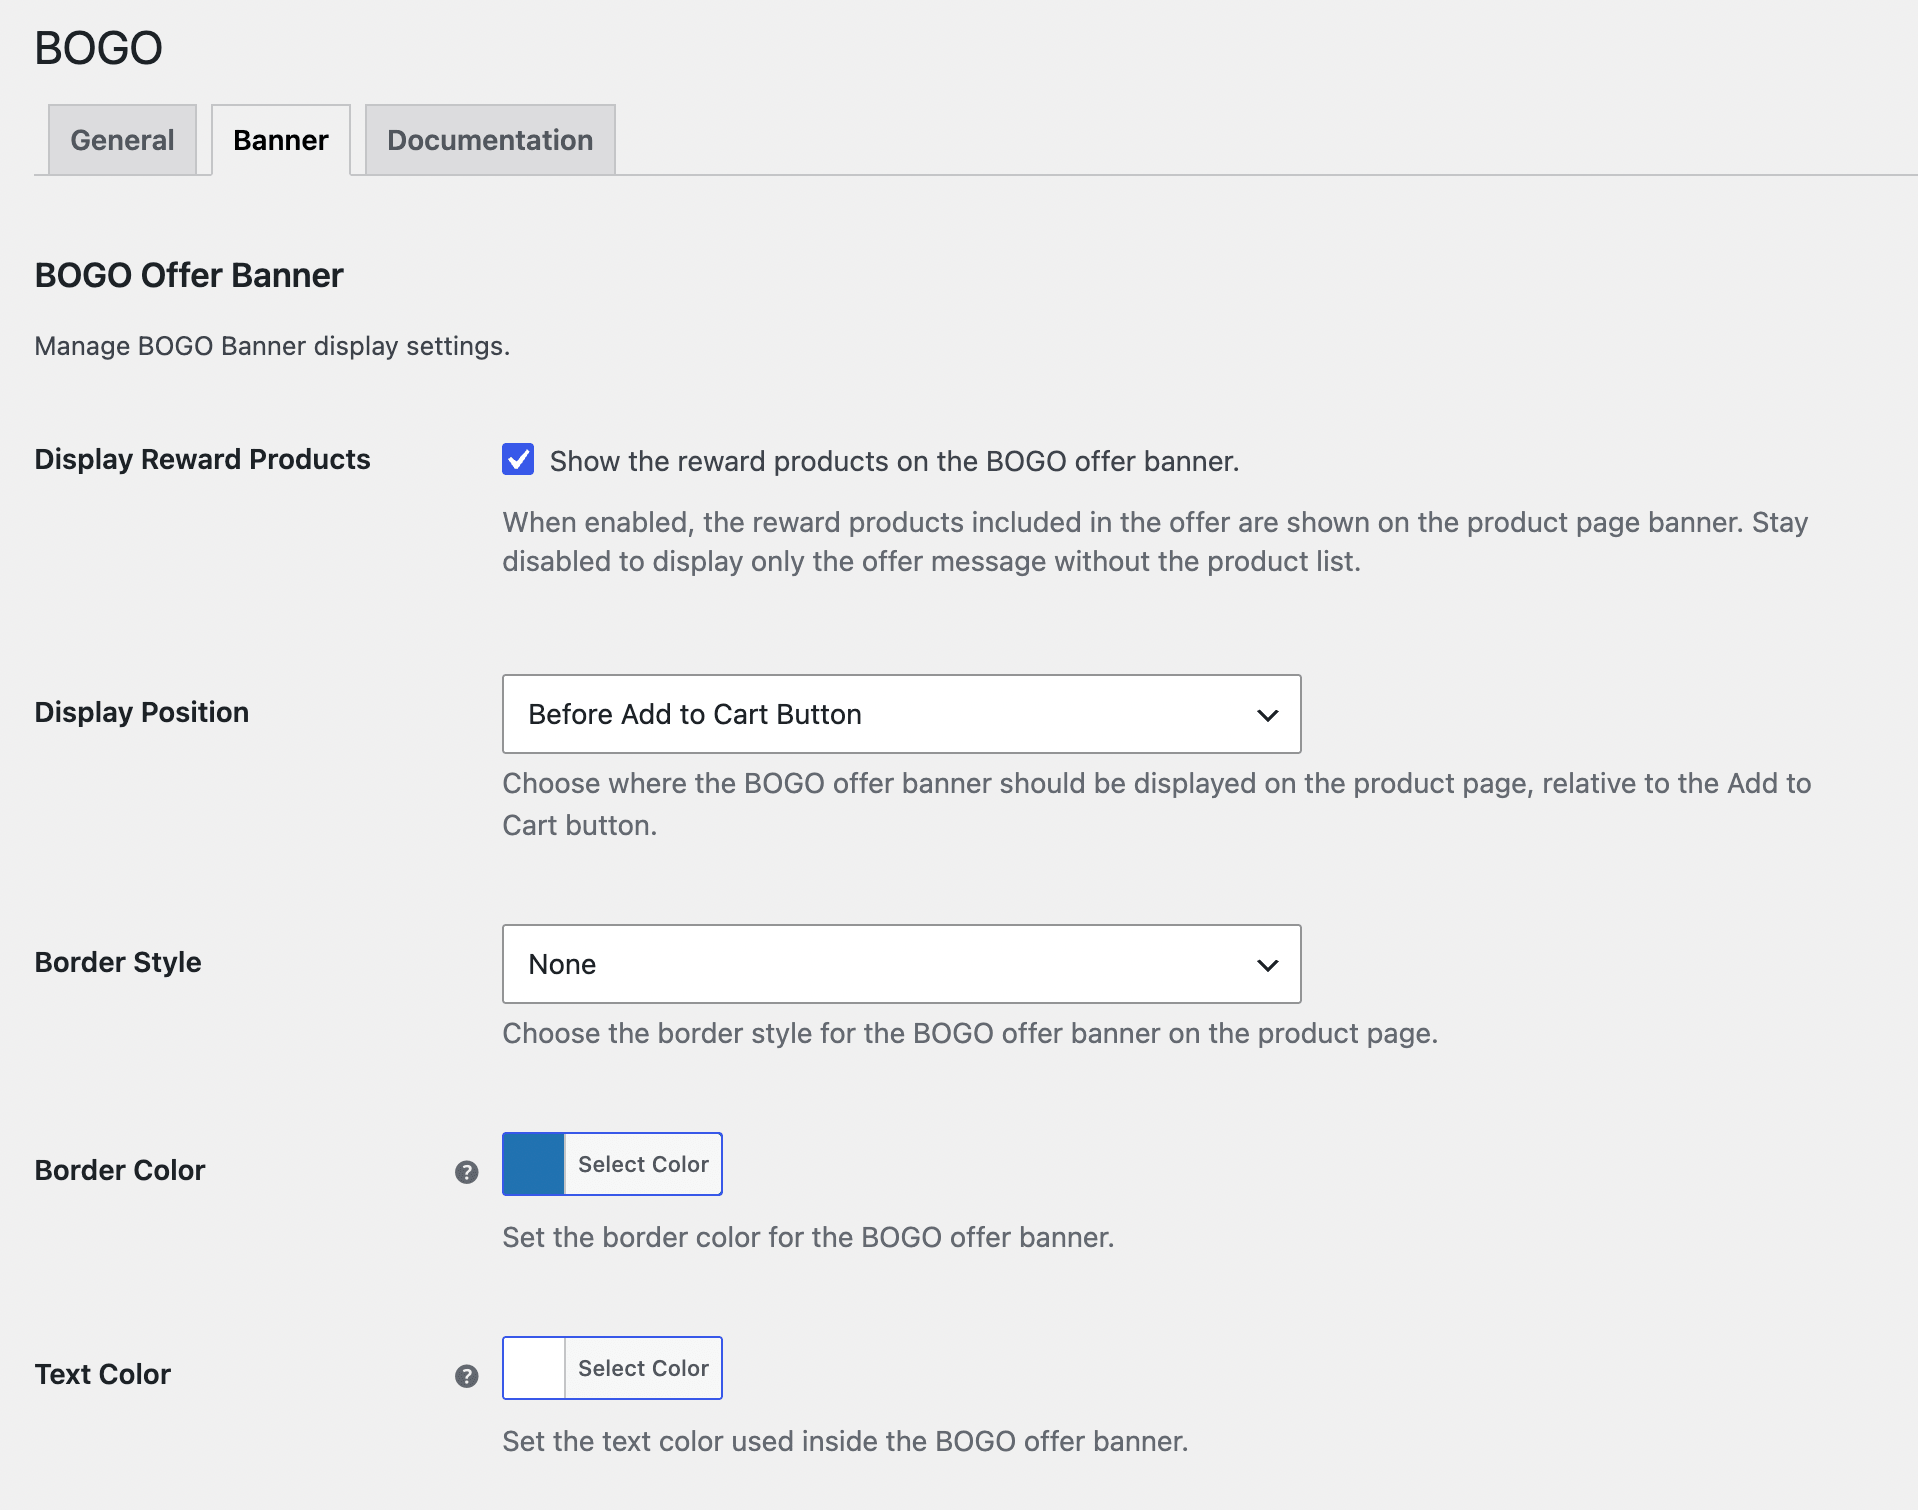
You’ll find these settings under WooCommerce > BOGO > Banner.
Step 2: Choose Whether to Display Reward Products
Check Display Reward Products to show eligible reward products in the banner, so customers can see their reward directly on the product page.
Leave this disabled to show only the offer condition message, without listing the reward products themselves.

Note: This setting also controls whether the Badge appears, since the badge is shown on reward product images. If this is disabled, no reward products are shown, so there’s nothing for the badge to appear on.
Step 3: Set the Display Position
Choose where the banner appears on the product page relative to the Add to Cart button: Before Add to Cart Button or after it.

Step 4: Configure Banner Styles
Border Style
Choose the banner border style: Dashed, Dotted, Solid, or No Border.

Border Color
Set the color of the banner’s border. This applies globally to every BOGO-enabled product’s banner.

Text Color
Set the color of the text displayed inside the banner. Like the border color, this applies globally across all BOGO-enabled products.

Step 5: Save Your Settings
Once you’ve configured all the options above, click Save Changes at the bottom of the page.

What’s Next
Continue to Banner Message to customize the offer condition text shown inside the banner.