WC Serial Numbers plugin by PluginEver enhances your WooCommerce store by enabling you to sell license keys and serial codes for your digital, subscription, and physical products. Below are step-by-step instructions for installing the plugin.
Step 1: Installing and Activating the Free Version
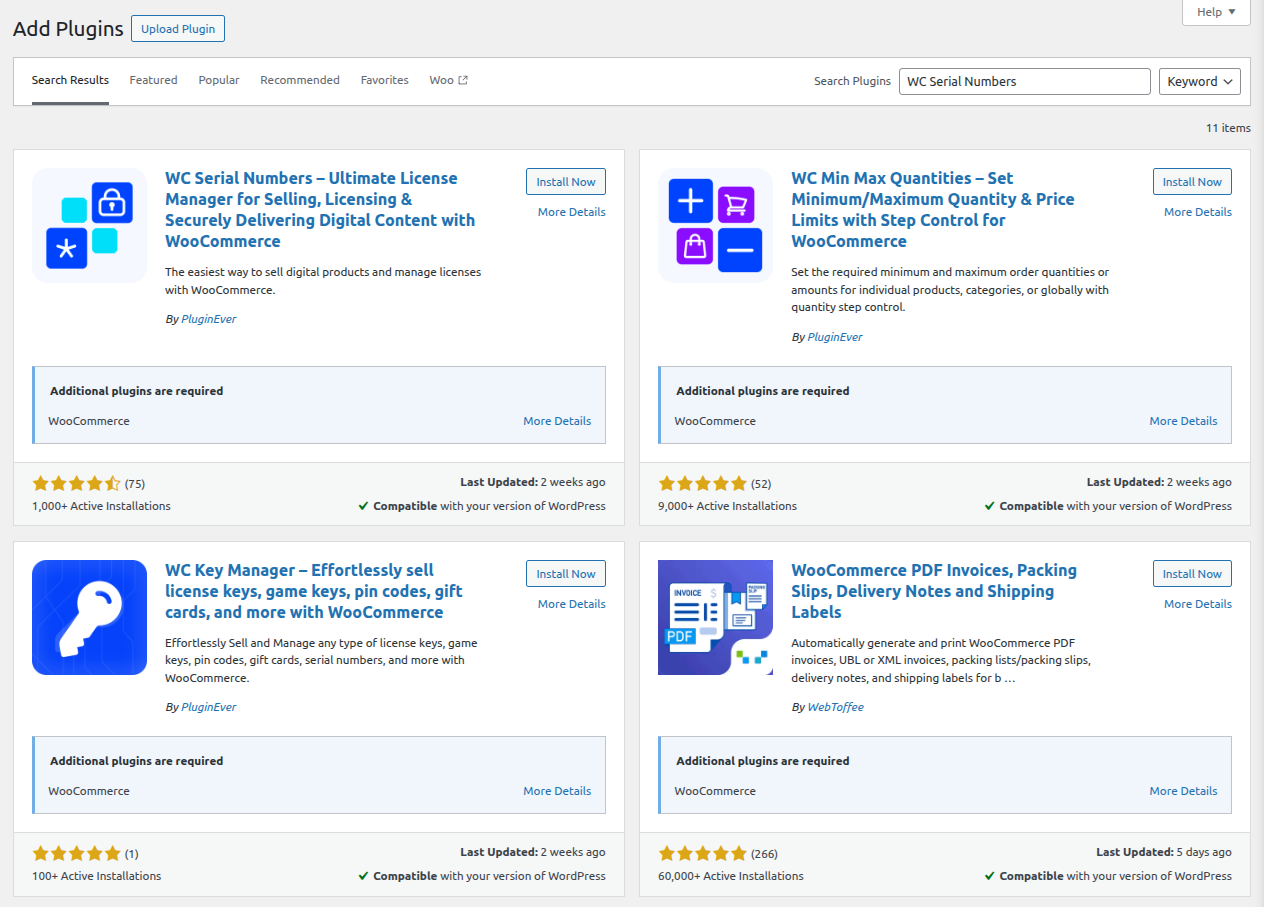
Option 1: Search & Install (Recommended for Most Users)
- Log in to your WordPress dashboard.
- Navigate to Plugins > Add Plugin.
- In the search bar (top right), type WC Serial Numbers.
- Locate the plugin and click Install Now.
- After installation, click Activate to enable the plugin.
Option 2: Upload via WordPress Dashboard
- Download the WC Serial Numbers plugin from the WordPress.org repository.
- Log in to your WordPress dashboard.
- Navigate to Plugins > Add Plugin > Upload Plugin.
- Click Choose File, and select the plugin ZIP file you downloaded.
- Click Install Now.
- Once the installation is complete, click Activate Plugin.
Option 3: Upload via FTP (For Developers)
- Download the plugin ZIP file from the WordPress.org repository and extract it on your computer.
- Open your preferred FTP client (e.g., FileZilla) and connect to your web server.
- Navigate to your WordPress installation path
wp-content/plugins/ - Upload the extracted plugin folder (typically named wc-serial-numbers) into this directory.
- Log in to your WordPress dashboard.
- Go to Plugins > Installed Plugins.
- Locate the WC Serial Numbers and click Activate.
Step 2: Downloading the Premium Version

If you’ve purchased the premium version of the plugin, follow these steps to obtain your copy:
- Go to PluginEver’s official website.
- Log in to your account and navigate to My Account > Downloads.
- Click on the downloadable zip file next to your purchased plugin.
- It will download the plugin zip file to your local machine’s download folder.
You’ll also receive a download link via email after your purchase.
Option 1: Installation via WordPress Admin Dashboard (Recommended for Most Users)

- Log in to your WordPress site.
- Navigate to Plugins > Add Plugin > Upload Plugin.
- Click Choose File, and select the plugin ZIP file you downloaded.
- Click Install Now.
- Once the installation is complete, click Activate Plugin.
Option 2: Installation via FTP/SFTP (Recommended for Developers)
- Download the ZIP file from your PluginEver account.
- Unzip the file locally.
- Use an FTP client, such as FileZilla, to connect to your server.
- Navigate to your WordPress installation path
wp-content/plugins/ - Upload the unpacked plugin folder into the plugins directory.
- Log in to your WordPress dashboard.
- Go to Plugins > Installed Plugins.
- Locate the WC Serial Numbers Pro and click Activate.
Ensure your server has the proper permissions for file uploads.
Step 3: Activating License
Once installed, follow these additional steps to activate and enable premium features fully:
License Activation
After activating the plugin, a notice will appear: “Please activate your license”.
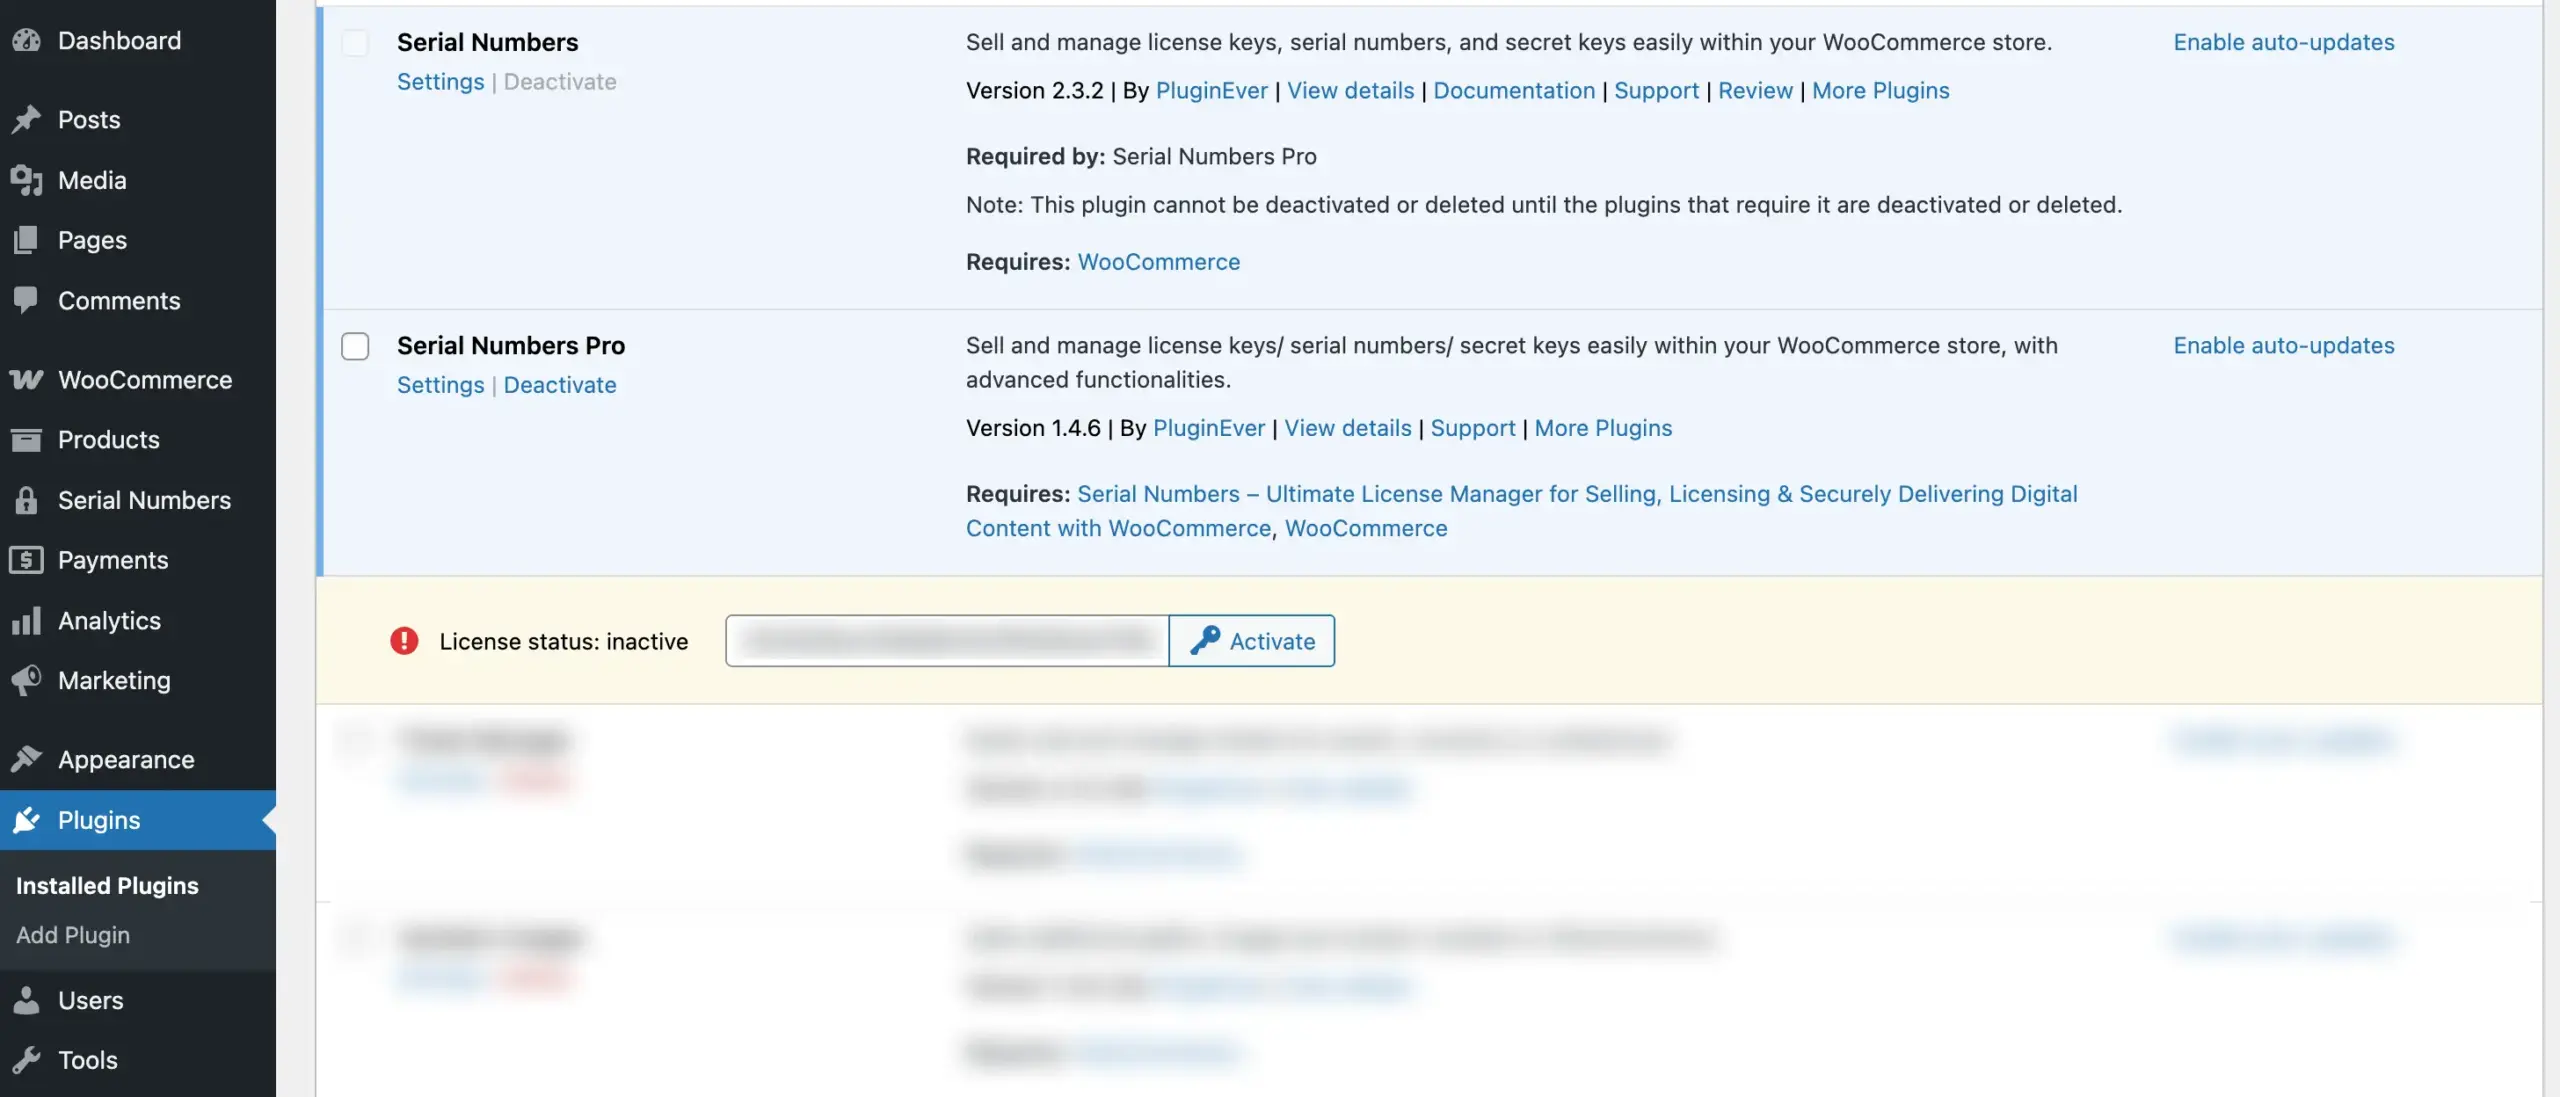
To activate your license:
- Go to: Plugins > Installed Plugins.
- Click the Activate License link under the WC Serial Numbers Pro plugin.
- Locate your license key by checking your order confirmation email or logging into your PluginEver account and navigating to My Account > License Keys.
- Copy the license key corresponding to the WC Serial Numbers Pro plugin.
- Paste the key into the license field under the plugin’s name in the Installed Plugins section.
- Click Activate.
Once activated, you’ll have full access to all premium features and updates.
Troubleshooting Tips
- Plugin not activating? Check PHP version compatibility (minimum PHP 7.4 recommended).
- Installation failed? Ensure file upload limits are not exceeded in your server configuration (e.g., upload_max_filesize, post_max_size).
- White screen after activation? Enable
WP_DEBUGin your wp-config.php to catch errors. - License not saving? Double-check that your domain matches the activation limit and that your license hasn’t expired.