The WC Tab Manager plugin allows you to easily create and manage custom tabs on your WooCommerce product pages. In this guide, we’ll walk you through the steps to create a General Content Tab using the free version of the plugin.
To create a General Content Tab using the WC Tab Manager plugin, follow these steps:
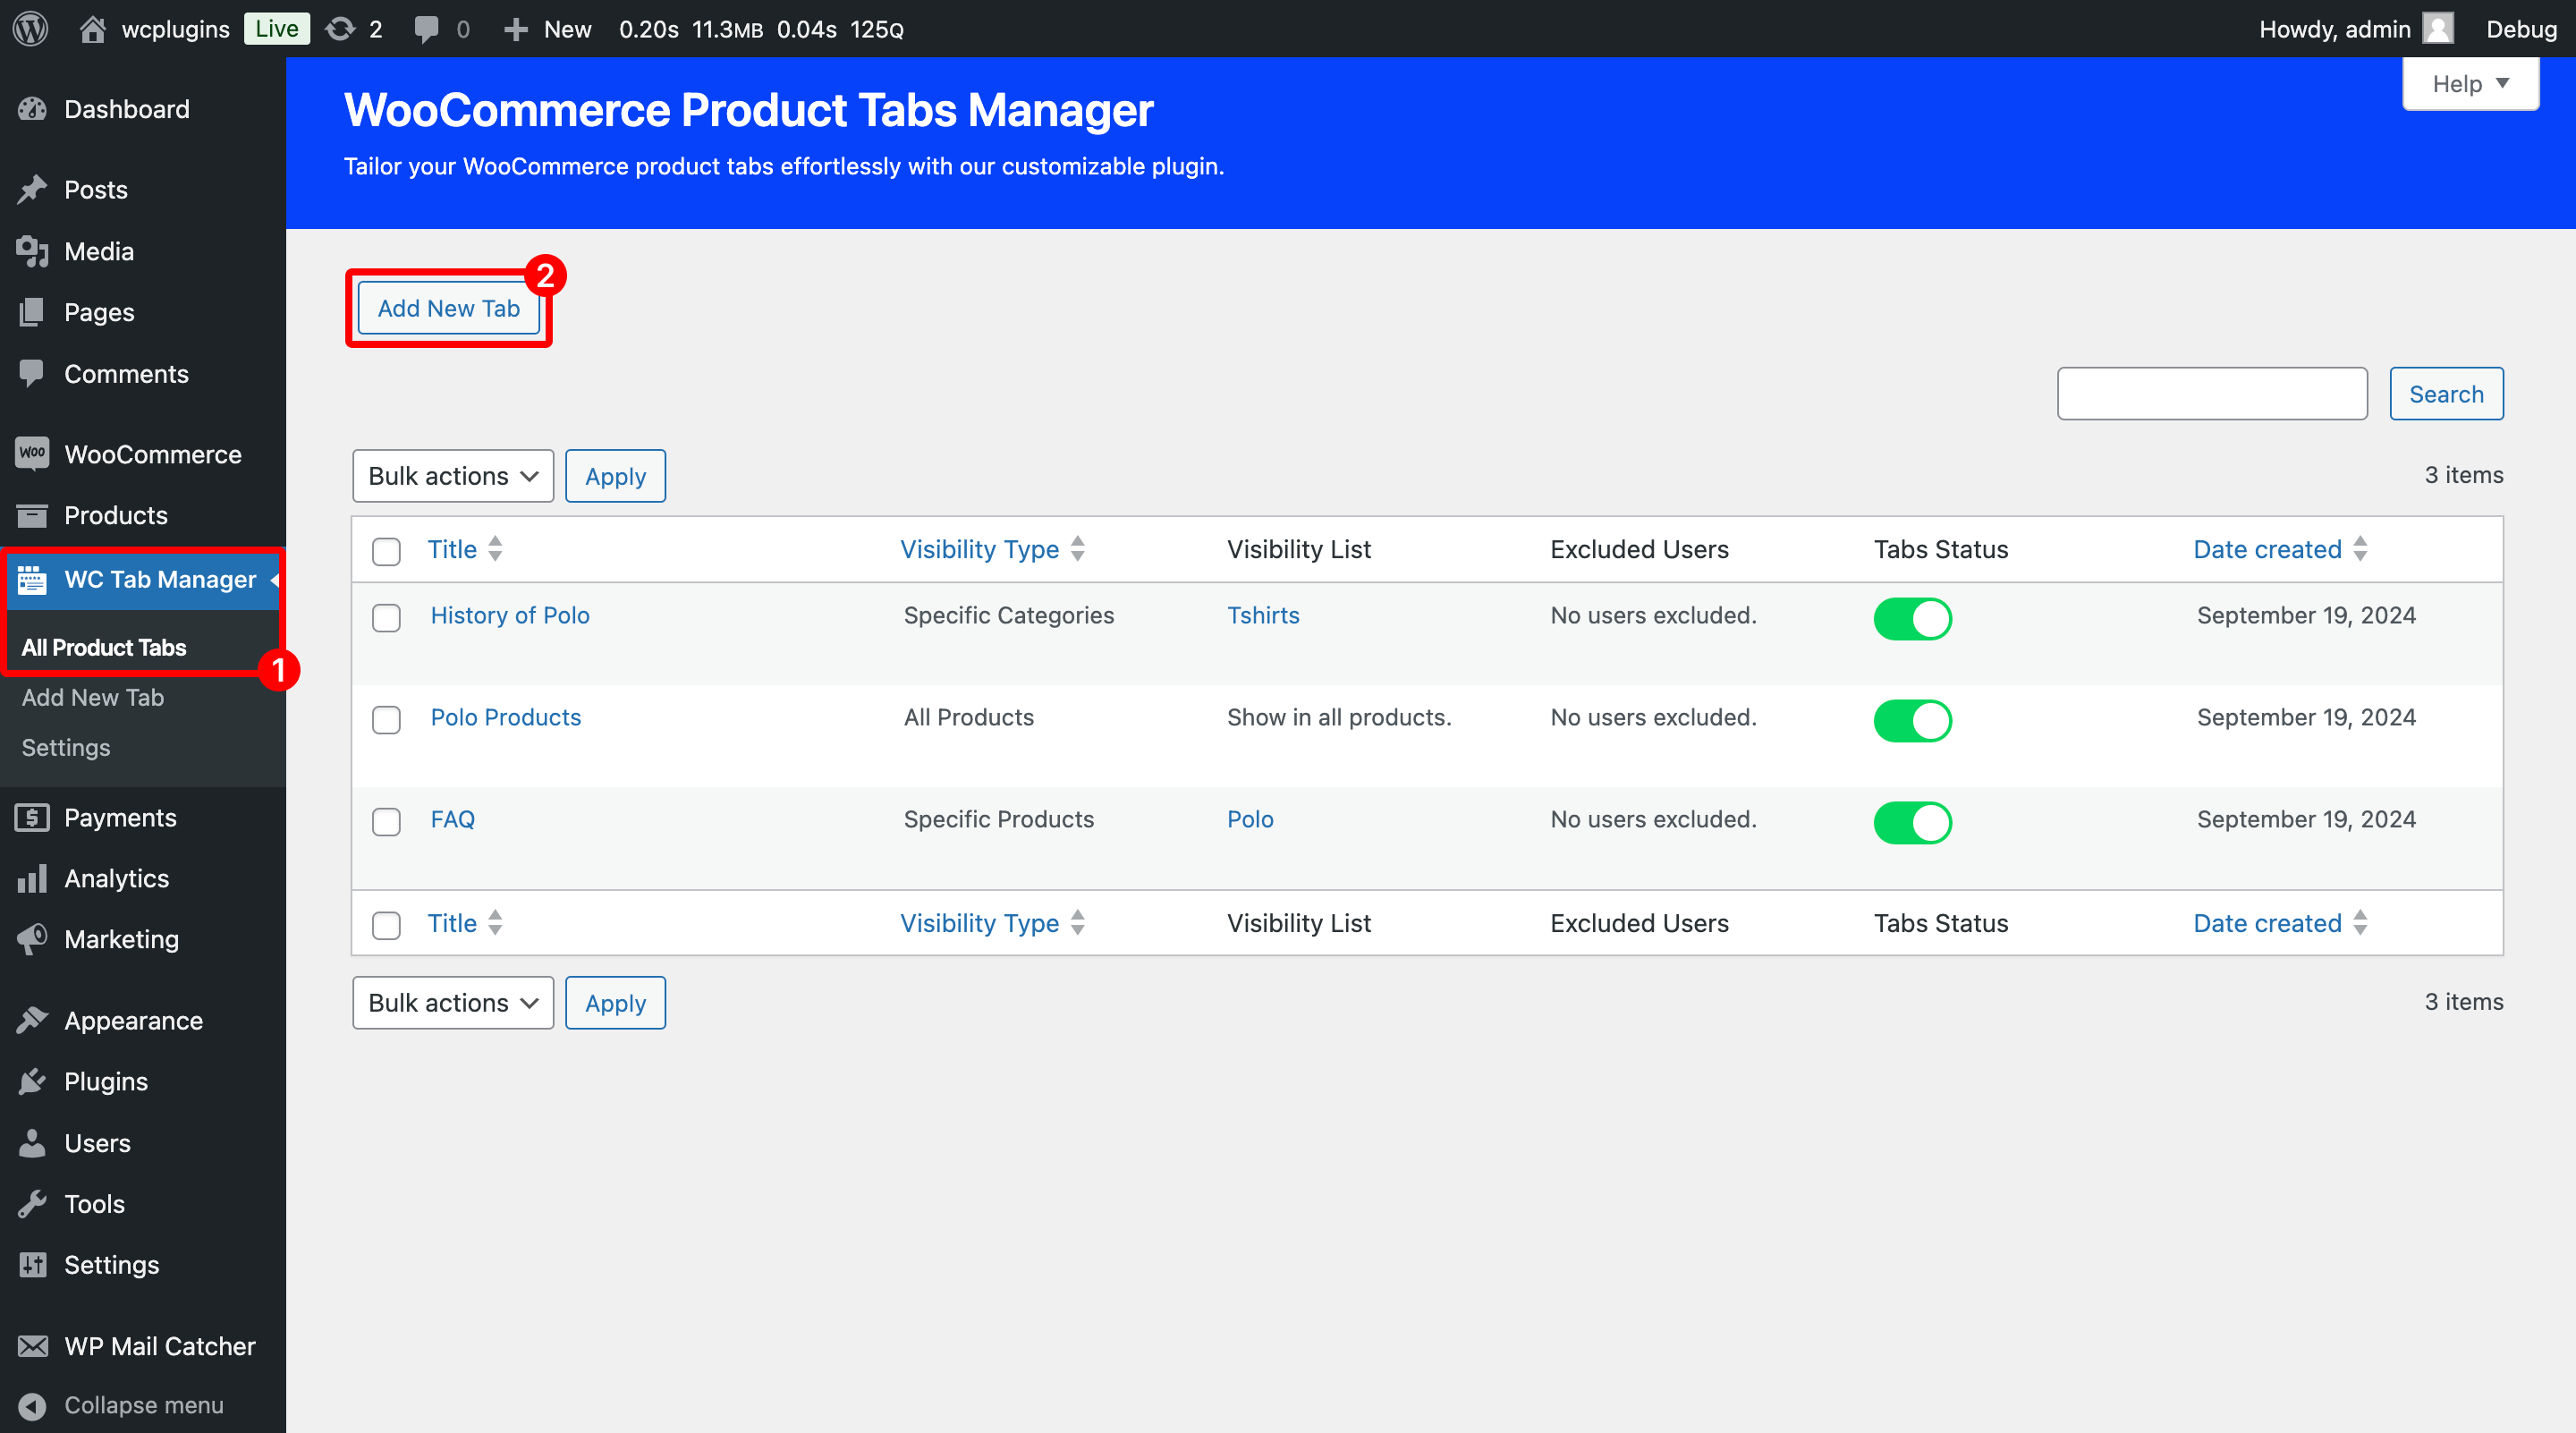
Step 1: Navigate to the WC Tab Manager
- From your WordPress admin dashboard, navigate to WC Tab Manager > Add New Tab to create a new custom tab.
- Additionally, from WC Tab Manager > All Product Tabs you can manage existing tabs.
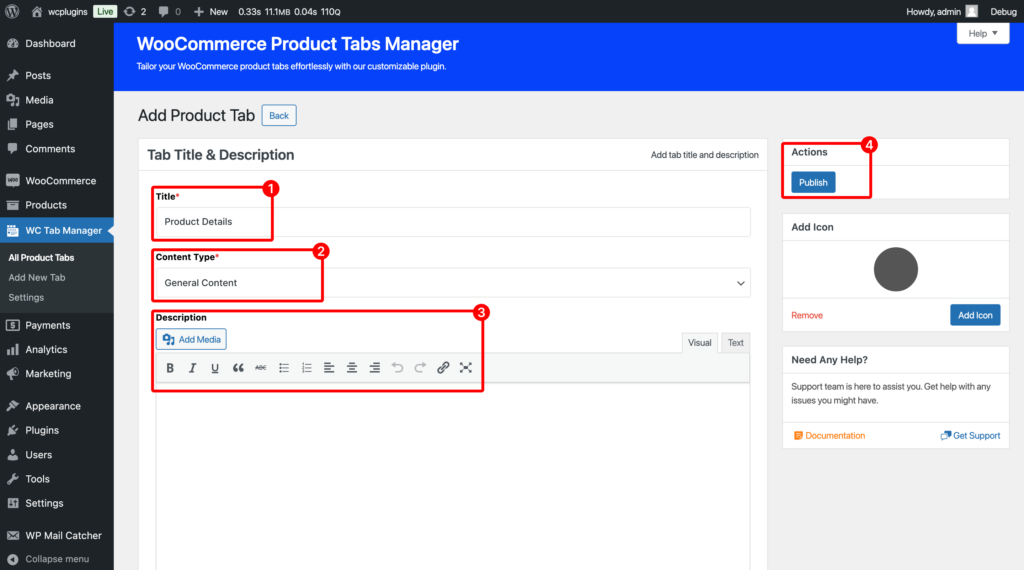
Step 2: Customize General Content Tab
- Enter the Tab Title. For example, “General Information” or “Product Details”.
- In the Content Type section, select the General Content.
- In the Description section, you can enter the content you wish to display, including text, images, or shortcodes. You can also add HTML content or media files here.
Step 3: Customize Additional Settings
To configure additional settings, click here.
Step 4: Customize Tab Icon
To configure icon settings, click here.
Step 5: Finalizing Your Customization
After customizing the settings, ensure your changes are saved by clicking the Publish button.