WC Category Slider plugin displays your WooCommerce product categories in a visual slider that you can place anywhere on your website. This helps customers easily browse through your different product categories.
Setting Up Category Images
Before creating a slider, your product categories need images. The plugin uses these images to create the visual slider elements.
To add images to new categories, go to Products > Categories > Add New Category, configure your settings, then click “Upload/Add Image” to add a thumbnail.
For existing categories without images, simply edit the category and upload an image the same way.

Creating Your Slider
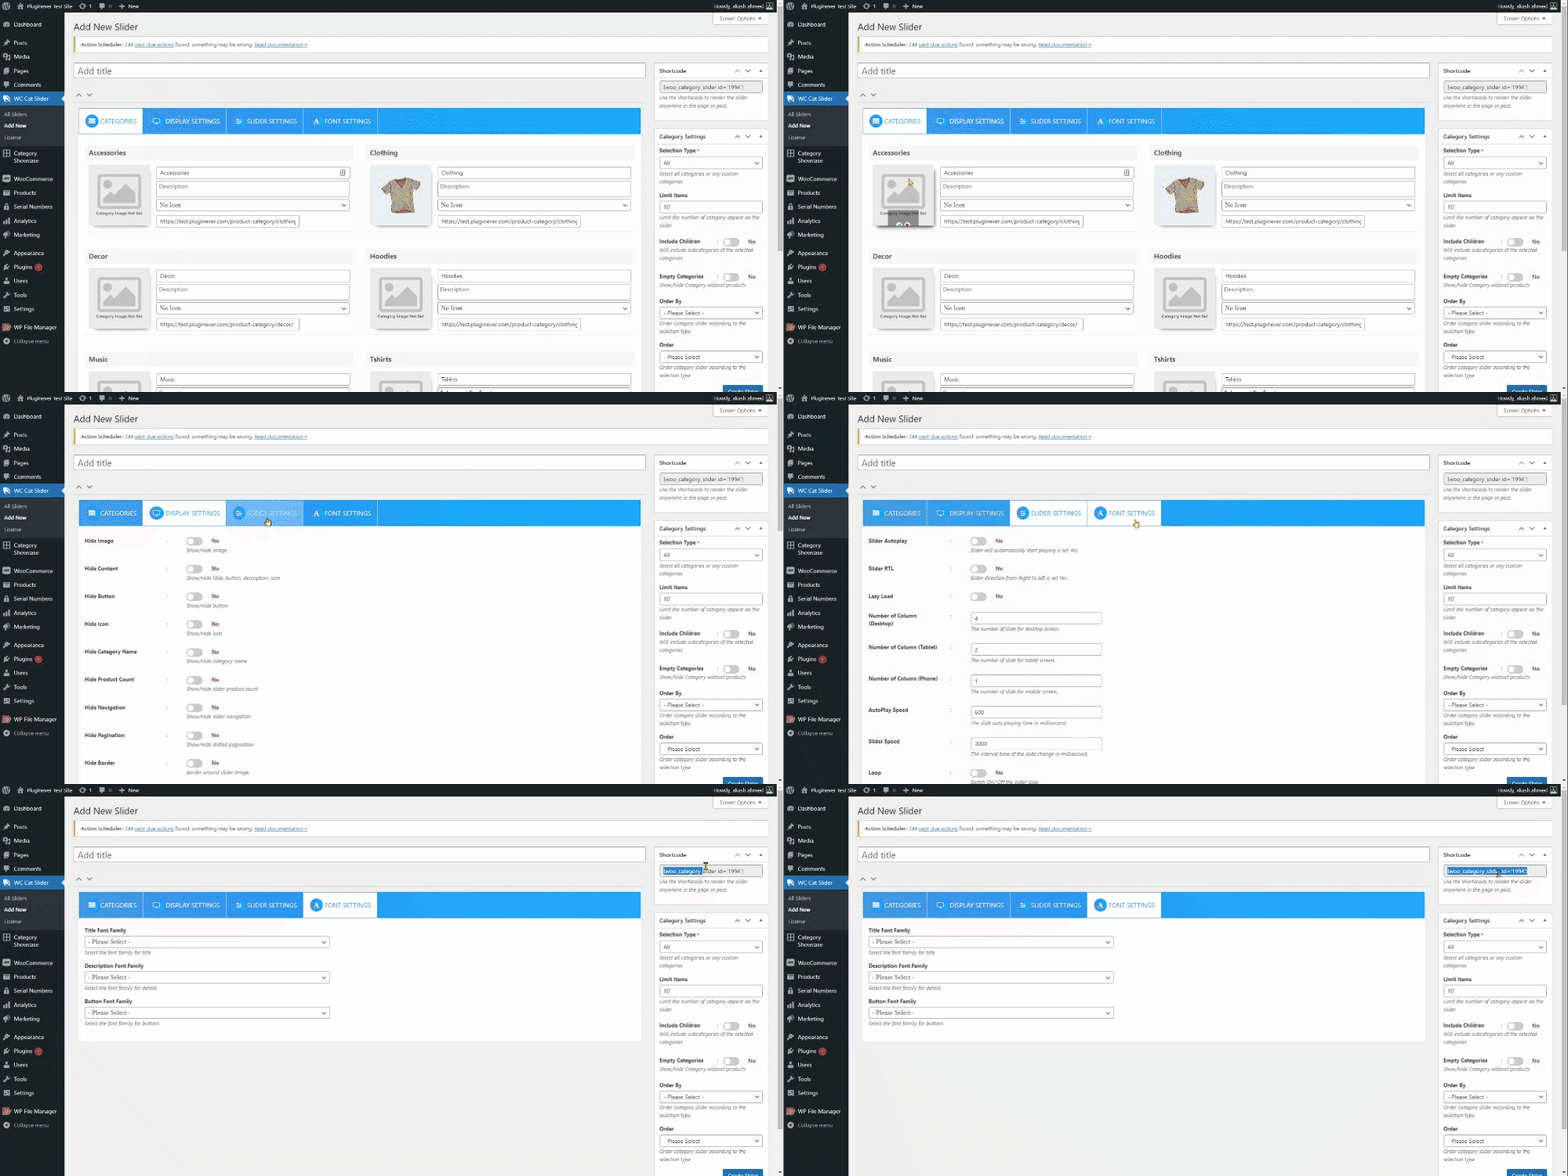
Navigate to Category Slider > Add New Slider in your WordPress admin. Enter a title for your slider, and you’ll see four configuration tabs below:
- Categories – Shows all your product categories. You can select which ones to include and customize them.
- Display Settings – Controls the visual appearance of your slider.
- Slider Settings – Manage behaviors such as autoplay and transitions.
- Font Settings – Typography options for text styling.
Using Your Shortcode
Find your slider’s shortcode in the shortcode tab beneath the actions section. It will look like [category-slider id="123"]. Copy this shortcode and paste it wherever you want the slider to appear on your pages or posts.
Next Steps
Explore the Category Settings documentation to manage and organize your slider’s categories.