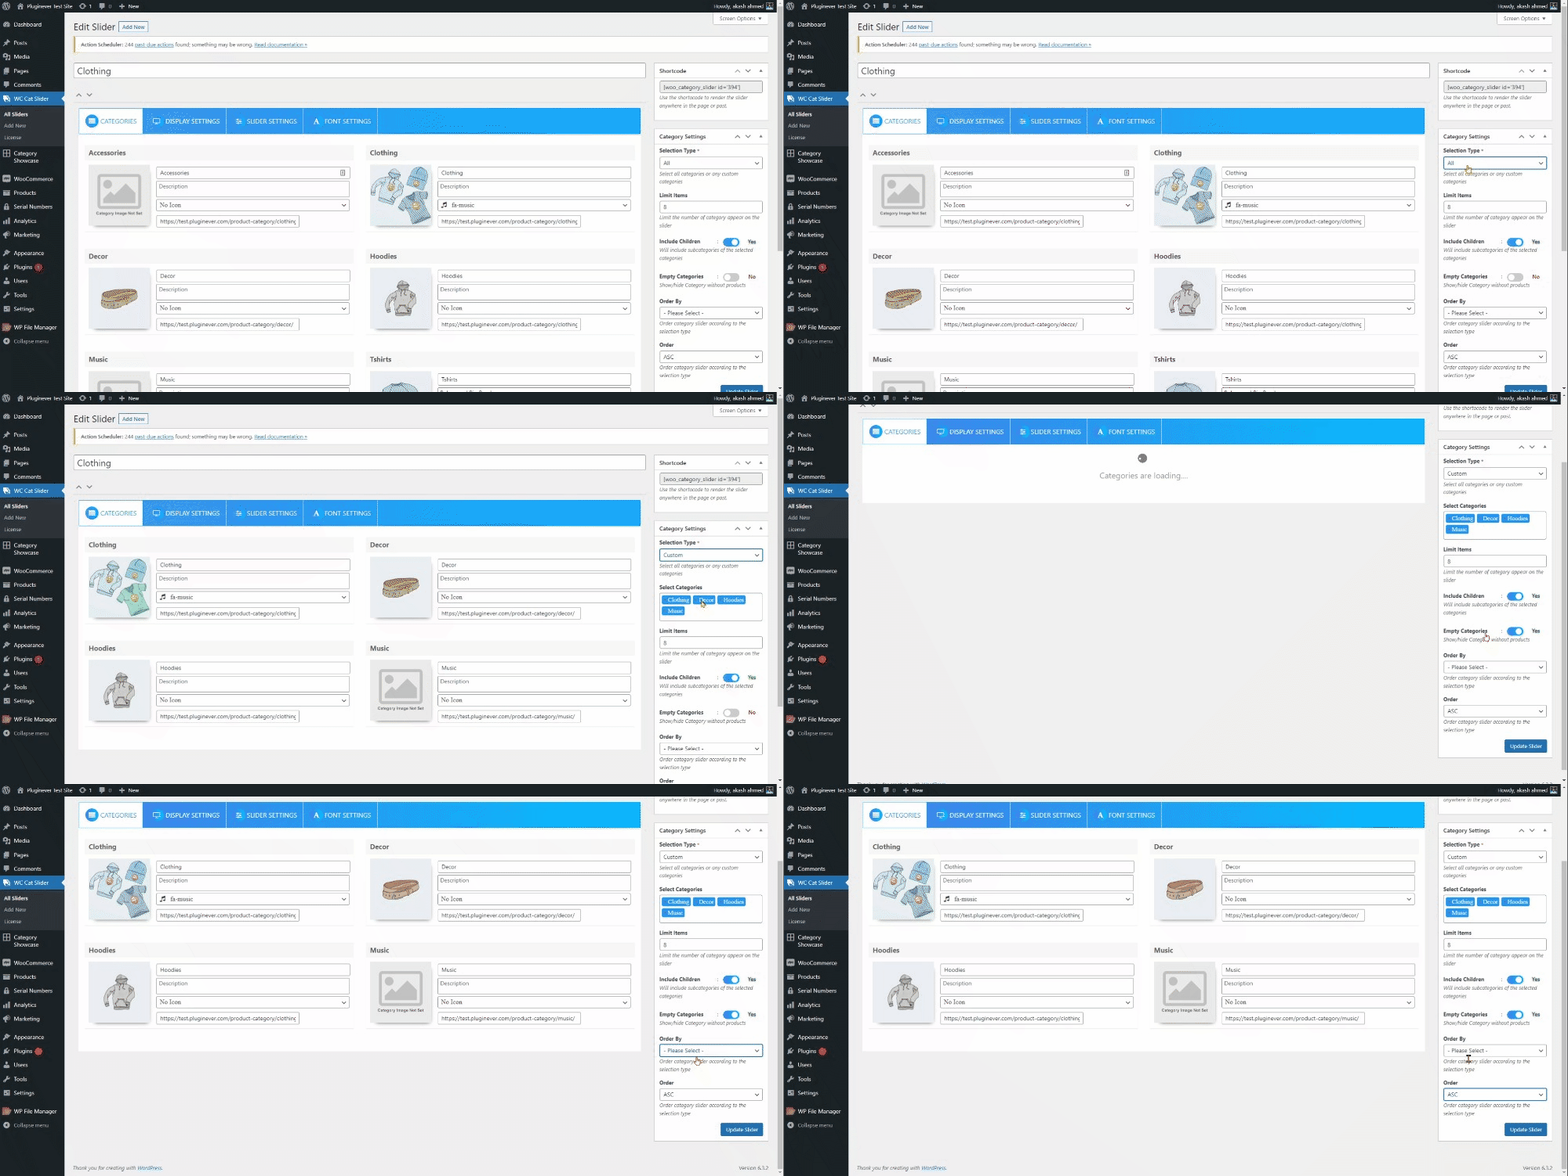
To begin, refer to the Creating Sliders and Shortcodes guide, which provides step-by-step instructions on setting up your category slider and generating the corresponding shortcode. Once you’ve created your slider, Category Settings controls which WooCommerce categories appear in your slider and how they’re organized.
Go to Category Slider > Add New Slider > Categories to set this up.

Category Selection and Display Options
Choose your Selection Type to determine which categories appear. Select “All” to display every WooCommerce category, or choose “Custom” to handpick specific categories.
When you select “Custom,” an additional field lets you choose which categories to include.
Use Limit Items to control how many categories load. Setting a reasonable limit improves page loading speeds and prevents overwhelming visitors.
Include Children/Subcategories determines whether subcategories appear alongside parent categories. Enable this for a comprehensive category hierarchy, or disable it for a cleaner top-level-only display.
Managing Empty Categories
Hide Empty Categories excludes categories without products. This prevents clutter and visitor confusion, especially when building your catalog or managing seasonal categories.
Category Ordering
Order By determines category arrangement:
- Term ID – Creation sequence
- Term Name – Alphabetical
- Term Description – Based on descriptions
- Term Group – WordPress internal grouping
- Count – By product number (highlights popular categories)
- None – WordPress default
- Custom – Manually arrange categories using a drag-and-drop interface. For detailed instructions on setting up a custom sorting, refer to this guide.
Finally, use the Order setting to determine the direction of the arrangement: ascending (A-Z) or descending (Z-A).
Customize Categories
For users of the premium version, you can modify and customize category settings further to tailor the appearance and functionality of your slider.
Next Step
After configuring your category settings, proceed to adjust the appearance of your slider by exploring the Display Settings.