Once you have turned a WooCommerce product into a ticket, the next step is to set up the event details.
Step 1: Enable Event Details
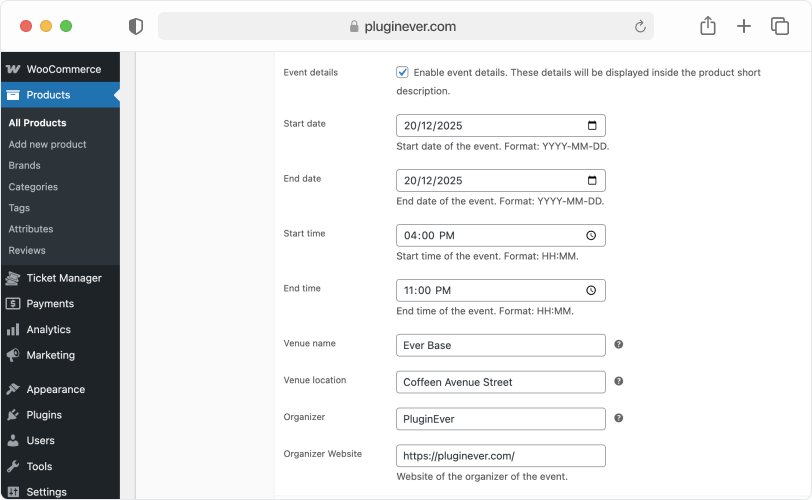
In the Product Data section, under Ticket Options, check the Event Details option to enable it.
Step 2: Add Event Information
Fill in the event fields:
- Date: Set the start and end date of the event.
- Time: Set the start and end time of the event.
- Venue Name: Enter the name of the venue.
- Venue Location: Add the address or location of the venue.
- Organizer: Enter the organizer’s name.
- Organizer Website: Add the organizer’s website URL.
Step 3: Additional Settings
You can also set additional details in the Tabs section. To do this, follow the instructions for configuring additional details.