To make a WooCommerce product into an event ticket, follow these steps:
Step 1: Enable Ticket
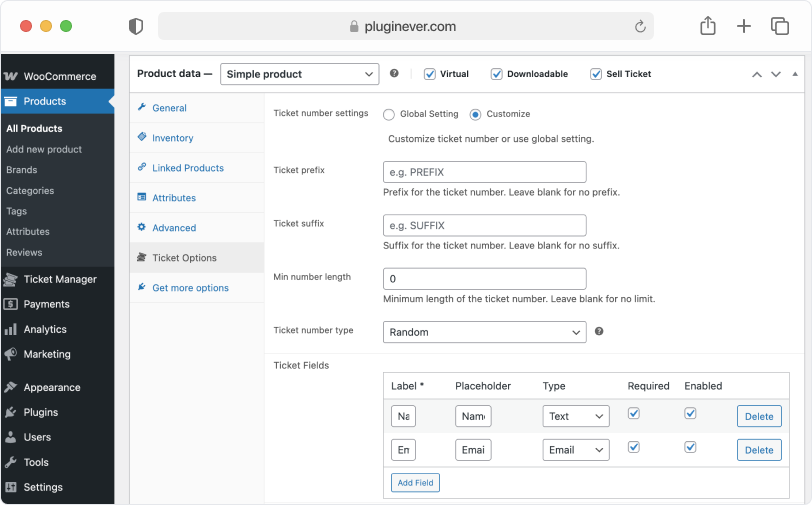
Go to Products > All Products, edit or create a product, and in the Product Data section check “Sell Ticket“. The product will now work as a ticket.
Step 2: Ticket Options
Open the Ticket Options tab. You can keep the Global Setting for ticket numbers or choose Customize to set your own.
When customizing, set:
- Ticket Prefix: Text added at the start of the ticket number.
- Ticket Suffix: Text added at the end of the ticket number.
- Number Length: Total digits or characters in the ticket number.
- Number Type: Set whether numbers are sequential or random.
Ticket Fields
Add fields to collect attendee information. You can set:
- Label: Field name.
- Placeholder: Text shown inside the field before input.
- Type: Choose from Text, Email, Phone, URL, Password, etc.
- Required: Mark if the field must be filled.
- Enabled: Show or hide the field in the ticket.
Step 3: Event Details
Set the event details to display on the product or ticket detail page.