
Control where and how lead time information appears across your WooCommerce store. Give customers clear expectations about product availability and shipping times.
Access Display Settings
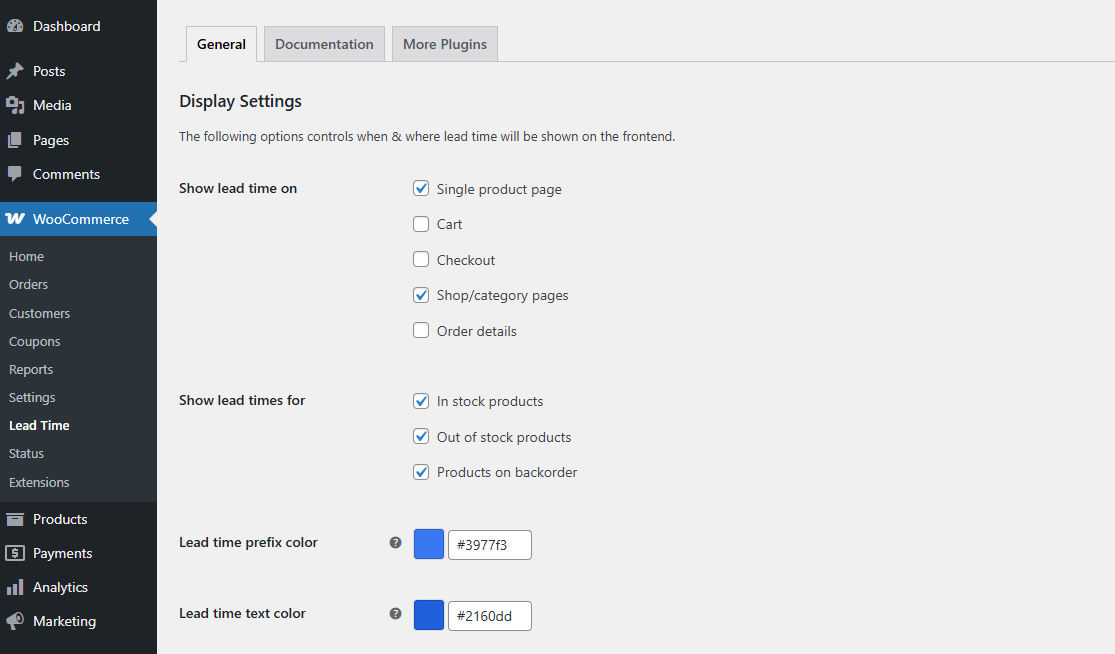
Navigate to WooCommerce > Lead Time Manager in your WordPress dashboard.
Display Options
Show Lead Time On
Choose where lead time appears in your store. Enable one or multiple locations:
- Single Product Page
Show lead time directly on individual product pages where customers make purchase decisions. - Cart Page
Display lead times for items already added to the cart. - Checkout Page
Reinforce delivery expectations before customers complete their order. - Shop / Category Pages
Let customers see product availability while browsing. - Order Details Page
Keep customers informed about expected delivery even after purchase.
Tip: You can enable multiple locations simultaneously, depending on your store’s user experience strategy.
Show Lead Times For
Select which product stock statuses display lead time:
- In-Stock Products
Show lead time even for available items, useful for products with processing or custom manufacturing times. - Out-of-Stock Products
Inform customers when unavailable items will be back in stock. - Products on Backorder
Communicate the estimated fulfillment time for backordered items.
Note: All three options can be enabled simultaneously for maximum flexibility.
Lead Time Prefix Color
Customize the color of your prefix text (like “Ships In:” or “Estimated Delivery:”) to match your brand or draw attention to delivery information.
Lead Time Text Color
Set the color for the actual lead time message to ensure it’s visible and matches your store’s design.
Save Changes
Click Save Changes to apply your display settings across the store.
Next Steps
After configuring display settings, set up lead times at different levels:
- Configure global lead time for your entire store
- Set category-specific lead time for product groups
- Set product-level lead time for individual items