Custom notices allow you to personalize the validation messages customers see when they violate purchase limits. This helps provide clear, branded communication and better customer experience when restrictions are enforced.
How to Configure
Step 1: Navigate to Notice Settings
- Go to WooCommerce > Min Max Quantities > Translations
- You’ll see different notice types for various limit violations
Step 2: Understanding Notice Types
The available three types of notices are:
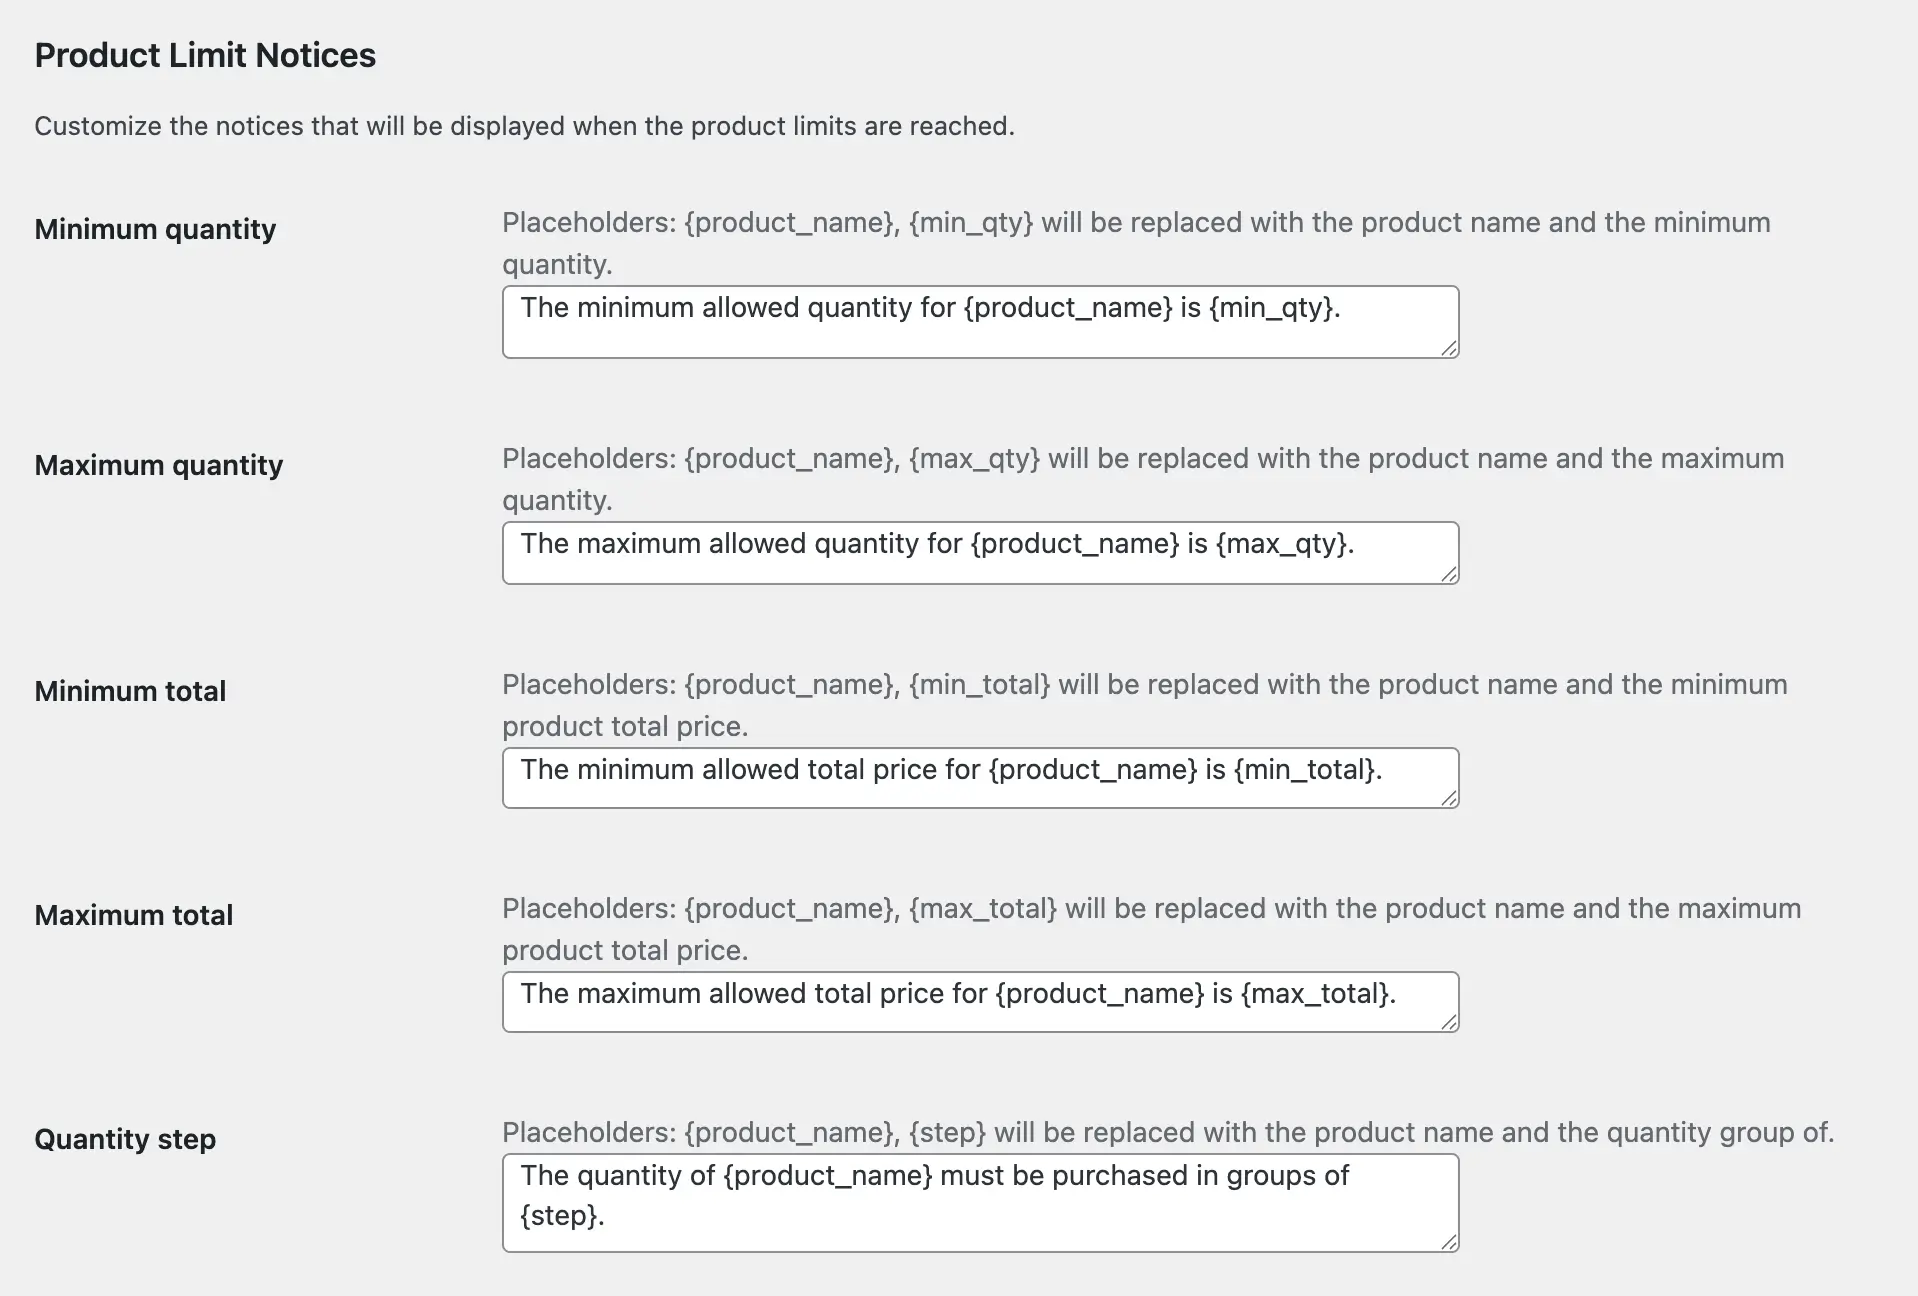
Product Limit Notices
- Notices related to individual product restrictions
- Min/max quantity, quantity step, min/max value per product
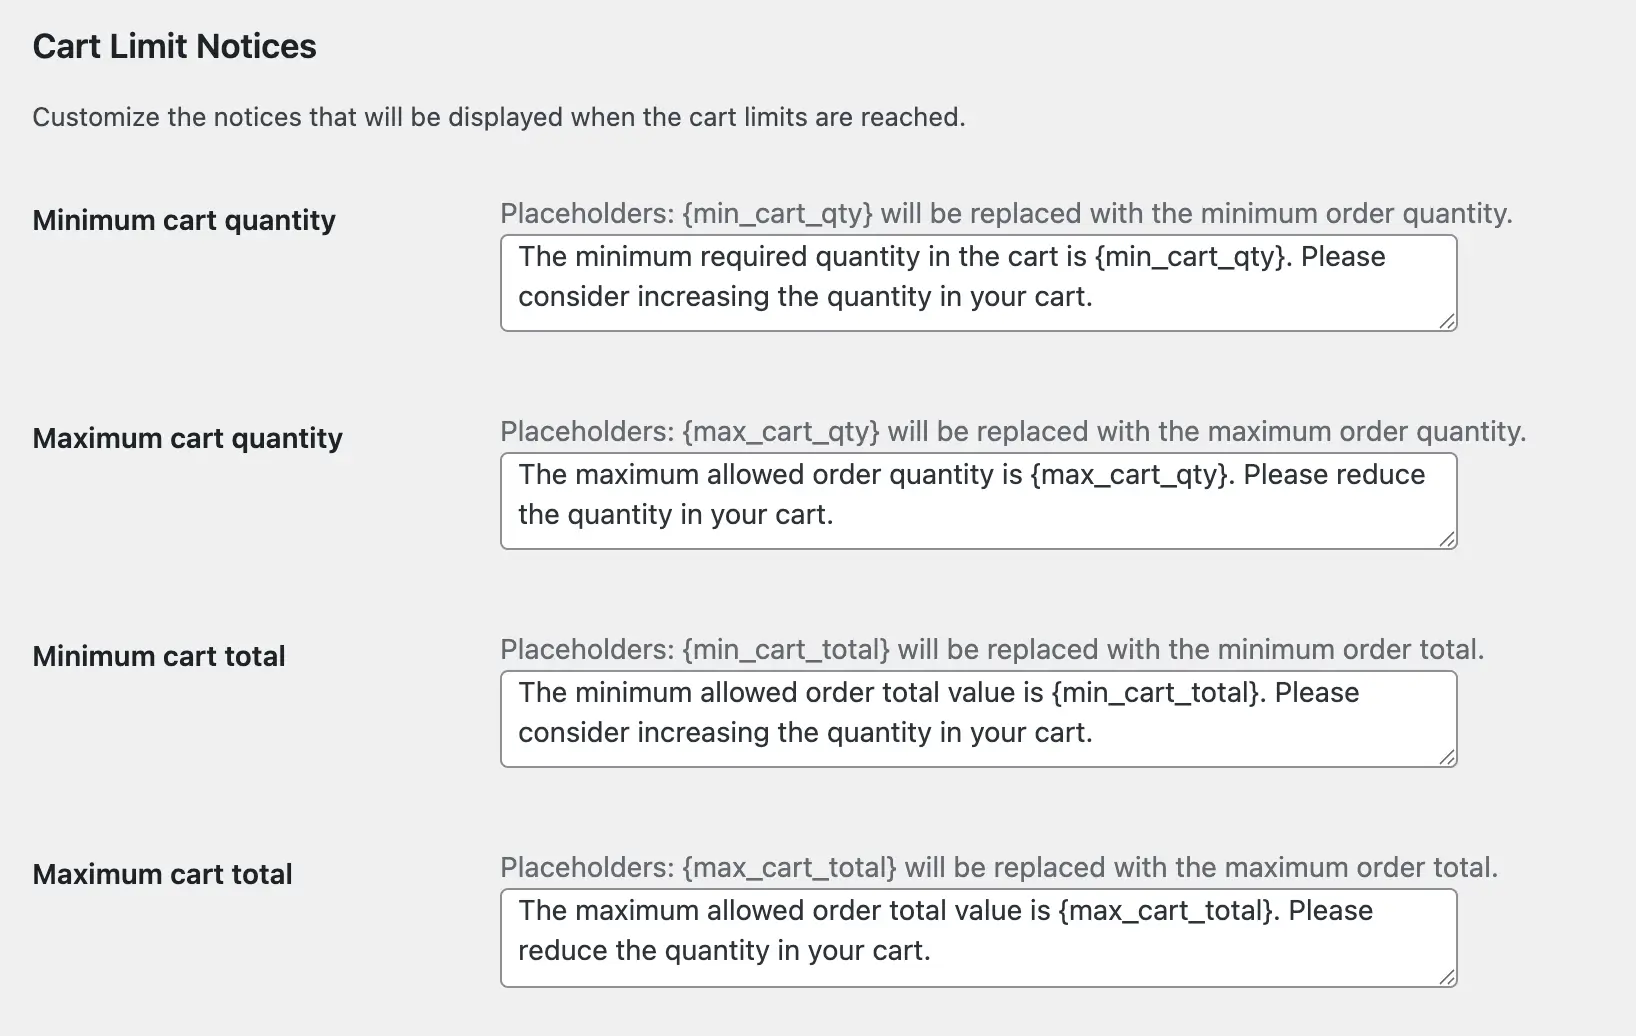
Cart Limit Notices
- Notices related to overall cart/order restrictions
- Min/max cart quantity, min/max cart total
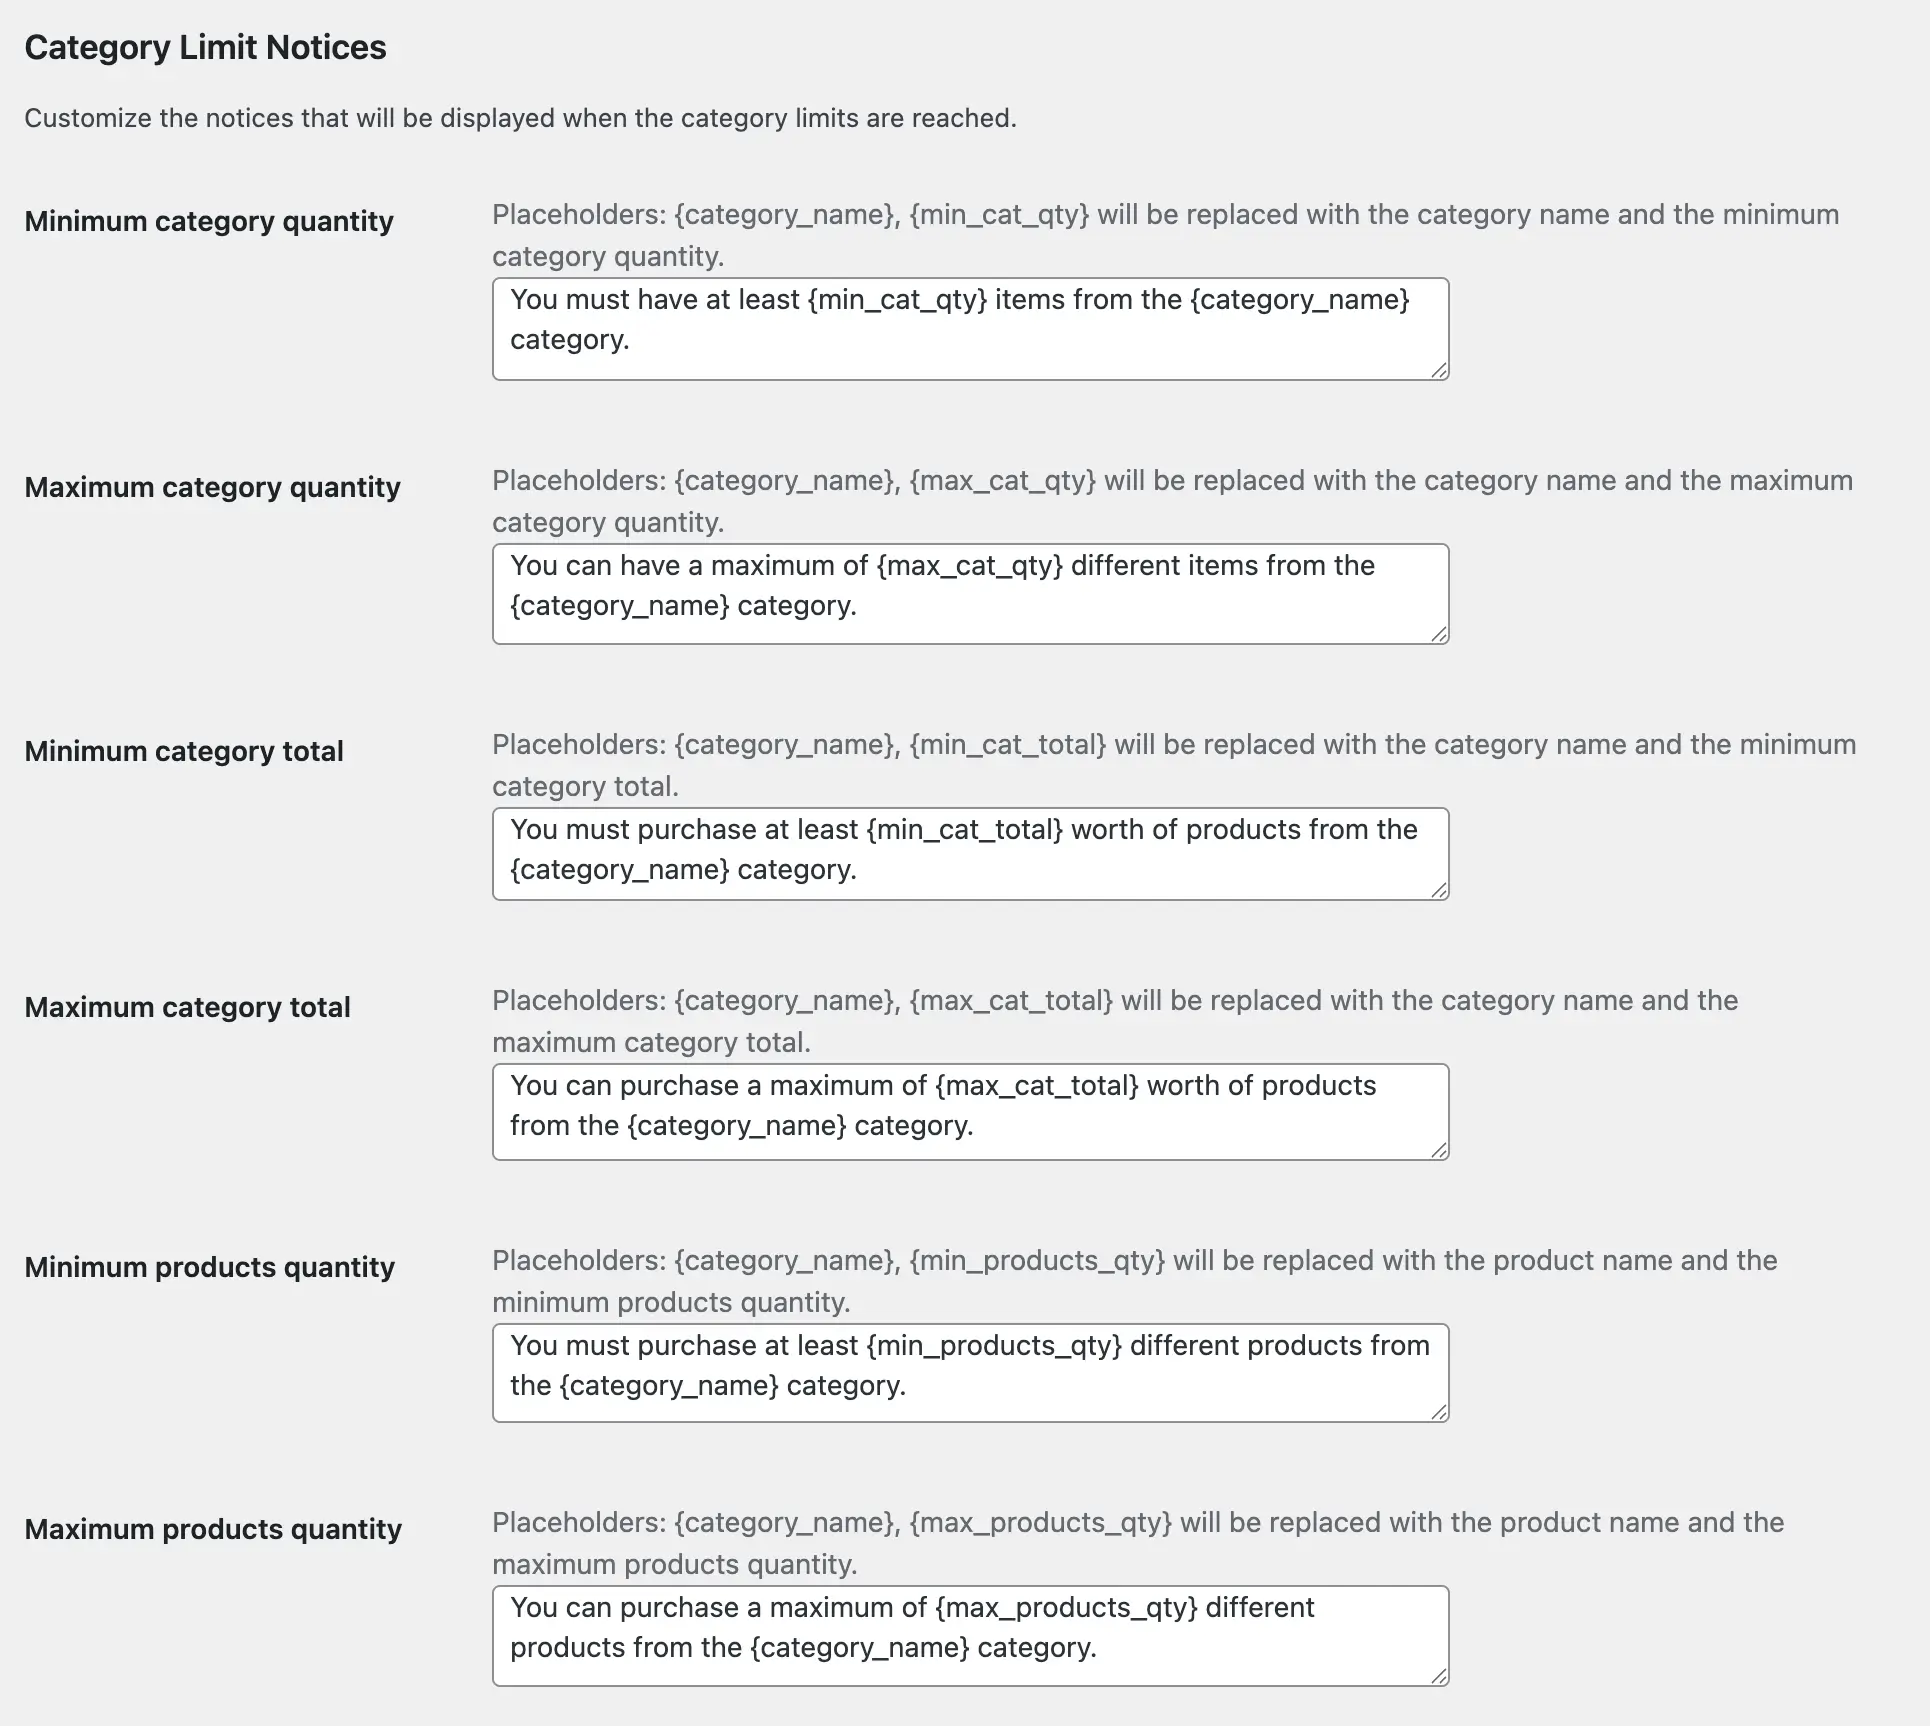
Category Limit Notices
- Notices related to category-wide restrictions
- Category quantity limits, product count limits
Step 3: Customize Notice Text
Edit or enter your custom notice text for each limit type. Use Placeholders as needed.
Multilingual Support:
You can write all notices in your own language. The plugin supports any language – simply enter your custom text in the language you prefer, and it will be displayed to your customers exactly as you’ve written it.
Step 4: Placeholders (Optional)
Include dynamic values using placeholders:
{min_qty}– Minimum quantity value{max_qty}– Maximum quantity value{product_name}– Product name{min_cart_total}– Minimum cart total{min_products_qty}– Minimum product quantity
Step 5: Save Changes
Click Save Changes to apply custom notices.
Next Steps
Now that you understand custom notices, you can display purchase limit information directly on product pages.