
Selling gift cards for your store, service, or digital products is an easy way for businesses to boost revenue and improve cash flow.
But if you are a WooCommerce store owner, you may have noticed that the platform doesn’t allow you to create gift cards by default. And if you can’t create one, it’s impossible to sell further.
While it is technically possible to create and sell WooCommerce gift cards using custom code, this method can be daunting, especially for those without coding experience.
Luckily, there’s a solution – a third-party plugin called ‘WC Key Manager’ makes gift card creation and selling like a breeze.
In this tutorial, we’ll show you how to sell gift cards on your WooCommerce store using the ‘WC Key Manager’ plugin. We’ll also show you how to create a gift card and customize it using its default settings.
Overview of WC Key Manager
Before we dive into creating a gift card on WooCommerce by using the WC Key Manager plugin, let’s get familiar with what it offers.
WC Key Manager is a versatile WooCommerce plugin designed to sell and manage license keys, game keys, PIN codes, gift cards, serial numbers, and more. It provides a comprehensive solution for generating, activating, and managing keys.
Now, let’s see how it works. The free version of WC Key Manager plugin includes four different parts –
Dashboard – It provides a quick view of your store related to key-based products. You can check here your monthly growths, recent orders, customer info, your top products, and stocks.
Keys – This keys directory helps you to add keys and custom generators, can check your key status (available, sold, activated, expired, canceled keys) and the custom activation field.
Tools – You can generate keys in bulk for a product using this tool option. Also, you can import keys from a CSV file here.
Settings – Here the Key Settings page allows you to configure various aspects of key management within your WooCommerce store. These settings control how keys are generated, delivered, managed, and displayed to customers.
Key Features of WC Key Manager Plugin
The WC Key Manager plugin also boasts unique features that make it ideal for creating gift cards in WooCommerce:
- Generate random or sequential keys and control the quantity delivered per order.
- Customize key formats with automatic pattern control.
- Generate keys individually or in bulk, or import them from CSV or text files.
- Set activation limits or allow unlimited activations.
- Track key usage history, including activation dates, counts, and user info.
- Reuse keys from canceled or refunded orders.
- Automatically deliver keys upon order completion or payment confirmation.
- Control where keys are displayed based on your requirements.
- Define custom key patterns, such as alphanumeric or numeric formats.
- Manage keys via the REST API for seamless integration with other systems.
- Roll out automatic updates for plugins, themes, or any software, and manage changelogs.
How to Sell Gift Cards Using WC Key Manager
To sell gift cards on WooCommerce, first, we should create an eCommerce store. But as a store owner, hope you have a WooCommerce installation environment on your WordPress.
If not, you can further check our blogs on how to create a WooCommerce store to create one.
Step #1 – Add WC Key Manager Plugin on WordPress
After WooCommerce setup, we are a step forward in our gift card creation process.
We have to add the WC Key Manager plugin to our WordPress. To do this, simply follow the steps –
- Check on your WordPress dashboard and click Plugins > Add new plugins
- Search for the plugin name ‘WC Key Manger’ with the search bar in the top right corner.
- Scroll down a little bit and you will find the plugin. Then click Install Now > Activate
Installing the Pro version
However, WC Key Manager is a freemium plugin. You can install its Pro version too.
Now, to install the WC Key Manager pro version –
- You have to download the WC Key Manager plugin from the website
- Then, go to the WordPress dashboard and navigate to Plugins > Add New.
- Click on the ‘Upload Plugin’ button at the top of the page. Choose the WC Key Manager zip file you downloaded from your computer by clicking the ‘Choose File’ button.
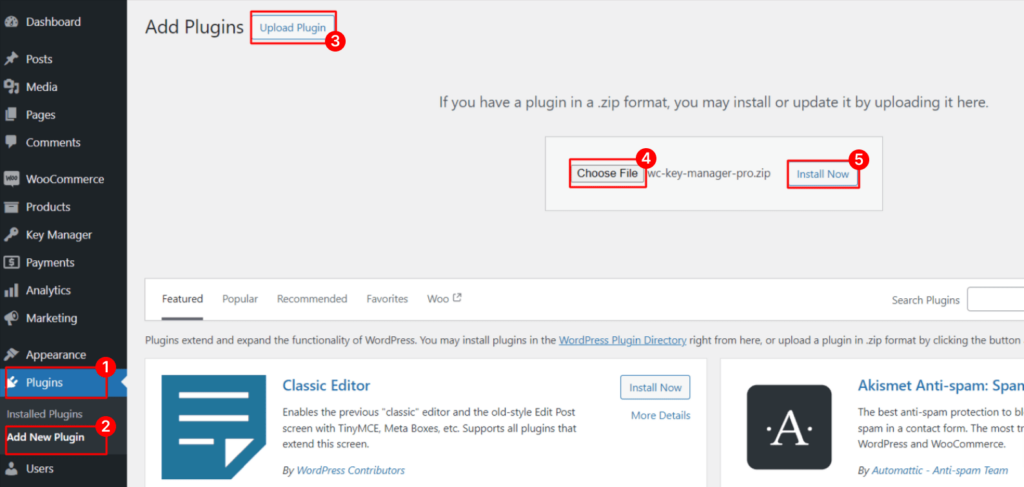
- After selecting the file, start the installation process by clicking the ‘Install Now’ button. Then activate it.

Note: You have to install the WC Key Manager free version first to use this PRO version
Step #2 – Add a Relative Product on WooCommerce
To sell gift cards on WooCommerce, you must add a relative product to it. This product can be anything you want. But as we are creating a gift card, so it’s better to make one like that.
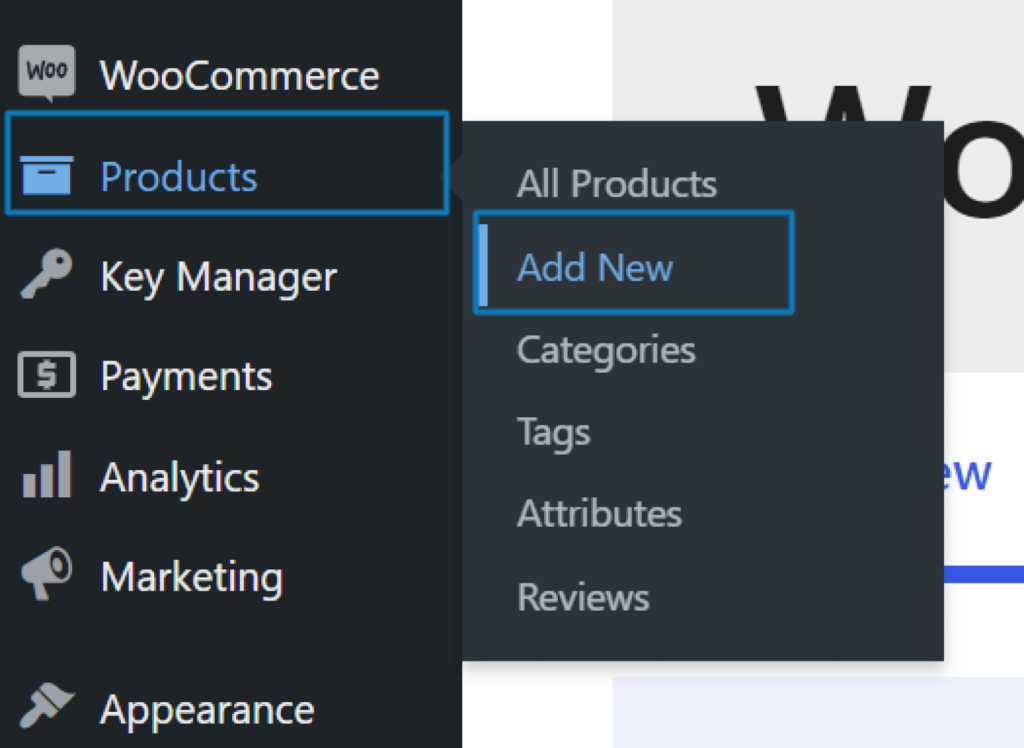
Now to add a product, get back to the WordPress Dashboard and click on the Products > Add New
Here you can see multiple fields to create a product.
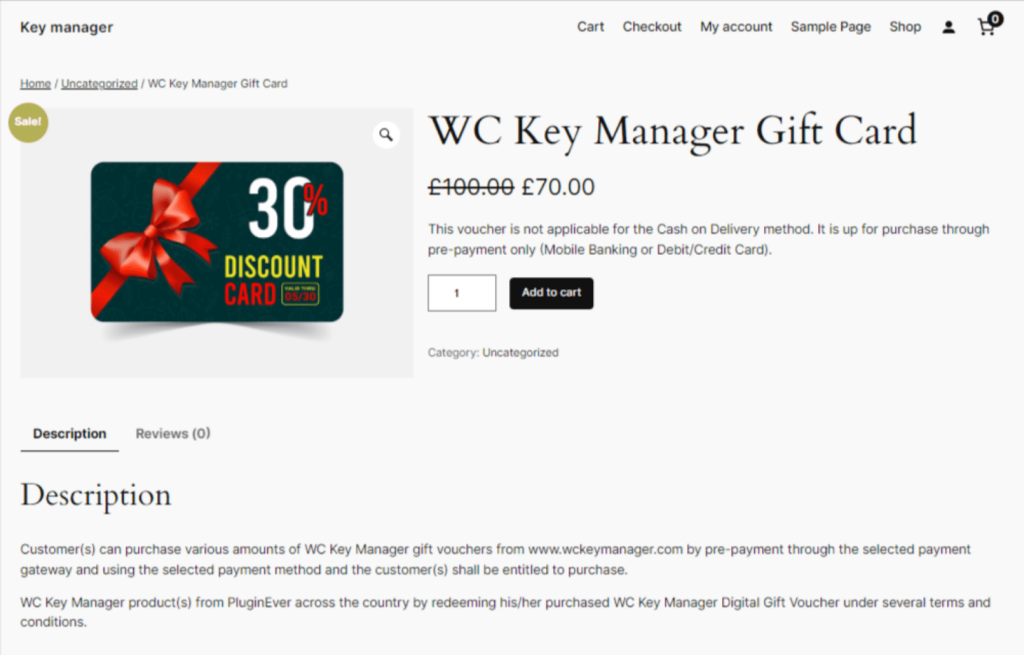
For creating a simple product – name it, add a product description, give itself two prices – regular and sale price, a short product description, and a product image. That’s it.
You can do further editing as you want. After finishing editing the product, make it publish to continue.
Here’s how the Gift Card will be visible on your store as a product.
Step #3 – Creating a Gift Card using the WC Key Manager
Doing step#1, we can see that, a field ‘Key Manager’ has been created by the WC Key Manager plugin on the WordPress dashboard.
Now to create a WooCommerce gift card follow these straightforward steps –
- Navigate to Key Manager > Keys > Add New
- Enter the key in the Key field or click the refresh icon to generate a random key
- Next, select the associated product from the Product dropdown (Ex – WC Key Manager Gift Card that we have just created)
- If you want the key to expire after a certain period, enter the number of days in the ‘Valid For’ field. The expiration date will be calculated from the date of purchase (ex-10 days)
- If the key has a specific expiration date, input the date in the ‘Expires On’ field. The key will expire on the specified date
- Input the number of times the key can be used in the Activation Limit field. To allow single use, enter “1”. Or if you want unlimited usage, leave this field blank

Next, click ‘Add Key’ to continue. Here’s the key we have created –
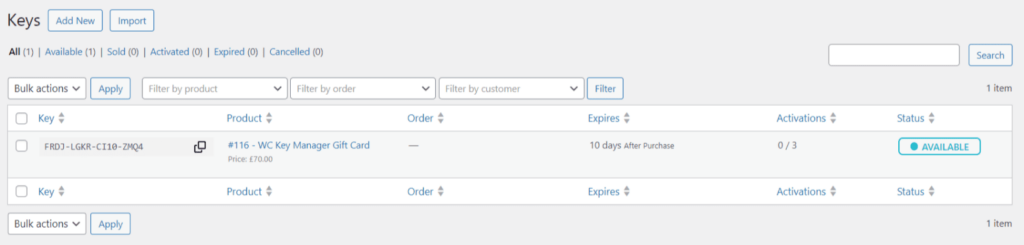
Preview
We are done. Let’s have a look at how our gift card works –
Note: Make sure that you have completed all billing information and selected a payment method in WooCommerce.
Advanced – Generate an Unlimited Number of Gift Cards in One Click
There’s a plus to using WC Key Manager plugin is that you can generate an unlimited number of keys for a product. By using the Bulk Key Generator tools from this plugin, you can make it happen.
You can generate keys in two ways – one is using the default generator and the other is using a custom generator.
Using the Default Generator
Here’s the way how can we start generating keys with default settings –
- Go to Key Manager > Tools > General
- Select the associated product from the Product dropdown (ex – WC Key Manager Gift Card)
- Leave the Generator field blank to apply the default generator rules (As we are not going with the custom generator)
- Enter the number of keys to generate. (ex – 50)
- Then finally, click on the ‘Generate Keys’ button to generate the keys.
Note: The global generator settings are on Key Manager > Settings > Advanced. You can customize the settings from here.
Using the Custom Generator
Using the custom generator means you can make a generator with your metrics. You can add product ID, SKU, date, month, year, and more to customize your keys.
Let’s start to create a custom generator –
- Navigate to the Key Manager > Keys > Generator
- Now click the ‘Add Key’ button. Here you will see multiple fields to complete.
- Enter the name of the generator in the ‘Name’ field (for ex-Black Friday deal)
- Now give the pattern of your generator.
- Specify the Charset for the generator. Leave it empty, if you want the default Charset.
- If the key expires after a specific period, enter the number of days in the ‘Valid For’ field. This period will be calculated from the date of purchase.
- Set the number of times the key can be used in the Activation Limit field. (If you want the key to be used only once, enter 1 here or leave it blank for unlimited usage)
- Next, on the right side, select the status of this generator. By default, it is set to Active. If you wish to mark the generator as inactive, click the dropdown menu and select ‘Inactive’.
Now to generate keys using this custom generator, simply follow the steps that we outlined in the ‘Using Default Generator’ section.
But there’s one step to add – we have to assign the generator name in the ‘Generator’ field. That’s it.
Benefits of Selling Gift Cards on Your WooCommerce Store
Gift cards allow your customers to purchase store credits and give it away to friends and family as a gift. But as a seller gift card has benefits too.
Here are some –
Get New Customers: Acquiring new customers and site visitors can be challenging. Selling gift cards can bring new customers to your store site. When someone receives and redeems a gift card from your store, they become a new customer, expanding your customer base.
Boost Sales and Revenue: Customers with gift cards often spend more than the card’s value, resulting in increased sales, higher revenue, and improved profitability for your business.
Enhance Customer Loyalty: Gift cards are an excellent way to reward your loyal customers with discounts and store credits. This fosters a sense of appreciation, helping to maintain customer retention and satisfaction.
Maintain Quality Sales in Crisis Moments: Gift cards can be sold during natural disasters or other crisis moments. You can generate upfront cash to sustain your business in tough times by selling them.
Conclusion
That’s all from us.
Hope you found our guide on how to sell gift cards on your WooCommerce store helpful. If it is, feel free to share it as well!
Or if you have any additional questions/comments, or need assistance, please let us know in the comment section below.
Leave a Reply
You must be logged in to post a comment.