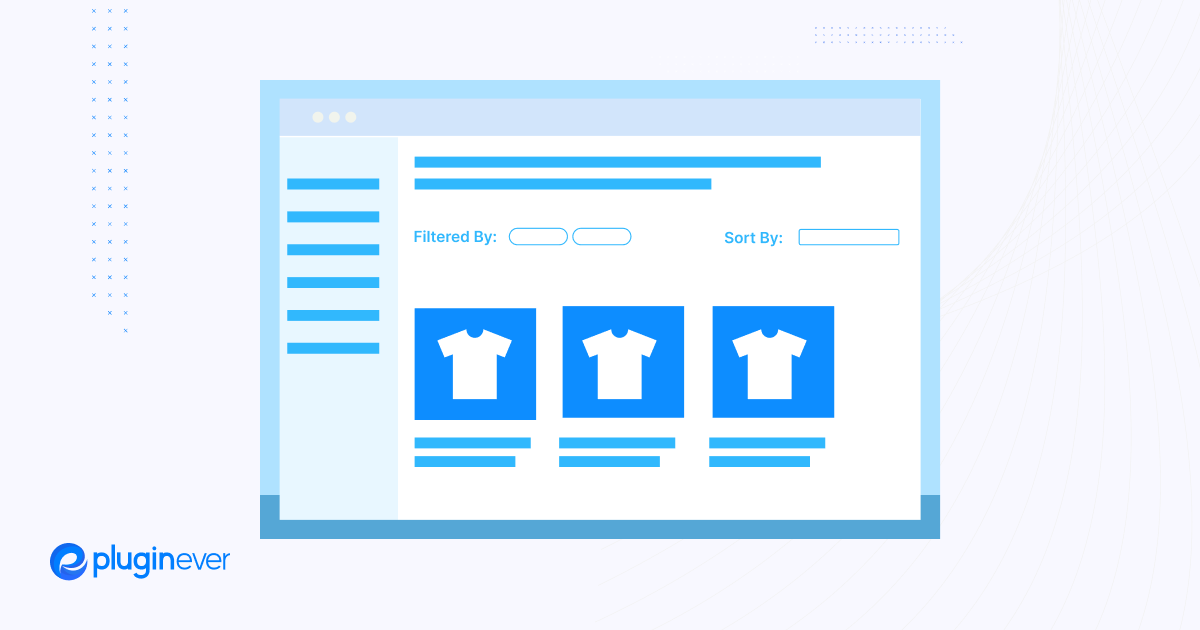
The WooCommerce Product Filter Plugin offers precisely this capability, enabling quick and intuitive product searches. By refining product visibility based on user preferences, this plugin not only enhances user experience but also plays a pivotal role in influencing purchasing decisions.
Let’s face it, nobody likes sifting through a thousand products just to find what they’re looking for. That’s where product filters come in to save the day. Product filtering will allow your customers to narrow down their search based on specific criteria like searching products by price, color, size, and more.
If you’re keen to understand how this plugin can revolutionize your WooCommerce store and boost revenue, you’re in the right place. Let’s delve into the world of optimized product filtering and its impact on sales!
Let’s do this!
Understanding the WooCommerce Product Filter Plugin

The WooCommerce Product Filter Plugin is more than just a tech tool – it’s more of an integral asset for online store owners seeking a streamlined shopping experience for their customers. Let’s delve deeper into what this plugin brings to the table.
At its core, the WooCommerce Product Filter Plugin offers advanced search capabilities to online shoppers. This includes filtering products by common parameters like color, size, and price and even extends to more nuanced attributes, such as fabric or origin.
The idea is to move away from overwhelming product lists and transition to efficient, focused searches. The direct advantage of using this plugin is the enhanced user experience it provides. An efficient and intuitive search mechanism often translates to quicker purchase decisions.
When customers can swiftly locate what they’re looking for, the likelihood of cart abandonment decreases, leading to potential growth in sales. Moreover, a pleasant browsing experience can foster customer loyalty and recurring sales.
One of the standout attributes of the WooCommerce Product Filter Plugin is its broad compatibility. It’s designed to integrate smoothly with a wide array of WooCommerce themes, whether they are simplistic or intricate in design.
This adaptability ensures that irrespective of the theme or specific setup an online store utilizes, the plugin will function effectively.
Best WooCommerce Product Filter Plugins in 2023

WooCommerce Product Filter by WooBeWoo
Features:
- Ajax product filter
- SEO friendly URLs
- Unlimited filters
- Filter by any criteria: categories, attributes, tags, taxonomies, price, and more
- Fully responsive and customizable design
Pricing:
They offered a free version with basic features and a pro version with extended functionalities. Prices for the pro version vary depending on the number of sites and duration of support.
WooCommerce Products Filter (WOOF)
Features:
- Uses Ajax for product filtering
- Can filter products by categories, attributes, and custom taxonomies
- Color, image, and label swatches
- Price range filter with a slider
- Shortcodes support
Pricing:
This plugin also offers a free version. The premium version’s pricing might vary based on features and support duration.
FacetWP
Features:
- Advanced filtering for WordPress listings
- Integrates well with WooCommerce
- Use your existing data: Facets use your site’s existing custom fields, taxonomies, and post-data
- Lots of facet types: checkboxes, dropdowns, date ranges, sliders, and more
- Lightning fast: Built with speed in mind, no more waiting for page reloads
Pricing:
FacetWP had a pricing model based on annual licenses. They typically offered several tiers based on the number of sites.
YITH WooCommerce Ajax Product Filter
Features:
- Allows users to filter products based on categories, tags, price, or attributes (color, size, etc.)
- Ajax-powered, so no page reloads when applying filters
- Multiple filter layouts: checkbox, color swatch, label, etc.
- Search filter for products based on a keyword
Pricing:
YITH offered both a free and a premium version. The premium version came with more advanced features and support.
Product Filters for WooCommerce by XforWooCommerce
Features:
- Full AJAX support
- Filters by any criteria
- Adaptive filtering for best-matching products
- Range filters for pricing and taxonomies
- Integration with WooCommerce shortcodes
Pricing:
This was a premium plugin, and its price depended on the platform it was purchased from, such as CodeCanyon.
I would also recommend you look for the right plugin in the WordPress plugin repository or WordPress.ORG to find the most suitable solution for you.
Setting up the WooCommerce Product Filter Plugin

Setting up the WooCommerce Product Filter plugin will enhance your WooCommerce store’s user experience by making product searching more interactive, faster, and more precise.
Here’s a step-by-step guide to get it up and running:
Installation and Activation Process
- Purchase or Download the Plugin
- Depending on the product filter plugin, you may need to purchase it or find a free version in the WordPress plugin repository.
- Install the Plugin
- From your WordPress dashboard, go to Plugins > Add New.
- If you’ve downloaded the plugin, click Upload Plugin and choose the .zip file.
- If you’re installing from the WordPress repository, search for “WooCommerce Product Filter”
- Find the suitable plugin from all the options, and click Install Now.
- Activate the Plugin
- After installation, click Activate. The plugin should now be live and will likely add a new menu item to your WooCommerce or general settings.
Configuration Options and Customization Settings
- Access Plugin Settings
- Usually, there will be a new tab or menu in the WooCommerce settings or a standalone menu item on your dashboard for the plugin.
- Basic Setup
- Filter Criteria: Decide on what basis users can filter products – categories, attributes (e.g., size, color), price range, tags, and so on.
- Filter Display Type: Some plugins let you choose between dropdowns, checkboxes, radio buttons, and more.
- Advanced Settings
- Ajax Filtering: Some plugins offer Ajax filtering, which means products get filtered without the page having to reload.
- Price Slider: Enable a slider for price filtering.
- Custom Styling: Depending on the plugin, you might be able to adjust colors, fonts, and other visual elements to match your theme.
- Integration Settings
- Choose where to display the filter: on shop pages, category pages, or custom placements.
- Decide on the positioning: Sidebar, above the products, etc.
- Save Changes
- After making all desired configurations, always remember to save.
Integrating the Plugin with your WooCommerce Store
- Shortcodes & Widgets
- Some plugins provide shortcodes, which you can paste into pages, posts, or custom widgets to display the filters.
- Many also offer dedicated widgets. Navigate to Appearance > Widgets and drag the filter widget to your desired widget area.
- Test the Filter
- Browse your shop or product page and ensure the filters appear as expected. Test each filter option to ensure it interacts correctly with your product listings.
- Custom Integration
- If you have a custom theme or if the plugin doesn’t integrate out of the box as you’d like, you might need to add specific PHP functions or hooks. This might require developer assistance.
- Optimize for Mobile
- Ensure that the filters work and look good on mobile devices. Some users prefer a collapsed view on mobile, while others like to see the filters right away.
- Monitor and Adjust
- After your customers start using the filters, monitor how they’re interacting with them. You might find that certain filter options are more popular and need to be prioritized, or that some filters aren’t being used at all and can be removed.
Remember, the features and configuration options might differ based on the specific WooCommerce Product Filter plugin you choose, so always refer to the plugin’s documentation or support forum for detailed guidance specific to that plugin.
Optimizing WooCommerce Product Filtering Options
Optimizing WooCommerce product filtering options can make a significant difference in the user experience, and consequently, can lead to increased conversions. Below, we’ll dive deeper into each of the outlined points and provide more detailed suggestions:
Understanding customer preferences and behavior
Analyzing customer data and trends
Utilize analytics tools such as Google Analytics to identify which products are viewed and purchased most frequently. Pay attention to search queries as they can give insight into what users are looking for.
Identifying popular filter options
Check which filters users frequently interact with and base decisions on this data. For instance, if many users filter for “organic” items, it might be beneficial to make this a prominent filter.
Creating relevant and intuitive filter categories
Categorizing products based on attributes
Ensure products are categorized accurately. If you’re selling clothes, attributes might include size, color, material, brand, and style.
Analyzing the significance of each attribute
Not all attributes are of equal importance. For example, for electronic items, brand or technical specifications might be more significant than color.
Prioritizing important filter options
Placing frequently selected filters prominently
Filters that are used often should be at the top or be more noticeable. For instance, if you’re selling books, ‘Genre’ might be a more commonly used filter than ‘Publication Year’.
Utilizing user-friendly filter displays
Use checkboxes for multiple selection attributes (like color), sliders for continuous data (like price), and drop-downs for long lists. Always aim for a responsive design to cater to mobile users.
Implementing advanced filter options
Utilizing price range filters
Price is a crucial filter for most eCommerce websites. Implementing a slider allows users to select a price range that suits their budget.
Incorporating custom filters based on customer preferences
If you have a loyal customer base, consider offering personalized filter options. For instance, if a customer often buys sustainable products, provide them with a ‘Sustainable’ filter or a ‘Recently Viewed’ filter.
Additional Tips for Optimizing WooCommerce Product Filtering Options
Ensure speedy performance
No matter how well you optimize filters, if the page takes too long to load after applying a filter, users may get frustrated and leave. Ensure filtering is quick and efficient.
Provide clear feedback
Once a filter is applied, make it evident which filters are active and provide an easy option to clear or modify them.
Mobile Optimization
With an increasing number of users shopping on mobile devices, ensure the filtering experience is seamless on smaller screens.
Test and iterate
Continuously gather feedback, analyze user behavior, and make improvements based on your findings. What works best can vary by target audience, product range, and industry, so constant tweaking might be necessary.
Use AI-powered recommendations
Modern AI tools can help in recommending products based on user behavior and preferences. Consider integrating such tools with filtering options to offer a more personalized shopping experience.
Clear product images and descriptions
A good filtering system goes hand in hand with clear product representations. Ensure that product images are clear, and descriptions are detailed to further aid users in their decision-making process.
Implementing UX-Focused Filtering Practices
When implementing filtering practices with a focus on user experience, it’s essential to combine functionality with a design that feels intuitive and pleasant. Here’s how to achieve this in detail:
1. Designing user-friendly filter layouts
Implementing intuitive user interfaces:
- Utilize common filtering patterns. Familiarity can be reassuring for users; they don’t need to learn a new system.
- Place filters where users expect them. Typically, this is on the left side for desktop and under a drop-down or slide-out menu for mobile.
- Group similar filters together for clarity and better organization.
Considering responsive design for mobile users:
- Design filters to be touch-friendly, ensuring touch targets are adequately sized and spaced.
- Prioritize the most important filters to appear first for mobile users. Space is limited, so showing everything might not be feasible.
- Consider providing an option to reset or clear all filters easily.
2. Providing real-time filtering results:
Ensuring fast and accurate search results:
- Make sure your search algorithms are efficient. This might involve refining the database structure or query optimizations.
- Feedback is crucial. If there’s a delay, consider implementing a loading spinner to indicate to users that the system is processing their request.
Using AJAX-based filtering for a seamless experience:
- With AJAX, users can see results without needing to refresh the page, providing a smoother experience.
- Error handling is essential. If there’s an issue fetching filtered results, provide a clear message to the user, and offer potential solutions or the option to retry.
3. Enabling multi-select options:
Allowing users to select multiple filter attributes simultaneously:
- Utilize checkboxes for filters that support multiple selections.
- Make it clear when multiple selections are possible. Tooltips or clear labeling can help.
Enhancing user experience and flexibility:
- Implement “select all” or “deselect all” shortcuts for filters with many options.
- Offer visual feedback. When a user selects a filter, provide visual changes such as color shifts or tick marks to confirm the selection.
4. Enhancing filtering performance:
Optimizing filter loading speed:
- Only load the necessary filters based on the user’s context or the data subset they are viewing.
- Consider lazy loading for secondary filters or those that may not be immediately necessary.
Utilizing caching mechanisms to improve performance:
- Implement a cache for commonly queried data or filters. This reduces the burden on the database, providing faster results.
- Monitor and regularly update the cache to ensure it stays relevant. An outdated cache can provide outdated results or miss out on new entries.
Lastly, always test with real users to get feedback. Cause it might seem intuitive to one person and might be confusing to another.
Tracking and Analyzing Filter Usage
Understanding how users interact with filters can provide valuable insights for businesses. By tracking and analyzing filter usage, you can optimize the user experience, improve product discovery, and potentially drive conversions. Here’s how to go about this:
1. Implementing analytics tracking for filter usage:
Choosing the Right Tool:
- Use established analytics tools like Google Analytics, Mixpanel, or Heap to track user interactions. They often offer built-in capabilities to track click events and filter usage.
Setting up Event Tracking:
- Track each filter selection as an event. This way, you can see which filters are used most frequently and in what combination.
- Monitor both the activation and deactivation of filters. This can give insights into user behavior and decision-making processes.
Tagging Filters Appropriately:
- Assign clear and distinct names to each filter so that when you view your analytics data, you can easily identify which filter corresponds to which action.
2. Analyzing data to identify popular filters and trends:
Data Visualization:
- Use dashboards or reporting tools to visualize filter usage. This can help you quickly spot trends or outliers.
- Create a heatmap of filter usage to identify which filters are most and least popular.
Identifying User Behavior:
- Examine sequences of filter usage. For instance, do users commonly filter by “price” and then “brand”?
- Identify any filters that have a high abandonment rate. If users often deselect a filter or leave the page after selecting it, it could indicate that it’s not providing the results they expected.
Segmentation:
- Segment filter usage data by user demographics, location, or device type. This can provide insights into the preferences of different user groups.
3. Making data-driven decisions to improve filters and conversions:
Optimizing Filter Placement:
- If certain filters are used more frequently, consider placing them at the top or making them more prominent.
- Conversely, lesser-used filters could be collapsed or grouped under advanced filtering options.
Improving Filter Relevance:
- If a filter has a high abandonment rate, consider refining its options or its presentation.
- Examine the products or results shown for popular filter combinations. Ensuring that these results are highly relevant can boost conversions.
Personalization:
- Based on filter usage trends, you can personalize the filtering experience for returning users. For example, if a user frequently filters by a specific brand, make that brand more prominent during their future visits.
Test and Iterate:
- After making changes based on analytics, A/B tests them to ensure that the changes indeed improve the user experience and conversion rates.
- Continuously monitor filter analytics and iterate based on new data and trends.
In summary, tracking and analyzing filter usage can provide a treasure trove of insights. When leveraged correctly, this information can help improve user experience, boost product discovery, and drive higher conversion rates.
Implementing A/B Testing for Filters
A/B testing, also known as split testing, is a method of comparing two versions of a webpage or app to determine which one performs better in achieving a set goal. When applied to filters, it helps in understanding which configuration provides the best user experience and maximizes conversions.
Here’s how to go about this:
1. Conducting A/B tests to evaluate different filter setups:
Define Clear Objectives:
- Start by setting a clear goal for your A/B test. This could be increasing user engagement, boosting conversions, reducing exit rates on product listing pages, or any other measurable metric.
Hypothesize:
- Based on analytics, user feedback, or expert opinion, hypothesize how a change in filter configuration might improve performance. For example, “Grouping color filters will increase user engagement.”
Select Variations:
- Create at least two versions: the control (current filter setup) and the variant (new filter setup). For more complex hypotheses, multiple variants might be necessary.
Randomize Your Audience:
- Use A/B testing software to randomly serve the control or the variant to different users. Ensure that each user consistently sees the same version throughout their session to avoid confusion.
Monitor Duration and Sample Size:
- Ensure the test runs long enough to collect a statistically significant sample. The required duration will vary depending on the site’s traffic and the baseline conversion rate.
2. Identifying the most effective filter configurations:
Analyze the Results:
- Once the test duration is over, analyze the data. Compare performance metrics (like engagement, conversion rate, time spent on page) between the control and the variant(s).
Statistical Significance:
- Use statistical tools to determine if the observed differences are significant and not just due to random chance. A p-value less than 0.05 is typically considered significant.
Consider Secondary Metrics:
- While the primary objective is crucial, also consider secondary metrics. For instance, if a filter setup increases conversions but drastically reduces the average order value, it might not be beneficial in the long run.
3. Optimizing filters based on test results:
Implement Winning Variations:
- If a variant outperforms the control significantly, consider implementing it permanently.
Iterate:
- A/B testing is an ongoing process. Based on learnings from one test, formulate new hypotheses and conduct subsequent tests.
Document and Share:
- Document the results, insights, and learnings from each test. This will be a valuable resource for future optimization efforts.
Consider External Factors:
- Always account for external factors that might affect test results. For example, if you’re testing during a holiday season, the behavior might be different than usual.
Avoid Overlapping Tests:
- Running multiple A/B tests simultaneously on the same audience can lead to interference and misleading results. If you need to test multiple hypotheses, either segment the audience distinctly or run tests sequentially.
Wrap Up

The WooCommerce product filter plugins offer an enhanced shopping experience by streamlining product discovery and catering to user preferences. The benefits of utilizing this tool are manifold, providing not only a more intuitive browsing experience but also a potential increase in conversions.
However, the journey doesn’t end at the initial implementation. Continuous optimization and refinement of filters are paramount to sustain and maximize sales. By closely monitoring user interactions and making data-driven adjustments, businesses can ensure they meet evolving customer needs and preferences.
In the ever-competitive world of e-commerce, using tools like the WooCommerce product filter plugin can be a game-changer, acting as a catalyst to boost revenue and solidify customer loyalty. Embrace the power of effective filtering to elevate your e-commerce venture.
That’s all for now. Until next time.
Adios!
Leave a Reply
You must be logged in to post a comment.