
After activating WC Store Timer, you can define when purchases should be restricted across your store. These settings control availability during off-business hours using time-based rules.
Navigate to Store Timer Settings
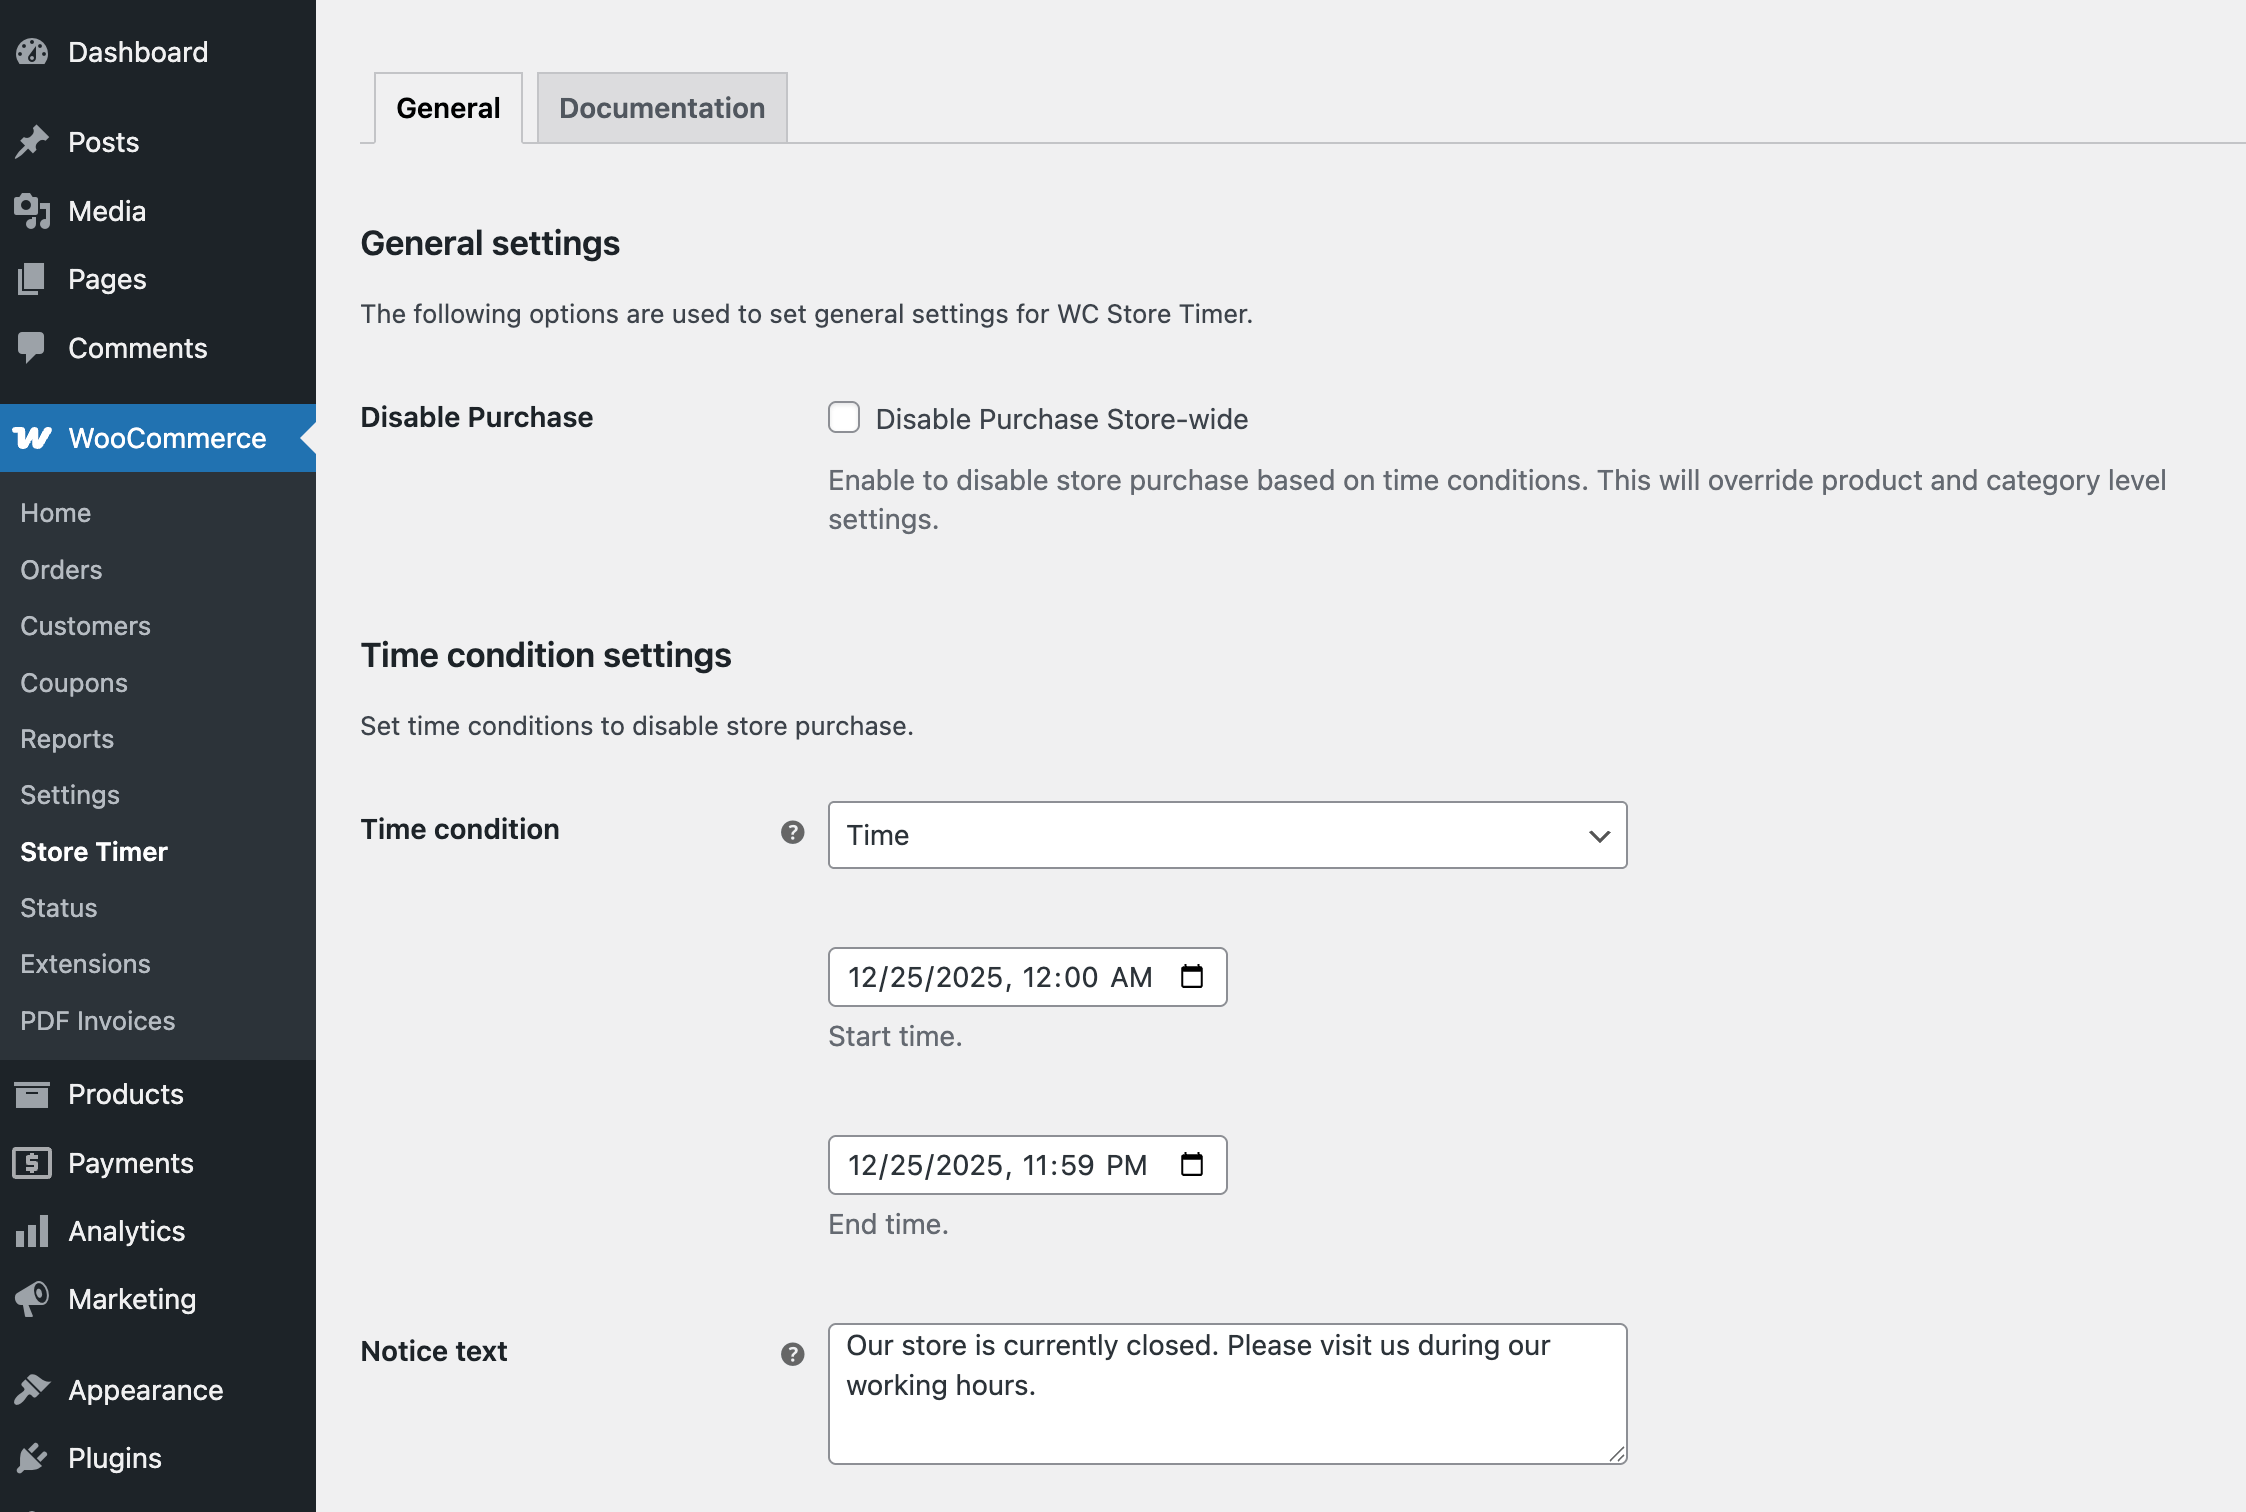
Log in to your WordPress dashboard and go to WooCommerce > Store Timer. You will land on the General Settings panel, where all core configuration options are located.
Disable Purchase
Enable this option to disable purchases across the entire store based on time conditions. This setting can be overridden at both category and product levels.
Time Condition Settings
Time Condition
Time conditions define when purchasing should be disabled. You can choose one or more scheduling options based on how your business operates.
Time Condition Options:
Time
Specify daily start and end time (e.g., 05/10/2025 09:00 AM to 05/11/2025 06:00 PM).
Weekly on Every [Saturday – Sunday]
Choose specific weekdays (e.g., disable every Saturday and Sunday).
Monthly on Every [1 – 31]
Choose specific days of each month (e.g., disable on the 15th of each month).
On the Month of [January – December]
Choose specific months of the year (e.g., disable in August).
Notice Text
This field allows you to customize the message shown to users when purchase is disabled.
You can inform users about Business hours, when purchasing will be available, and custom instructions (e.g., contact during off-hours).
Save Changes
After completing your configuration, click Save Changes to apply the rules storewide.
Next Step
Once global settings are in place, you can override them for a specific category or a specific product if different availability rules are required.