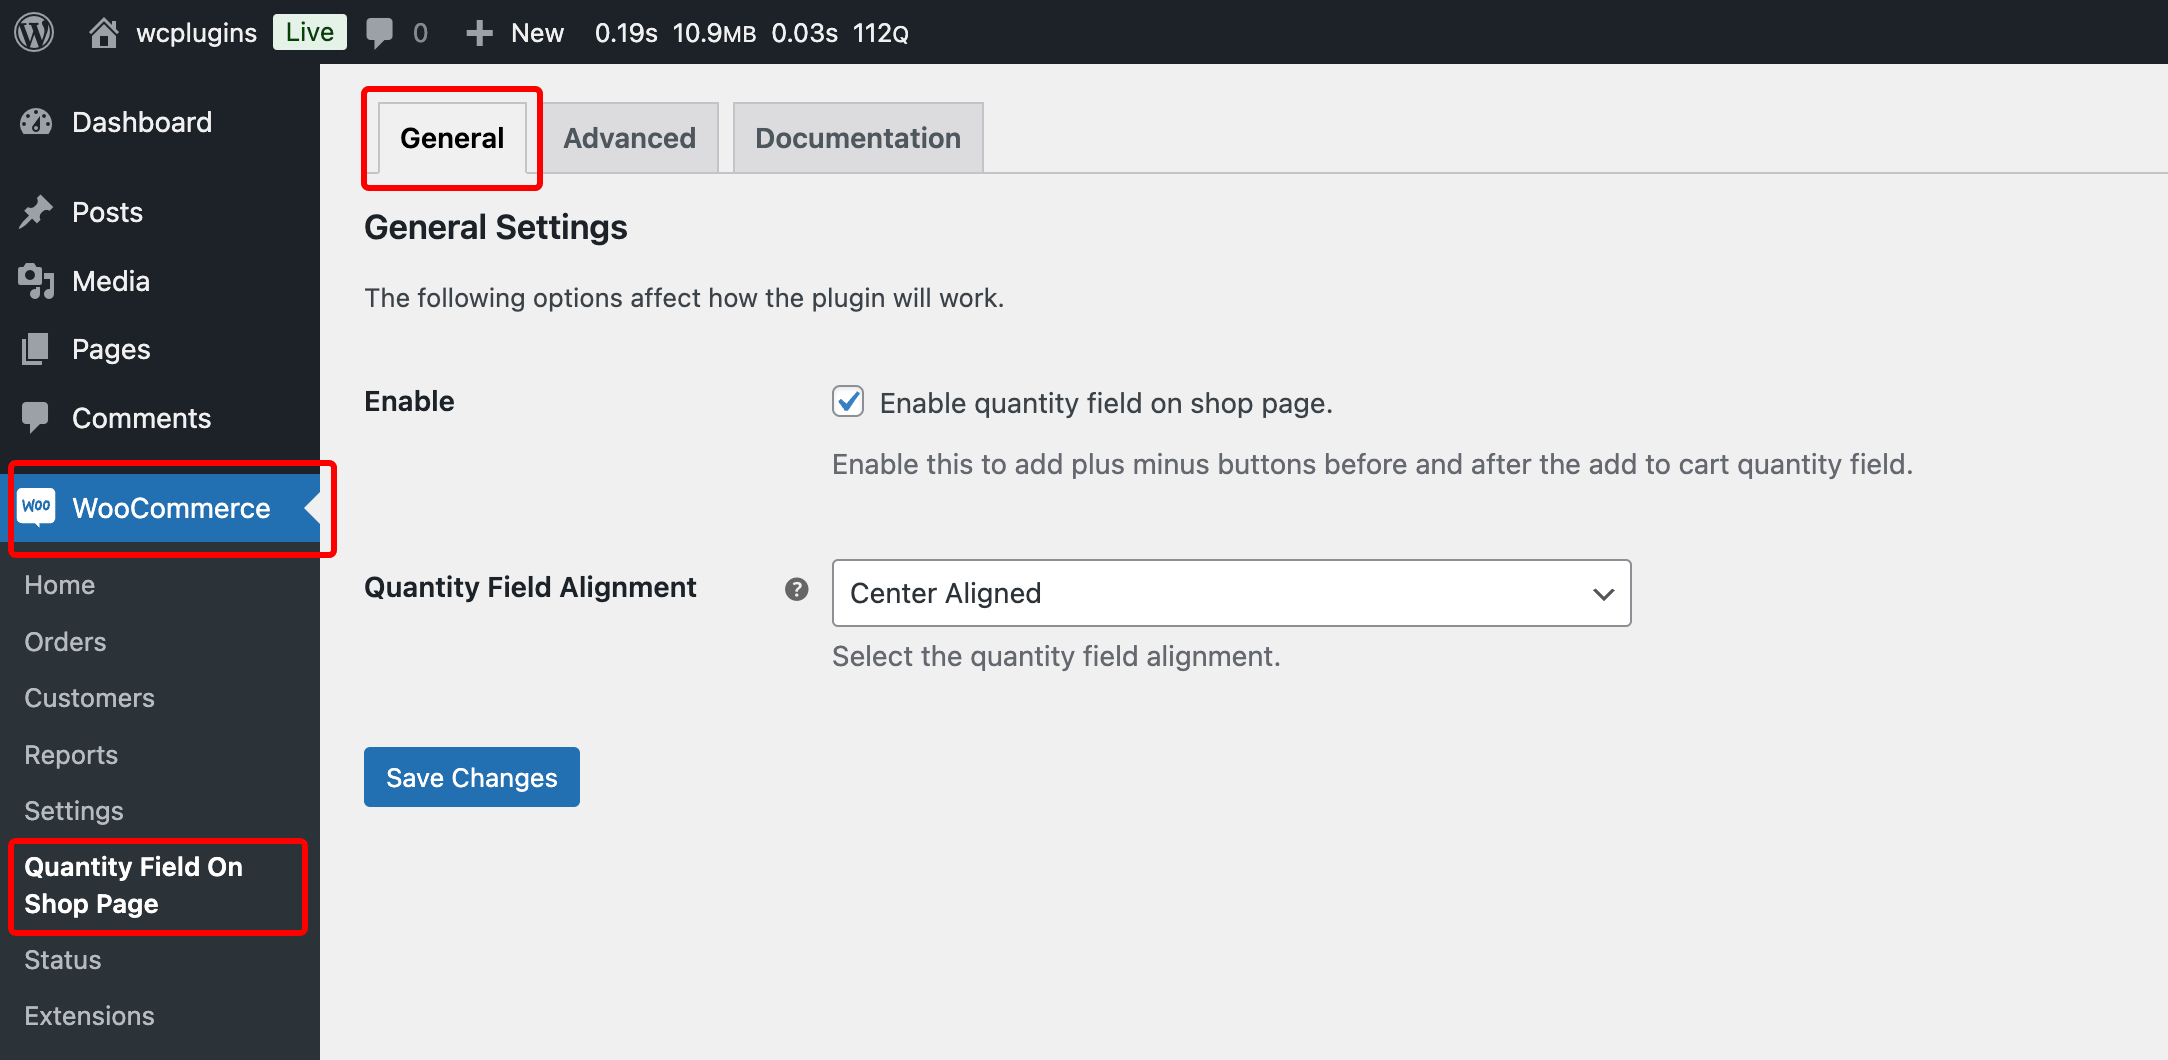
This section provides instructions on how to enable and configure the quantity field on the WooCommerce shop page. The quantity field allows customers to adjust the number of items they wish to purchase directly on the shop page, using plus and minus buttons.
Step-by-Step Guide
1. Accessing the Settings
To configure the quantity field, follow these steps:
- Log in to your WordPress Admin Dashboard.
- Navigate to WooCommerce > Quantity Field On Shop Page.
2. General Settings
Once you are in the Quantity Field On Shop Page settings, locate the General tab to adjust the following options:
a. Enable Quantity Field
- Option Name: Enable Quantity Field On Shop Page
- Description: Tick this checkbox to enable the quantity field on the shop page.
- Effect: Once enabled, the quantity field will appear, allowing users to adjust product quantities directly on the shop page.
- Notes: If left unchecked, the quantity field will be disabled and won’t appear on the shop page.
b. Quantity Field Alignment
- Option Name: Quantity Field Alignment
- Description: Select the alignment of the quantity field.
- Options:
- Left Aligned: Aligns the quantity field to the left side of the product.
- Center Aligned: Centers the quantity field.
- Right Aligned: Aligns the quantity field to the right side of the product.
3. Save Changes
After making your desired changes:
- Click the Save Changes button at the bottom of the page.
- Your settings will be applied, and the updates will reflect on the shop page of your WooCommerce store.
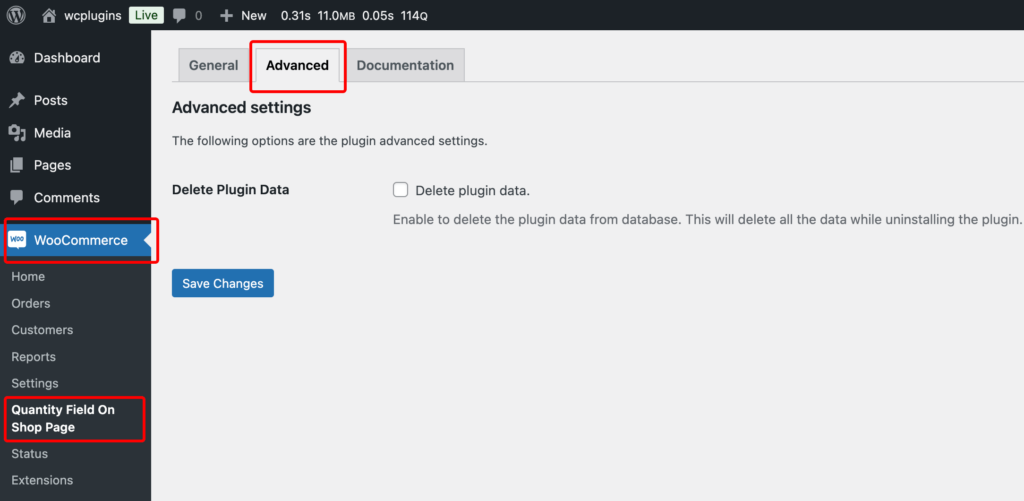
Advance Settings

If you want to delete all plugin data after uninstalling the plugin, simply go to the Advanced tab, check the “Delete plugin data” option, and click Save Changes.