The WC Purchasing Power Parity settings allow you to configure discount options based on the purchasing power of different countries. This feature is ideal for offering country-specific discounts to make products more accessible based on regional economic conditions.
Navigate to Purchasing Power Parity
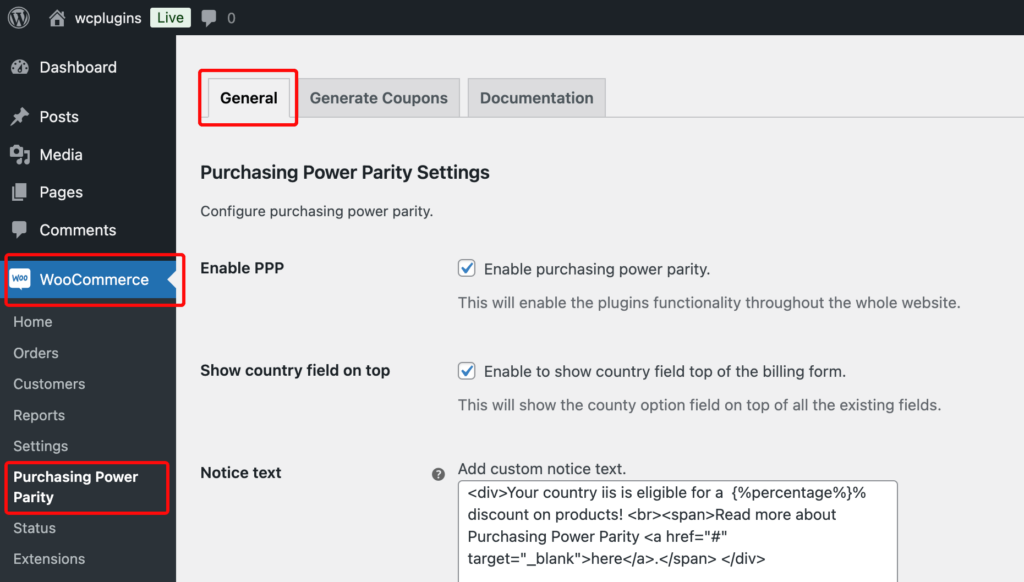
- From your WordPress admin dashboard, navigate to WooCommerce > Purchasing Power Parity > General to access the plugin functionality.

General Settings
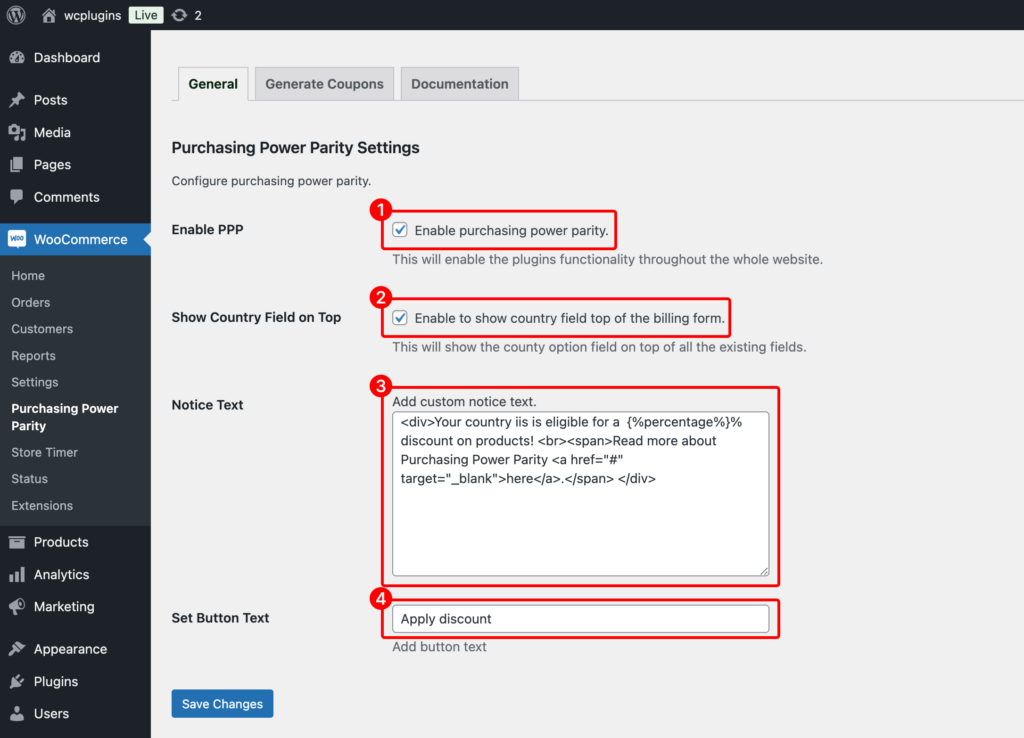
Step-1: Enable PPP
- Toggle this option to enable or disable the site-wide Purchasing Power Parity (PPP) functionality. Once enabled, the plugin will apply the configured PPP settings to your entire website.
Upon installation of the plugin, this function will be enabled by default.
Step-2: Show Country Field on Top
- Enable this option to display the country selection field at the top of the billing form. This ensures the country field is visible prominently, allowing users to see if they are eligible for a PPP discount.
Upon installation of the plugin, this function will be disabled by default.
Step-3: Notice Text
- This field allows you to add a custom notice message that will be displayed to users eligible for a PPP discount. Use
{%percentage%}as a placeholder to insert the discount percentage based on the country dynamically.
Customize this message according to your preference. You can add links, styles, or other HTML elements as needed.
Step-4: Set Button Text
- Define the text on the button users can click to apply the PPP discount. Customize this field to make the button more descriptive or engaging.
Customize this button text according to your preference.

Step-5: Save Changes
- After configuring the settings, click the Save Changes button to apply your preferences.
These settings are found under the General tab of the plugin configuration. Be sure to test the functionality on the front end after saving to ensure that the discount messages and button appear as expected