WC Discontinued Products plugin includes a settings panel where you can manage how discontinued items behave across your store. These options work as the default configuration for all products. You can later override them on individual product pages when needed.
Navigate to General Settings
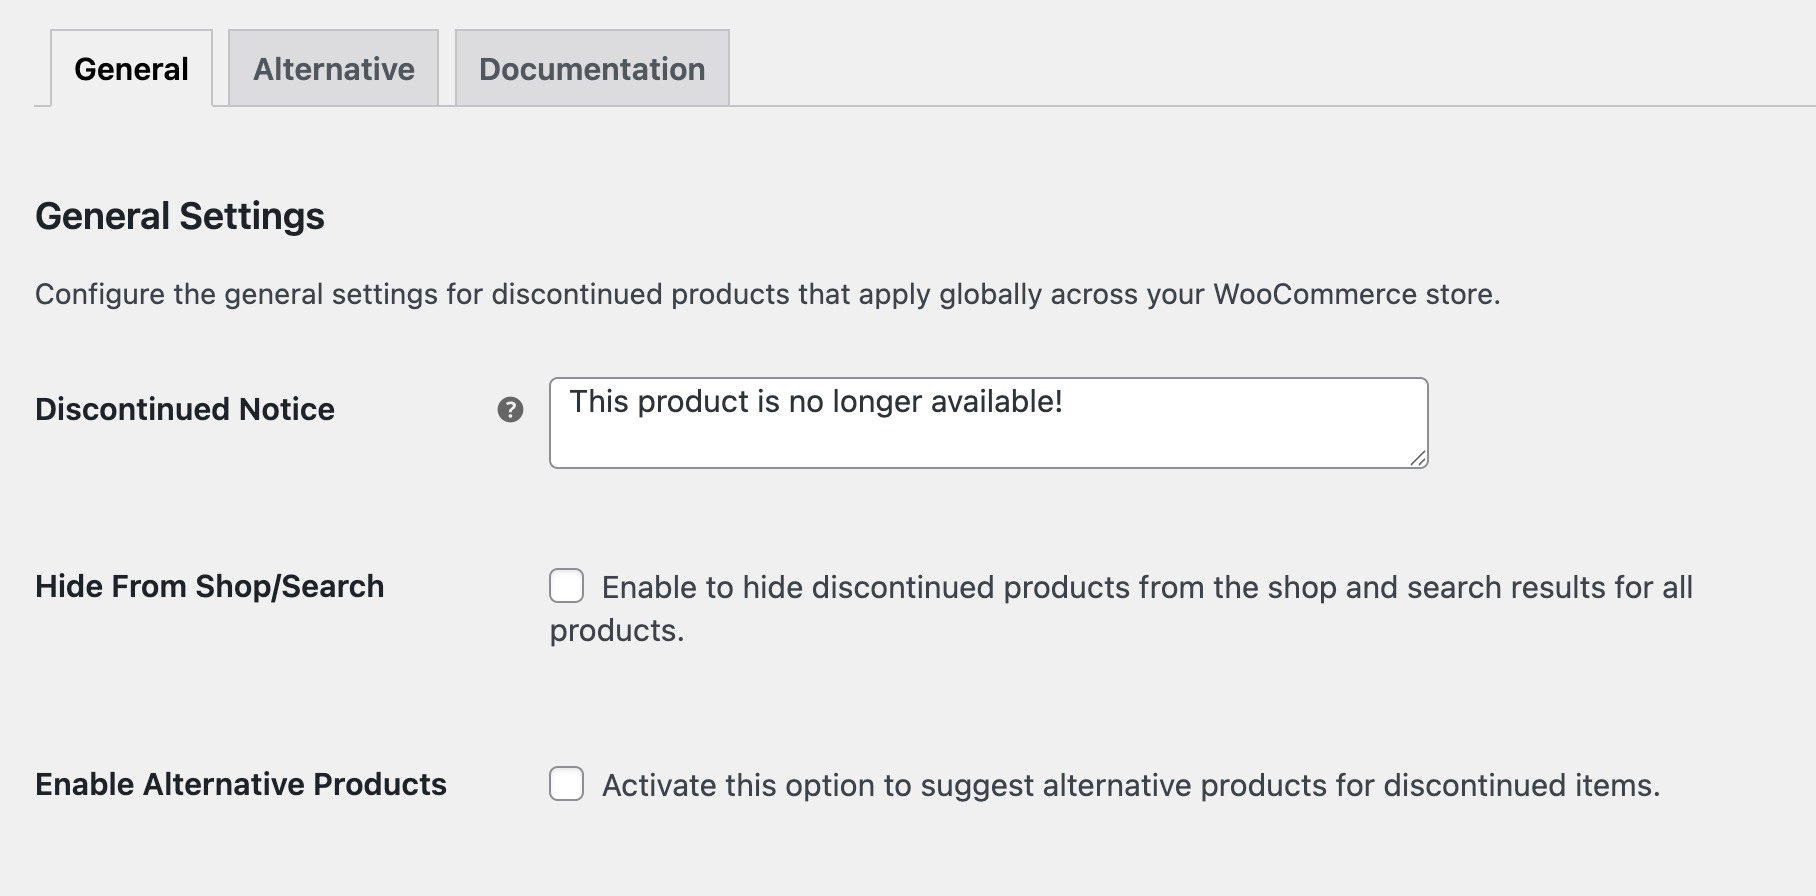
Open your WordPress dashboard and go to WooCommerce > Discontinued Products > General. This page contains every global setting that affects how discontinued products appear in your shop.
Discontinued Notice
You can display a short notice on any product marked as discontinued. The default message is “This product is no longer available!”.
Edit this text to match the tone of your store. A clear message helps customers understand why the product cannot be purchased.
Hide from Shop/Search
If you prefer not to show discontinued items in your catalog, enable this option. Once active, the product will not appear in the shop page, category pages, or search results.
This option is useful when you want clean browsing and do not want customers to see items that are no longer offered.
Enable Alternative Products
Turn this on to suggest replacement items when a discontinued product is viewed. You need to choose specific alternatives from the product edit screen.
Once this option is enabled, an additional setting called Alternative Product Display will appear.
Alternative Product Display
Use this option to control how alternative products are shown on the product page. You can choose between:
- List View – Displays alternative products in a simple vertical list. This works well for minimal layouts or text-focused themes.
- Grid View – Displays alternative products in a grid layout with images. This is ideal if you want a more visual presentation.
Choose the display style that best fits your store layout and product presentation.
Save Changes
Click Save Changes when you are done. Now, you need to enable the product as discontinued.
These preferences will apply to all discontinued items unless you set different rules for individual products.
Mark a Product as Discontinued
Open the product you want to update and scroll to the Product Data panel. Select the Inventory tab and look for the Discontinued option. Check the box to declare the item as discontinued.

The product is now marked as discontinued and will follow either the global rules or the individual overrides you configure.
Next Step
After setting your defaults, continue to the guide on styling and configuring the discontinued notice.