The WC User Registration Fields feature allows store owners to enhance the customer registration process by adding custom fields. This functionality is useful for:
- Collecting Additional Information: Gather essential information from customers during the registration process to better understand their needs and preferences.
- Improving Customer Experience: Customize the registration form to make it more relevant to your business, enhancing user experience and engagement.
- Streamlining Data Collection: Automatically collect and organize customer information, reducing the need for manual data entry and improving order processing efficiency.
By utilizing this feature, you can create a more personalized shopping experience, which can lead to increased customer satisfaction and loyalty.
Steps to Configure User Registration Fields
Step 1: Activate the Plugin:
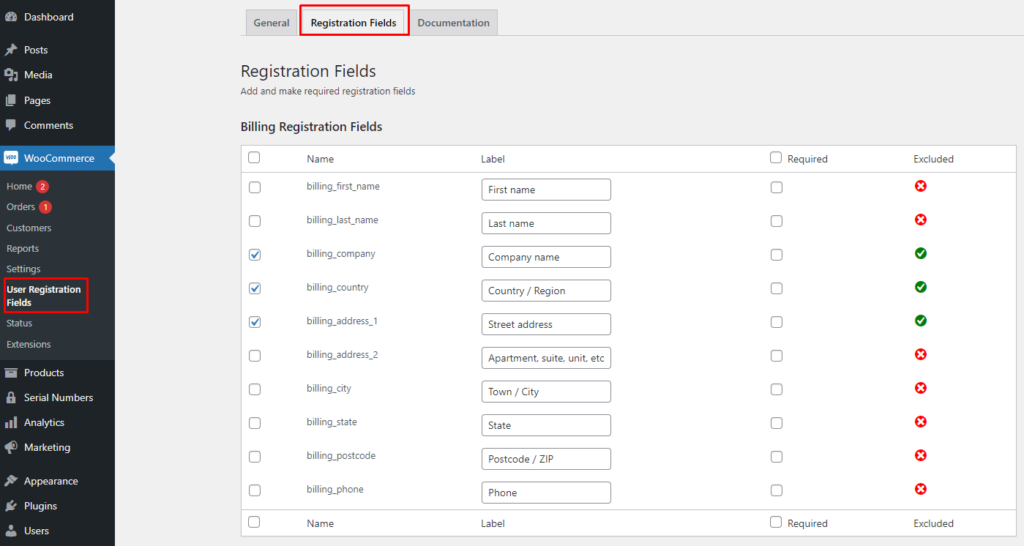
- After activating the user registration plugin, navigate to WooCommerce > User Registration Fields > General.
Step 2: Enable Registration Fields:
- To enable the registration fields for your store, check the option labeled ‘Enable to use this plugin store-wide.’
- If you wish to disable the registration fields, simply uncheck this option and click on the Save Changes button.
Step 3: Allow Account Creation:
- Before adding registration fields, you need to ensure that account creation is enabled in WooCommerce.
- Go to WooCommerce > Settings > Accounts & Privacy.
- In the Account Creation section, ensure that you allow customers to create an account.
Step 4: Add Custom Fields:
- To add custom registration fields, click on the Registration Fields tab.
- You will find two sections: Billing Registration Fields and Shipping Registration Fields.
- In both sections, you’ll see checkboxes on the left. Check or uncheck the boxes next to the fields you want to activate or deactivate.
- Customize the Label according to your preferences.
- You can mark a field as Required if you want to make it mandatory; if unchecked, the field will be optional.
Step 5: Save Your Changes:
- After configuring the fields, you will notice a green icon indicating that the field has been enabled.
- Click the Update button to save your changes.