By default, WooCommerce doesn’t allow you to attach files to emails. However, the WC Email Attachments plugin provides a simple solution to add attachments to your WooCommerce emails, such as PDFs, documents, images, and more.
Step-by-Step Guide
- Access Email Settings:
- After installing and activating the plugin, Go to WooCommerce > Settings > Emails.
- Choose Your Email Template:
- Select the specific email template you want to modify. This could be the “Order Complete” email, “New Order” email, or any other relevant template.
- Manage Email Attachments:
- Click on the Manage button next to the chosen email template.
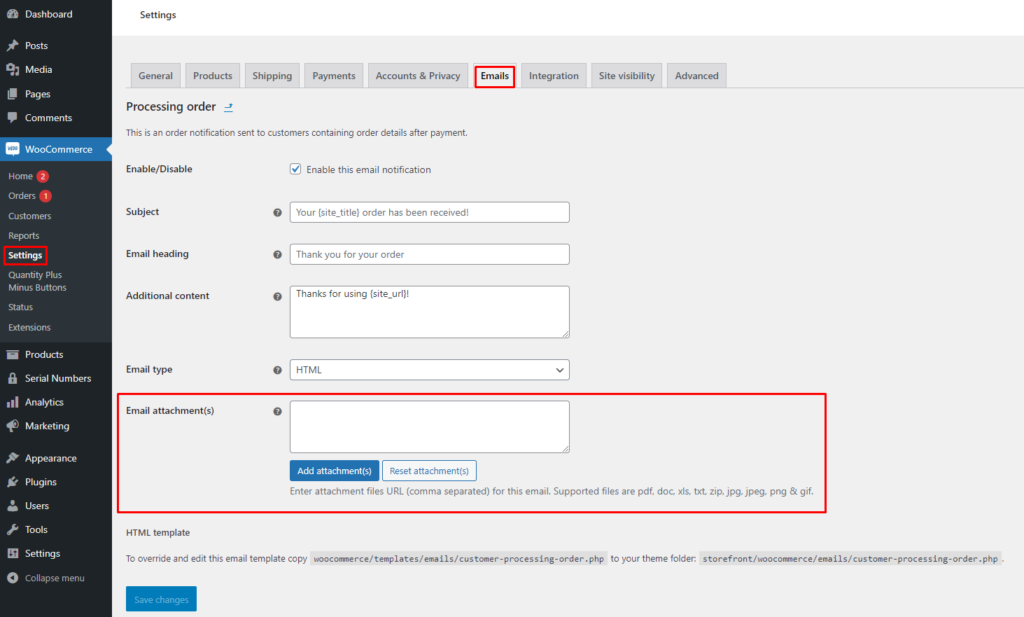
- You’ll see a section for Email Attachments.
- Add Attachments:
- Click on the Add Attachments button.
- Upload the files you want to include in the email. You can upload multiple files at once.
- Supported file formats include PDF, DOC, XLS, TXT, ZIP, JPG, JPEG, PNG, and GIF.
- Save Changes:
- Click on the Save Changes button to apply your modifications.
That’s it for setting up everything.