How to Configure Uploader Settings
The WC Checkout Files Upload Manager plugin allows customers to upload files while shopping. This is perfect for custom products, ID verification, or any case where uploading documents is essential.
To configure the uploader settings, go to WordPress Dashboard → WooCommerce → Checkout Files → General
Once you’re there, you’ll see a range of settings you can adjust to control how file uploads work on your store. Below is a breakdown of each option and what it does.
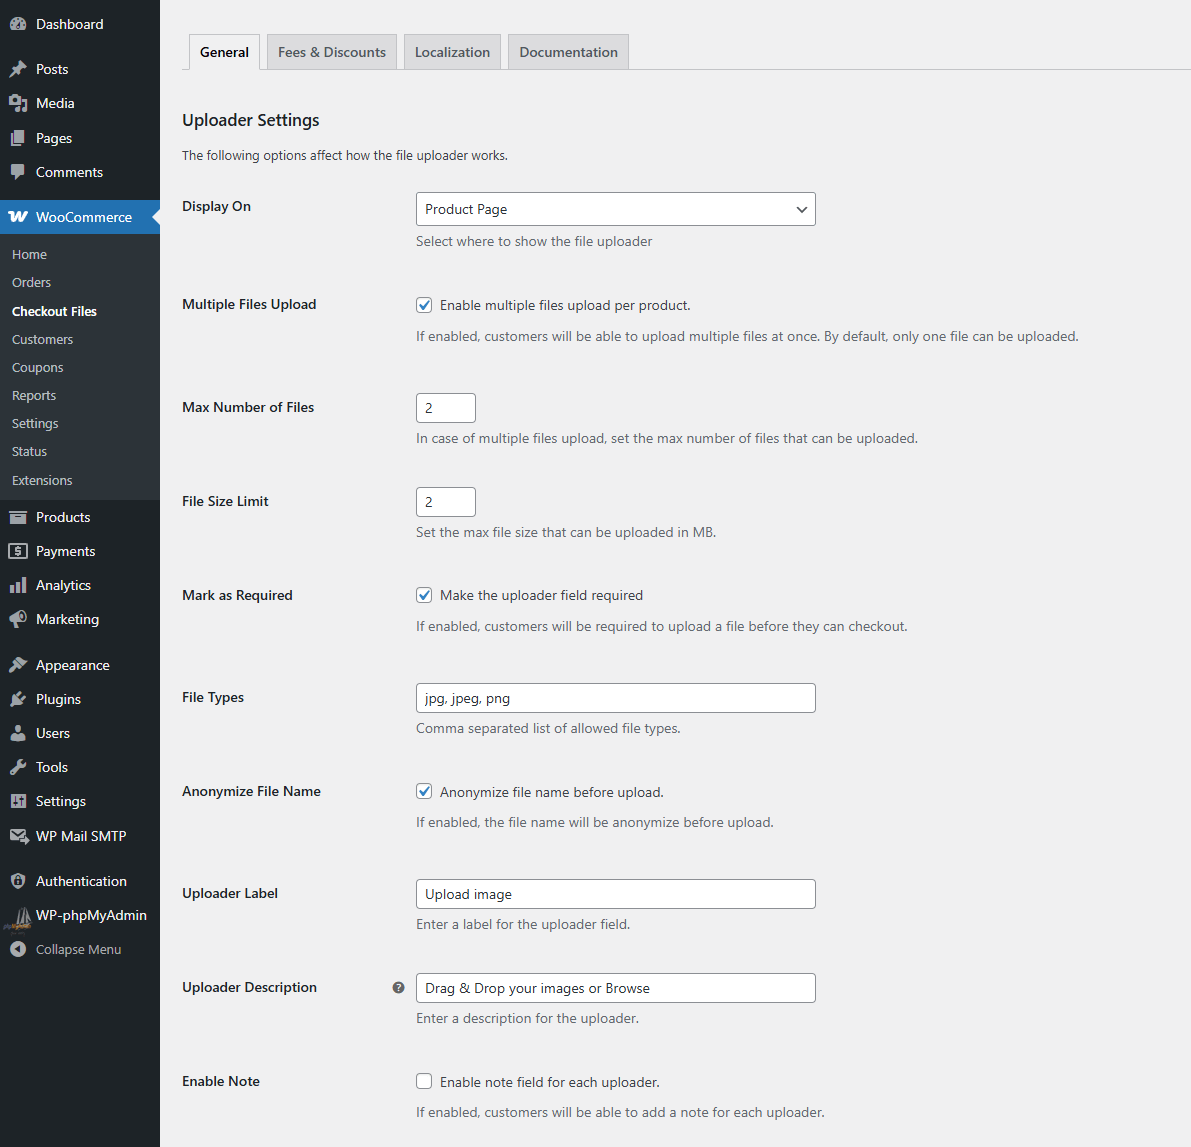
Display On
Set the location where the uploader field appears on your site.
Choose one:
- Product Page – Displays the uploader directly on the product detail page.
- Checkout Page – Shows the uploader during the checkout process.
Multiple File Upload
Allow customers to upload more than one file at a time.
- Enabled – Multiple files can be uploaded.
- Disabled – Only a single file is accepted.
Max Number of Files
Set a limit for how many files can be uploaded per upload field. Only applicable if Multiple File Upload is enabled.
Example: Set this to 3 to allow up to 3 file uploads.
File Size Limit
Set the maximum size (in MB) for each file upload.
Example: Set it to 5 to limit each file to 5MB.
Mark as Required
Make the file upload field mandatory for customers.
- Checked – Customers must upload a file before they can complete checkout.
- Unchecked – Uploading is optional.
File Types
Define which file types are allowed. Use a comma-separated list of extensions.
Example: .jpg, .png, .pdf
Anonymize File Name
Replace original file names with random strings. Helps protect customer privacy and prevent filename conflicts.
Example: invoice_john.pdf becomes file_abc123.pdf
Uploader Label
Set a custom label for the uploader field.
Example: “Upload Your Logo Here”.
Uploader Description
Add a short description or instructions below the upload field.
Tip: Accepted formats: JPG, PNG. Max size: 10MB.
Enable Note
Enable a text field for customers to leave a note with each uploaded file.