
Before configuring donor email notifications, make sure your global preferences are properly set in the Advanced Settings.
The Email Settings section in WC Donation Manager Pro allows you to manage automated emails sent to donors when their donation orders are completed. This ensures every donor receives a timely and personalized acknowledgment of their contribution.
Accessing Email Settings
From your WordPress dashboard, navigate to Donations → Settings → Emails. Locate the Completed Donation Email template, then click Manage to customize its settings and appearance.

Configure the Completed Donation Email
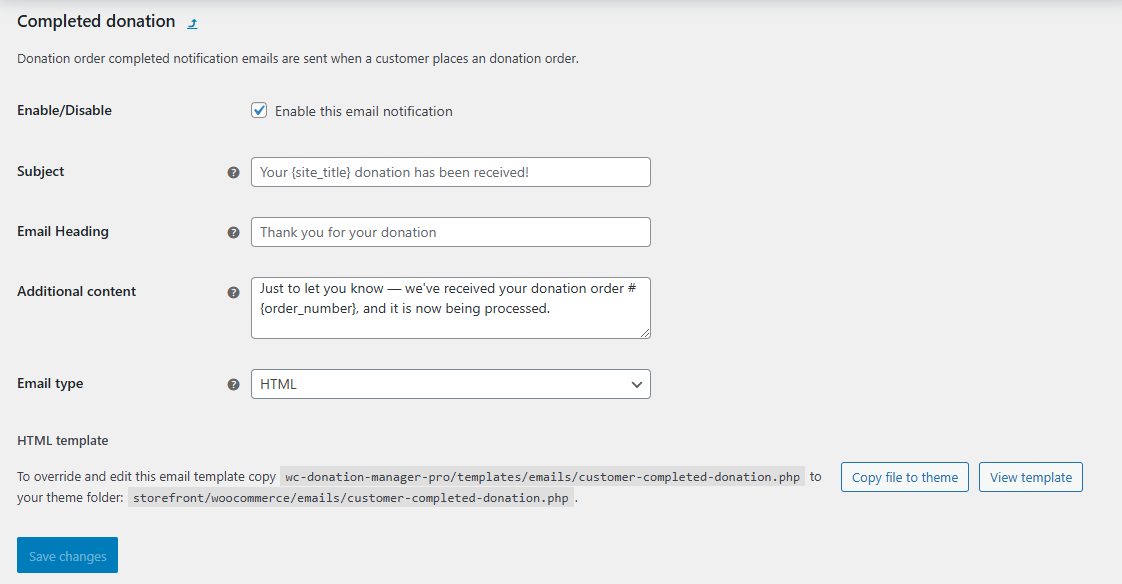
Use the available options to define when and how donation confirmation emails are sent:
- Enable/Disable: Activate this option to send confirmation emails when a donation order is marked as completed. Disable it if you prefer not to send notifications.
- Subject: Set the subject line of the email. You can use placeholders such as {site_title} to display your website name automatically.
- Email Heading: Define the main title at the top of the message – something simple, like “Thank You for Your Donation.”
- Additional Content: Add extra text within the email body. Use placeholders such as {order_number} to include dynamic information, or write a short thank-you message for donors.
- Email Type: Choose how the email is formatted – HTML, Plain Text, or Multipart (which includes both versions).
- HTML Template: If you want full design control, you can override the default template. Copy
wc-donation-manager-pro/templates/emails/customer-completed-donation.phpinto your theme folder atstorefront/woocommerce/emails/customer-completed-donation.php.
This ensures your customizations remain intact after plugin updates.
Save and Review
After finalizing the content and format, click Save Changes. Test by completing a donation order to confirm that emails are sent correctly and display as expected.