
Before creating a campaign, ensure you have at least one donation product ready to receive contributions. Campaigns use these products to collect and track donations. If you haven’t created one yet, follow the Create a Donation Product guide first. Once done, you can set up a campaign to track goals and donor activity from your WordPress dashboard.
Steps to Create a New Campaign
Open the Campaign Page
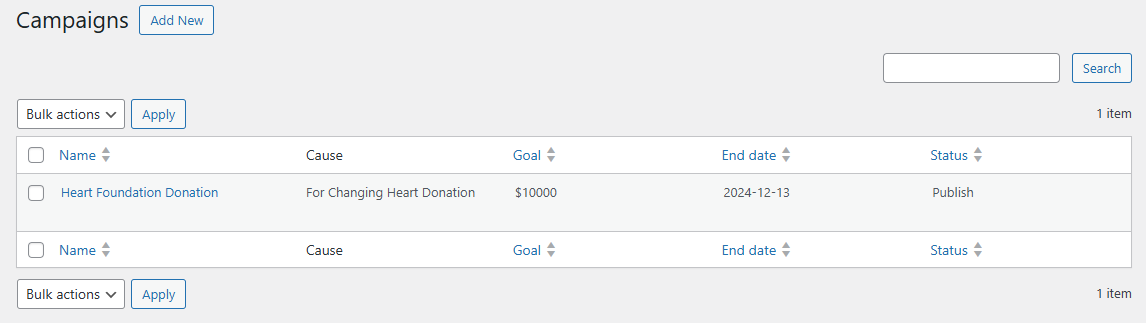
From the WordPress dashboard, go to Donations → Campaigns. This opens the Campaign Management page, where you can view existing campaigns and start a new one.
Start a New Campaign
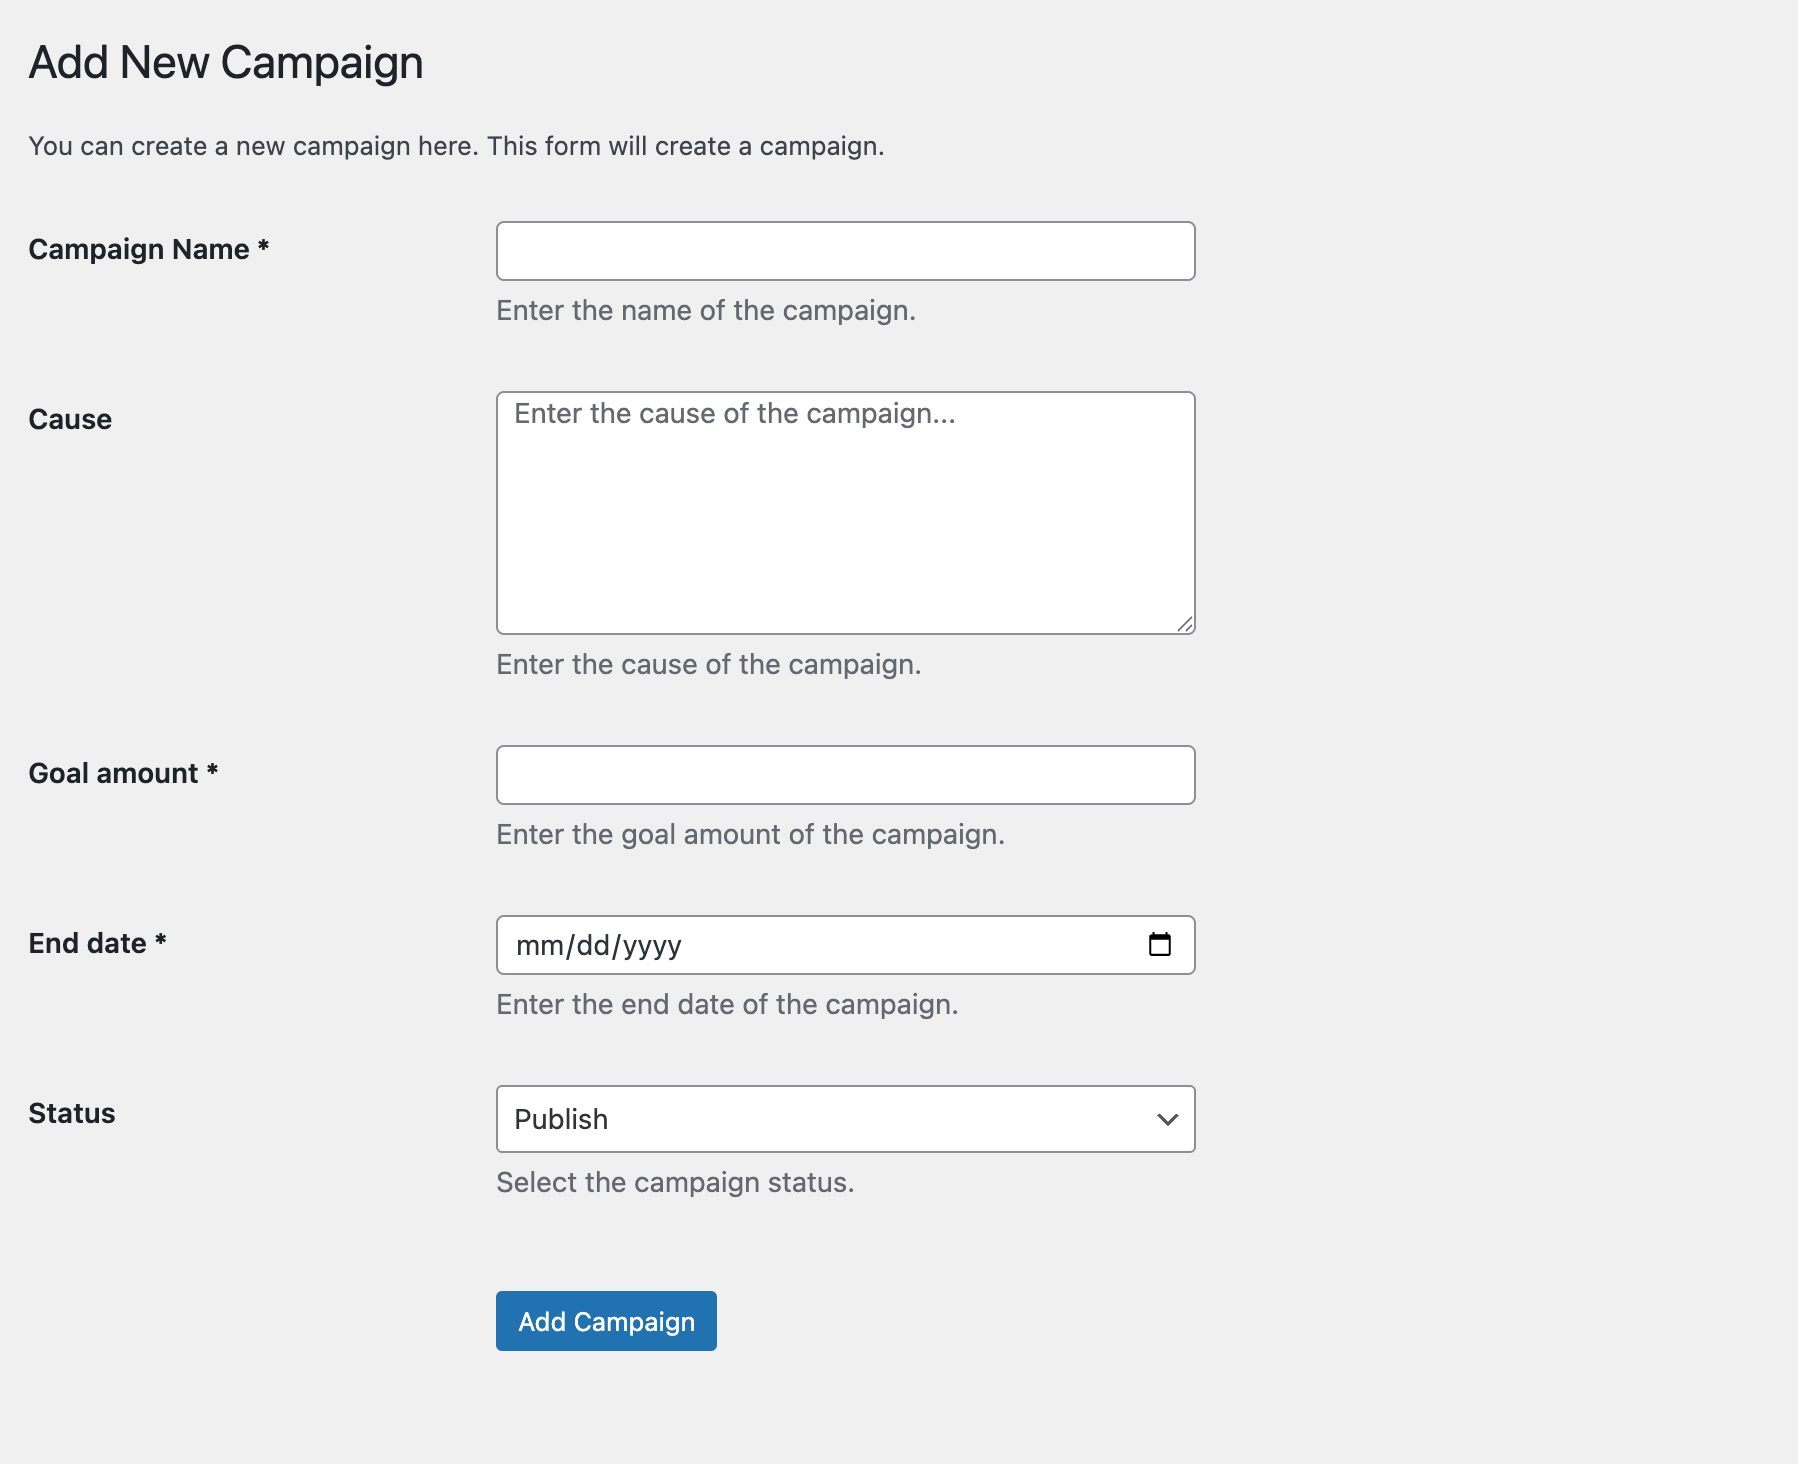
Click Add New to open the campaign creation form. This is where you define your campaign’s name, purpose, goal, and duration.
Complete the Campaign Form
Fill in all the required fields carefully.
- Campaign Name: The public title shown to donors. For example, Save the Rainforest.
- Cause: A short explanation of why the campaign exists, such as Protect endangered wildlife habitats in the Amazon rainforest.
- Goal Amount: The total target for donations, such as 5000 to represent $5,000.
- End Date: The date when the campaign ends, in mm/dd/yyyy format (for example, 12/31/2024).
- Status: Choose Publish to make the campaign live or Draft to save it privately for later review.
Click Add Campaign once all information is entered.
Finalizing the Campaign
Ensure all required fields (marked with *) are complete before saving. Double-check the goal amount and end date to maintain accuracy and consistency in reporting.
Next Step
When your campaign is ready, you can continue to fine-tune its settings. Visit the General Settings documentation to learn how to manage overall donation configurations and plugin behavior.